Sunday, May 31, 2009

Martini Madness


This little chipboard album sort of took on a life of its own. I started out by just covering the fronts and backs with some of the Bo Bunny papers.


Then I added:


*cardboard stickers from the collection to add some details

* ribbon for a little bizazze

* few miscellaneous die cuts from K&Company (Citronella collection)

* Hambly acetate cut out in the shape of the glass

* Scalloped circle punch for the recipes

* a straw for some


This album took 1 hour tops from beginning to end and I have to say it just was fun.


Attached are some pictures of the finished project!


Enjoy this beautiful Sunday!


Saturday, May 30, 2009

Photoshop Fun

I am rather new to the whole Photoshop thing, but I am learning. VERY SLOWLY! This month I decided to take some cute frames that I picked up (if I could remember where I got them, I so would give you the link...if you are interested I can look a little further) and I decided to frame out some of my spring flower pictures. I was in D.C. one day, actually I am in D.C. everyday for work but this particular day I had taken my camera on my lunch time walk and I saw the most beautiful blooms. I love the feeling for spring. I could do without all the pollen, but I guess we can't have everything.


Friday, May 29, 2009

Goin' for the Grid

I really liked all the patterns in the Bo Bunny collection this month. A great way to highlight different papers is to use them as a background grid. Using a little bit of each pattern with a lot of solid cardstock lets you show it off without it looking too busy.


For this layout, I used 3 x 3 blocks of patterned paper in a grid behind my photo. To help the photo stand out I mounted it on a piece of Hambly transparency and backed it with a slightly larger piece of cardstock on the back of the transparency and peeking out around the photo. The three layers were then added to the layout with 3M adhesive squares. A few flowers, circles, brads, and some Bo Bunny cream chipboard elements (coated with Glimmer Mist) finish it off!


thanks for stopping by!

erin

Thursday, May 28, 2009

Gift Bag by Esther


How about a gift bag to match the card for a special friend?


Most of us probably make cards. But do we take time to decorate the gift bag? Start with a gift bag in the desired color. This one was a metallic gold, I used patterned paper to shape with a flexible ruler for the swirls. ScrapBooks Plus has the bendable ruler by Bo Bunny that can be used to mark the shape of the bent ruler. After marking the curves, I used a craft knife (Fiskars has a good one the your index finger fits into) to cut along the curves. The pieces were moved around to get the desired effect & glued to a solid cardstock. A gold marker was used to show the curves. I cut the rectangle to fit the bag front.

Once the shaped paper pieces are glued to the gift bag, you can decorate it with markers, ribbon, lace, pearls,& stickers, etc. Use contrasting colors and patterns for interest. The yellow flowers pop on the aqua tones of the paper. Double-sided tape is good for this project because the bag will get a lot of movement. Add a tag & ribbon on the handle.


Now the bag becomes a part of the gift. Add tissue inside with the gift. I made a card to match that is on display at ScrapBooks Plus. Let me know if you make a gift bag to go with a card?

Wednesday, May 27, 2009

There's No Place Like Home


This little HOME word album had been talking to me long before the Bo Bunny DT kits were ready for pick up. I had seen a similar album done in the Abbey Road paper line and just had to create one for myself in honor of the eleventh anniversary our house. What a long way it's come since the barren, red clay yard and bare, builder-white walls of April 1998!

The key to making this (and other similar books) sing is all the detailed cutting. I cut at least forty flowers, vines, leaves and other elements from the paper's patterned to achieve this effect. Frankly, not a lot of embellishments were purchased for this book - the decorative touches are mostly achieved through inking, layering and pop dotting the handcut items. Add a little ribbon and a few buttons and you are set. I know a couple of people at the store have told me that they have been making their own book from this sample. Just let me know via this blog, and I'll gladly leave the book at the store after the wall changes out on June 1 for a little while longer if you need it to finish your own "HOME" book.

Tuesday, May 26, 2009

Spring Bubbles

I used the Cordinations to start with and gave it a little sanding, not a lot just a little so you could randomly see the green threw it.

I again, love this paper, even though it is girlie it still works with my little boy stuff...lots of little boy things.

The flowers on the top of the layout, is a sticker from the sheet. It WAS 12 inches long but I just wanted a little something to add above that picture. I then added brads to the center to give them a little dimension. Moral of this story is don't be afraid to cut things up and add things to them...because it sometimes works out to your benefit, but you never know unless you try.

Wanna know more come in and check out the wall...you are sure to find something that you love.

Monday, May 25, 2009

On the Hunt


So I told you at the beginning of the month that I had challenged myself to go without inking anything in this kit. This is the one project that I joke about. Last time I was in the store, I swore it was begging me to take it home and ink it up! It will be inked up before it goes in an album, that's for sure! :-) This is my oldest nephew hunting for eggs on Easter Sunday. There were lots of shots taken and I knew I wanted to use most of them. One of my favorite tricks is resizing images in Photoshop. I learned it on a message board and have been using it constantly since. For the small square pictures on the left, I opened up a 4x6 canvas and then took six pictures and resized them all to fit into that 4x6 canvas. Here's what it looks like finished.
I ended up with 6 2x2 photos which allowed me to use all the shots I wanted without bogging down the layout with photos. This way there's room for embelishments and journaling. I hope you enjoyed the new BoBunny papers as much as we did!

Sunday, May 24, 2009

Fiesta!!!

I collect fiesta dishware, but since they are so expensive I travel to WV to get mine directly from the factory.  These pictures were from my last trip with my aunt in April.  I really wanted to try to be different this month and use two different patterened pages to create my back ground.  I am usually very skeptical of doing this, but I think I made it work for me.  With all the bright colors of the pictures, the bright colors of the papers flowed a little easier for me!  I think if I would have used any other kinds of pics, they may have been over powered by the paper!  Make she you have a balance that fits your style and pictures!  Don't underestimate the background!

Saturday, May 23, 2009

"e" is for egg hunt by Susie

I had several snapshots of my niece from the annual family egg hunt this year and I wanted to get them all on a layout, and include pics of her interaction with my 3 kids. That meant a lot of pictures - 8 total - and I was a little concerned about the layout looking too crowded.
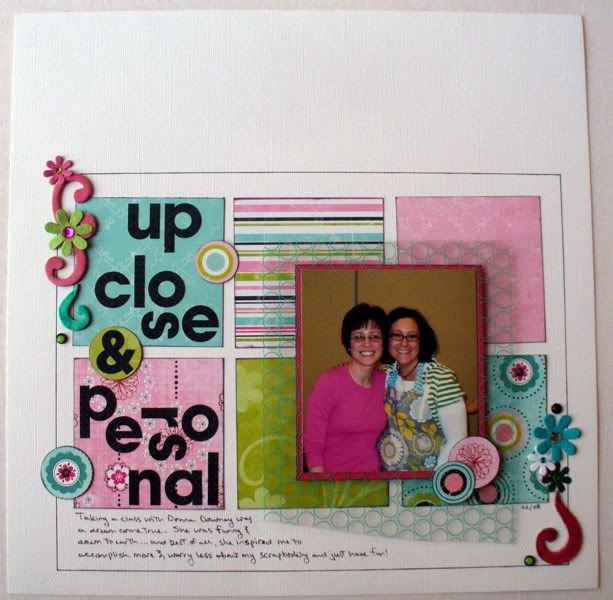
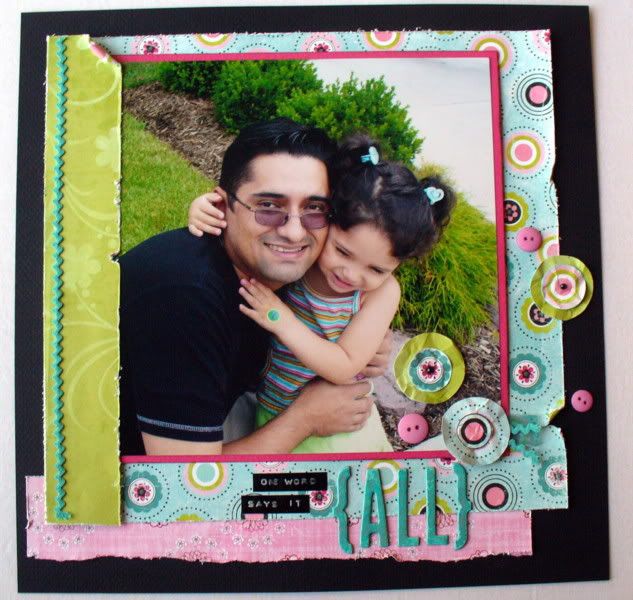
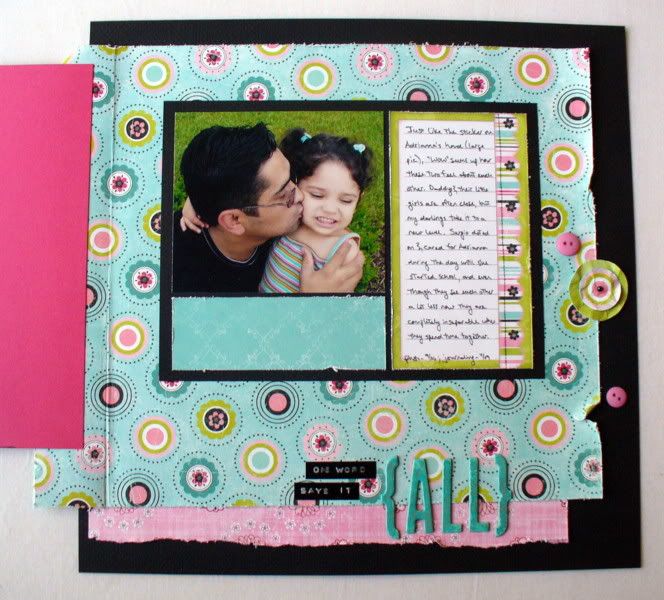
I usually go for a block of pictures when I try to incorporate so many shots, but that just seemed too structured for this subject. So I twisted and I turned and I trimmed - and I finally captured the movement I was looking for - the elements look like they were just tossed across the pages! I loved the "Alissa" paper line from BoBunny and the spring-like feel it gave the layout.
The kit this month also had some fabulous die cut chipboard frames so I decided to use one for the title block. I was so excited that Debbie had some bright green flock which was a perfect match for these pages. A sprinkling of the sparkling little Flora Doodles flowers was the finishing touch! (Do you recognize the Heidi Swapp letter from last month?)


This is my favorite picture on the whole layout, so I triple matted it and added two more splayed mats to give it the most "weight". I am not much of a button girl, but with a little DMC floss, these pink beauties seemed to fit right in - I love how the graduated sizes help to frame the picture and draw the eye in.
.
.
.
.
.
.
I love charms. I love them. I love the way they add the perfect touch to a page. I found Mr. Easter Bunny in my stash. Layering him on top of another one of those cute pink buttons created a darling accent for the journaling block.

.
.
.
.
.

I do find a digital camera to be a useful tool when I am shifting elements around. Sometimes it is hard for me to keep track of where things were - and sometimes I look back and see something I really like. For example, in this picture, you can see how my 2 page layout almost became a one page layout. In fact, I am going to reproduce this one page layout as a Father's Day gift for my brother-in-law.
.
.
More and more I find myself duplicating my favorite pages as gifts because although I can't bear to give the originals away, I know how much they would be appreciated. Once the design work is done, making it a second time is fast & easy. Have you created any pages recently that are just begging to be shared? This one is going to look great framed and hanging on the wall for others to enjoy. Be generous! Make a gift! Share your talent!

Friday, May 22, 2009

Bo Bunny minibooks

I've been saving this Clear Scraps chipboard book for something special. And this book, this month's Bo Bunny paper and my daughter's recital pictures are just a great match! She loved the book so much she was not very happy with me when I took it to display at the store.

The fun thing about this chipboard book is all the pages have different edges. And I liked the raw chipboard look, so I left a lot of it showing after I inked the edges. How do you ink rounded edges? Simple - use a spongy eye shadow applicator or a dauber.

I used a Jenni Bowlin calendar page here to mark the date of the show. Journaling was added around the pictures, on the paper, wherever it fit.

Sometimes you don't need a lot to make a great statement. Here I used Bo Bunny chipboard, Bo Bunny stickers and a bracket shape cut from the patterned paper.

What to do with all those programs? Add them to your project, of course! I used Mod Podge to glue the interior of the program right into the book covering one of the pages.

Thursday, May 21, 2009

Photo Enlargements

Sometimes you'll have one photo that really stands out. Why not enlarge it? I used a photo from our Easter egg hunt to enlarge to an 8x10, using the grassy area to handwrite my journaling. When I bought a coolpix camera in January I got a card for free prints every month - including one 8x10. So I thought I'd put it to good use!


My kit is the "Love Shack" collection from Bo Bunny. This group of papers has lots of bright colors - pinks, oranges, greens with a touch of muted teal. I matched them up with some of our photos from Easter - fabulous with our bright Easter eggs (even the Star Wars ones!) and my daughter's pink dress (what else?).

Wednesday, May 20, 2009

Easy hidden journaling

Most scrapbookers admit that journaling is an important part of a layout. Some of us start with our journaling and some of us fit it in at the end, but all of us know that it's a necessary part of recording our stories.

I personally tend to be a "fit it in at the end" kind of journaler. Sometimes I find myself editing what I want to say to get it to fit around the photos and embellishments I've already placed on the page. That's where hidden journaling is so handy. It lets you put in everything without having to save tons of space. This month I created a space for hidden journaling and an extra photo with an easy hidden journaling technique. All you need is a large photo and some double-sided patterned paper.


For this layout I cut a large photo mat out of the double-sided patterned paper with about an extra inch and a half on the left-hand side, which I folded over the front. Then I matted my photo with a piece of solid cardstock. I put my adhesive on the top left-hand edge of the photo, laid it in place on the large mat, and folded over the flap to glue it in place perfectly. Underneath the photo I have a block of extra patterned paper, another photo, and my journaling block. You could easily have all journaling or more photos here too!


thanks for stopping by!

erin
PS. My AC Thickers were too green for this paper... so I sprayed them with Robin's Egg Blue Glimmer Mist to alter the color slightly. As an added bonus, the letters got a bit splotchly looking from the beading of the Glimmer Mist on the surface. I think it helps them match the distressed edges of the paper!

Tuesday, May 19, 2009

Fixing Photos to suit your layouts

On this layout, I selected three great photos of my son Zach. Problem was, the one I liked best, the one I wanted to highlight, had this red flag (literally) in it that was really distracting and didn't fit the paper I selected.

You can see here on the original photo just how distracting that flag is. So I "deleted" it - sort of. I have an old version (3.0) of Adobe Photoshop - I'm an old gal and have a hard time upgrading software - especially when they move all the buttons and icons around - it makes it hard for me to find anything! I loaded the photo in the standard edit workspace of my old Photoshop program. I used the "clone" tool (the icon on the left that looks like a rubber stamp handle) to essentially copy the water above the flag and paste it over the red flag. "Ctrl/Alt" allows you to set the "copy" function. Then you just click where you want to paste the block. You repeat this as many times as you like until you get the effect you want.

The Result: Red flag gone, and a beautiful portrait of my son on the bow of the boat.


I alter photos ALOT - remove the color, change the color, delete unwanted objects (and people!). What I won't do to get that perfect layout!


Monday, May 18, 2009

Quick Frame


So, I was walking through the craft store thinking about this month's projects and saw these blank wooden frames that were pretty inexpensive. I decided it was a perfect break from the mini-album rut I was stuck in. I used Mod Podge to adhere the paper to the frame. Make sure you cover all areas of the frame and then rub to get the air bubbles out. A trick I have learned is to take your bone folder and run it across your surface and that will help spread the glue under the paper and will help push out any air bubbles that have started under the paper. Then I just embellished it with some Bo Bunny chipboard and flowers. You could even use these to frame quotes instead of pictures. The possibilities are endless. If you ever need a quick gift, this is it!

Sunday, May 17, 2009

If you know me, then you know that I LOVE MY CAR!!!!  Over spring break I went to PA to visit friends and family.  While I was driving I hit the 50,000 mile mark!  I can't believe it!  You know that I had to take a picture of it.  I was driving on 76, the toll road across southern PA, and I almost missed it.  It took me a whole mile to get my camera out, but that was pretty close.   As you can see, I was also driving the speed limit!!  HA HA... because when you take the shot, you get it ALL!

Having all of life's little moments is important to me.  I had no clue going into this month that I'd use these photos, but with the paper, I just couldn't help myself!  Having theses special moments captured inspires me when I just don't think I have anything special.  It's just a little pick me up to feel refreshed about scrapbooking and me!  I hope that you capture your own moments in life and take the time to put them down with a little glue on some fancy paper!

Saturday, May 16, 2009

Becoming You - by Loretta Cooper


This month's design team kit made me nostalgic. It made me remember how much I used to enjoy scrapping when my boys were little pudgy baby things. Now through the magic of digital photography, I have access to all those old film shots.

(Side note: Take your old negatives to Costco and let them digitize them. It's cheaper than you think, and suddenly you have all those wonderful old photos as accessible for your projects as yesterday's digital snaps!)

Anyway, since I had these old baby pictures on disc now, and this sweet BoBunny paper to work with I decided to take a stroll down memory lane. The layout itself is pretty typical of "my style" (whatever that is...) but the journaling is all about my oldest son growing up. Essentially it's a love note, telling him how much I enjoyed his baby years and how I can see the hints of the young man he is becoming today in these baby photos.

It was a wonderful project.
Looking for a little inspiration? Stop by the store and stroll through all the great design team projects. You can also find all the materials we use for these projects compiled in the same place near the DT wall. A little kick start to get your scrapping mojo going!

Have Fun,
Loretta

Friday, May 15, 2009

Envelope Fun

This month I loved all the bright colors of the Bo Bunny Collection that I receieved. I have various cards and envelopes around and I knew that once I saw these colors that I was going to use my orange envelope. I am going to use this to hide some journaling...


Just a thought!


Thursday, May 14, 2009

Sneak Peek

Have you ever fell in love with a paper line and wanted to display it for everyone to see? I find that more and more I want to display the beautiful patterned paper that ScrapbookPlus carries. This summer I am planning to teach a workshop on making magnetic photo collage displays that are covered with your favorite scrapbook paper. It is a great way to display your favorite photos AND your favorite papers. This makes a great gift or room decoration. Make sure to check out all the fabulous classes that our talented teachers offer at www.scrapbooks-plus.com!

Border punches and a sneak peek later in the day


I have a new love in my life....border punches. I find that I am using them more and more in my designs. With the month's kit, I used 2 of the new punches from EK Success. ScrapbooksPlus has a great variety of border punches- including the ones that I used in my LOs this month! I love the way the Binding Edge punch works on my Bunnies LO. I wanted to put some bling on my Sisters LO but wanted it to be subtle. So I used my Postage Stamp border punch on some of the AWESOME glitter paper by Best Creations that ScrapbooksPlus carries. The glitter paper comes in a variety of beautiful colors and the best thing about it..the glitter stays on the paper- no glitter everywhere! It put just the right amount of bling for me.


I will posting later today about a workshop that I am planning for in the next month or so. Stop by and check it out!
Enjoy!
Lisa

Wednesday, May 13, 2009

Mother's Day


I have been so lucky to be the designer of the month. I loved everyone's work this month. I am amazed each month by the fabulous job that everyone does.

This month I went crazy and did several layouts above and beyond what I had to do. I had to weed out what I was going to put up. Funny I have never had that issue before...lol...must be because it is my month.

This single page layout was just something a little simple and something I actually did for my mom. It is a picture, that my mom had left from when my grandmother had passed away. My granny had it in a frame and it was one of her favorites. Guess from the look of the picture they didn't really pay that close attention to the background being right. (boy I am so glad for digital pictures)!

The journal that I did is just the writing from the back of the picture. My mom says she spent every penny she had on those pictures...and my dad was so mad at her, but she just had to have them. I was 5 months old. I love the pictures from the 70's..

I hope that you all have had a chance to run by Scrapbooks-Plus and pick up some of these papers. They will work great with many different kinds of layouts not just little girls...check out my blog on the 26 where I will show you the papers used for my little boy.

Tuesday, May 12, 2009

Father's Day Card


This is a card for father that's easy to make from scraps. June is fast approaching & you must make that card soon. The papers in our kit had browns & blues, so it seemed like a good combo for a man's card. It began with a sheet of solid green cardstock folded in half. Strips were placed to one side with layers of blue and white solids that were torn cut and embossed. The brown is one of the Coredinations papers that was distressed to show the blue underneath the brown.

Use stickers for the title - father. Add a newspaper and coffee sticker element to give it the meaning of father being relaxed. The mini tools are tied with twine and attached with a brad. Now add the sentiment inside before mailing it to dad.

Monday, May 11, 2009

Look Mom! No Ink!!


Can you believe it??? I started working on this layout and realized I actually liked it better with no ink! I must have been a little feverish. I then decided I should challenge myself this month and not ink any edges whatsoever! I loved how this one turned out, but can't say I was in love with everything I made. A few pieces will probably get inked before being put into an album or given away. :-) You didn't expect me to really embrace scrapping without ink, did ya?
I've actually had fun sewing on my layouts lately so I decided to sew a few bits on this one.
This is my newest nephew taking a little snooze with my dad, niether of them noticed us taking pictures, it was great! Enjoy!


Sunday, May 10, 2009

Thank you card - for the bright!

I loved this paper!!!  I started off with patterned paper, but then finished it off with sticker embellishments that matched the paper.  I added sticker letters that were a similar color and some sticker flowers with a pop dot!  How easy!  Make sure when you use super bright paper that you don't add too much (I know I get crazy sometimes) to keep it simple and flowing.  

Who doesn't need thank you cards!  They're the best present to give and get!

Enjoy!

Saturday, May 9, 2009

Double Pocket Card *Tutorial* by Susie

I love the beautiful things you can create with double sided paper, like the Alissa line by BoBunny.

This month I made a cute little "Thank-you" set - a card and a cupcake box!

Here is a step by step tutorial - easy peasy!


I started with a piece of "Look at Me" paper, which has a really cool dot pattern on one side and a bright green on the reverse.

I trimmed the paper to 8-1/2" x 11", and reserved the remnant for later use.


Fold the paper in half length-wise and crease.
Open.
Turn paper 90 degrees.


Fold the paper in half again, width-wise this time, and crease.
Open.
Flip it over so the dot side of the paper is facing up.


Align paper so the short side is along the bottom.

Cut along the fold line from the left edge of the paper to the intersection of lines in the middle.


Fold the bottom right corner up so that it meets the center fold line. Crease.


Fold the top left corner down so that it is about 1-1/4" from the center fold line. Crease.


Fold the top left quadrant over on top of the right quadrant.
Crease.


Fold the bottom left quadrant under the bottom right quadrant.
Crease.


Fold the bottom right corner up and match edges.
Crease.


Put red line tape along the right and left edges of the green paper.
Fold the bottom section up. Adhere.


Trim out the "Thank you" square from the BoBunny Alissa Cut Out sheet. Mat it with the green side of the remnant.
Mount with dimensional tape on bottom right of card.


Create tags: (1) 5" x 2.5" and (1) 5" x 1.75"
Embellish as desired.
Insert tags in pocket.


Bake a cupcake!


Deliver to someone you really appreciate!


This would also make a great "Happy Birthday" set if you simply change the sentiment on the card.


Thanks to Claudia Rosa at SCS for the inspiration! Happy crafting! Susie