Wednesday, December 31, 2008

Going on a Tree Hunt


Every year, John and I head to the same tree lot to get our tree. We're pretty quick about it, too. We walk around judging the various trees: Too boxy, too short, too bare at the bottom, lopsided, etc. Then we find it, the perfect tree for our great room. It's bundled up, tied to the top of our car and off we go. Judging by last year's picture, I was little chilly.

And that was perfect for the mitten mini book. We didn't have a lot of pictures, but we did have the right amount to fill out both hands. The story of the day is told chronologically and ends with the tree being tied to the car. I used both Pink Paislee and My Mind's Eye paper along with red card stock and some embellishments from our kit. The Santa stamp comes from Making Memories (I love this set!) and the white poms poms came from my stash.

The chipboard book comes from Art Blanche, which is part of EK Success. The site also offers a mitten template, which I downloaded and used to trim my paper. I used Glossy Accents to adhere the paper and trimmed around the edges with an X-acto knife. The pages with the chipboard embellishments will be used for journaling.

Tuesday, December 30, 2008

Snowflakes


I'm a big fan of Christmas paper, and I was really taken by the "Jack Frost" paper from Pink Paislee in the December kit. I picked up a few thin wooden forms at a craft store and this paper was just perfect for this project.

To make this, I coated the snowflake with Mod Podge and adhered the paper. Once the glue was dry I carefully cut around the form with a craft knife. I took a piece of white felt, stitched around it a few times, then added Thickers from the kit for my sentiment.

The smaller snowflake was made with another wooden ornament coated in Martha Stewart glitter. I covered a chipboard circle with more Pink Paislee paper then coated it with Ranger's Glossy Accents. As a final touch I added a paper snowflake and brad from Making Memories that I picked up at Scrapbooks Plus.

Here's a close-up of the center:


Monday, December 29, 2008

Merry 07


You know, we were much more organized last year. Christmas took us by surprise this year, which is odd considering that it comes at the same time every year. This year, though, we were behind, so outside of a tree and a hastily hung wreath, we kept it pretty low key.

But this layout featuring papers from My Mind's Eye (Trim the Tree) and Pink Paislee (5th Avenue) will be a nice reminder of what we can do when we have the time. For this layout, I used green card stock as my large photo mat and created a photo collage in Photoshop based on the size of card stock. The Pink Paislee papers added a pop of color along with the Merry '07 Thickers. I left myself room under the dinner photo for journaling.


To create the glittery snowflakes:

1. Paint some Bazzill chipboard snowflakes white and stipple to create pockets for the glitter. You can also stipple if you don't want paint lines to show.
2. Add the glitter while the paint's still wet. Set aside to dry.
3. Once dry, hit with a little hairspray, line up and admire your work. Send Martha Stewart a note of thanks for the fab glitter. Most of the white glitter I've seen usually has an additional color sprinkled within, such as gold or blue. I just wanted plain white, and Martha Stewart did the trick. And the glitter's nice and fine, not chunky. I'll be heading back to Scrapbooks Plus to purchase some more.

Saturday, December 27, 2008

Christmas Cards

Hopefully you got your Christmas cards out way ahead of the holiday. Got some scraps lying around? Why not get a head-start on next year? Here's a trio of cards I made with the kit.

I used rub-ons from Pink Paislee to make the tree in the center of the first card. I backed the Bazzill Bling cardstock with a bit of red, then used My Mind's Eye paper as my background, which draws all the colors together.

The second card is quick and easy - lightly draw a circle on your cardstock, then adhere punched-out circles of patterned paper around the circle. Finish it off with by sticking a bow onto the top with a glue-dot. This is a great way to use all those small scraps you have leftover from other projects.

For my third card I cut out part of the pattern from the Pink Paislee paper, then used snowflake rub-ons around the trees. Very fast. If you're making a number of cards, substitute stamps for the rub-ons.

More Martha Stewart Glitter


I love how Erin made the cardinal dazzle with Martha Stewart glitter. I am a huge fan of her "brillo" bling in the many jewel colors. Santa must know how much I love the stuff because he filled my stocking with nearly every color! You know I'll be using more of it in my designs!

On my project for this month, I used a Clear Acrylic Christmas Tree Album from Creative Acrylics (Scrapbooks-Plus has both Christmas trees and snowflakes in stock at the store). Once I removed the protective covering, I used Martha Stewart's craft glue (Elmer's school glue works just as well) to make the designs I wanted on the boughs. I wanted that "snow-covered effect". I placed each page on a 12x12 piece of white paper (I save those white pages that come in albums for just this reason). I shook out some glitter over the page, tapped off the excess, placed the page somewhere safe (out of my elbows way) to dry, folded the paper in half to create the funnel to pour the excess right back in the bottle. Erin is so right about the tops on these glitter jars - it is impossible to miss getting the glitter back in without spills because the mouth of the jar is so wide.


For this tree I used Garnet, Rose Quartz, Peridot, Blue Sapphire and a few of her snow glitters from the Artic collection. Many of these colors, especially the Christmas colors like Garnet, and Blue Sapphire, are on the shelves now at Scrapbooks-Plus for a great price. For the rest of the album, I used left over scraps from the kit - Pink Paisley and My Minds Eye patterned papers - and my many Marvy and EK Success punches to decorate the pages.
The nice thing about these acrylic albums is that you don't have to cover the pages with paper - the pages (especially with the glitter) are beautiful enough. It saves you tons of time and makes for a good way to use your scraps.

Friday, December 26, 2008

Made with Martha!

I was so excited when I saw that Debbie had some of the Martha Stewart supplies in the store... escpecially the glitter! I had heard great things about it, and I had definitely eye-balled it elsewhere on numerous occasions, but I am trying to limit my support of the big-box stores and showed great restraint. Now that it's at Scrapbooks-Plus I had no excuse... so I bought it!!! ...and am I glad! A lot of people don't like to work with glitter because of the mess factor. Martha's packaging helps a lot: the shaker built into the lid makes it easy peasy to put right where you want it without having to empty the container, and the wide mouth jar is a cinch to get the extra back inside where it belongs. The other great thing about the glitter is that it is extra fine. If you ever ended up with the cheap, extra-chunky glitter you know what I mean. The fine powder sticks better and looks shinier too.


Well, now that I had the glitter, I needed to use it on something. I decided to make a decorative piece for the holidays. I snagged some of the free chipboard at the store counter and cut out a cute cardinal on the Accucut die-cut machine. Once I was home, I painted him red and black before adding glitter to the red portions. (I used a general purpose craft glue - Soho made by Delta - for this. I used a foam brush to brush it on quickly and allow me to glitter the entire piece at once without stressing that it was going to dry before the glitter was on.) Once he was dry, and sprayed with a touch of hairspray, I mounted him onto a chipboard frame painted with "Frayed Burlap" crackle paint from Tim Holtz and added a sprig of berries for him to stand on.
I backed the frame with scraps of patterned paper and some vellum that I've had in my stash for years. I used to pick vellum up all the time when I first started scrapping, but rarely used it. This sheet has some pieces of glitter embedded in it, making it look a bit like falling snow to me. It really helps to mute the patterned paper behind it and soften the look. A seasonal message stamped on top (from Papertrey Ink) and a ribbon for hanging finishes it off!

thanks for stopping by!
erin

Tuesday, December 23, 2008

Winter Days


Deborah's kit was so much fun to work with. As soon as I saw the snowflakes, I knew I wanted to create a page that showcased a crazy dumping of snow we had here in Leesburg in 2006. I selected the die cut papers, trimmed them down, added the glittery gold sewing down one edge and popped up the trees on the left. I knew I wanted some more layering and something related to the season, so I added a Jenni Bowlin Merry card along with the Warm Wishes chipboard. (I love the added dimension chipboard adds to a page.)

The Merry card was wrapped in Martha Stewart baker's twine for a bit more texture and to give the page another hint of red. The title came after I realized I was one "R" short of Winter Wonderland." (Woe!) I tried cutting down a "Q" and pasting it together with another letter, but that wasn't working for me, so "Winter Days" won. I'll eventually journal on this page, and when I do, I'll either add it along the scallop edge on the left or side-saddle it next to the photo. Or I'll write it on a separate piece of card stock and tuck it into the star paperclip dangling from the baker's twine.

Monday, December 22, 2008

Santa & Snowmen


This month's DT kit designed by Deborah was full of Pink Paisley and My Minds Eye papers. There were not the "traditional" Christmas colors that I normally work with but I fell in love with these papers and couldn't wait to get started.

For this LO I used a simple sketch that I use a variation of often. I love the way blocks of pictures work on a 2 page LO. Since I struggle doing 2 pages LO I usually use my "go to" LO- a large block of photos. I scalloped the edges of the striped and polka dot paper- I used the Scallop blade that goes with my Fiskars paper trimmer. Cut a piece of red cardstock, edged it with the scalloped paper and put on my pictures. Quick and easy!


Sunday, December 21, 2008

Christmas Cards!

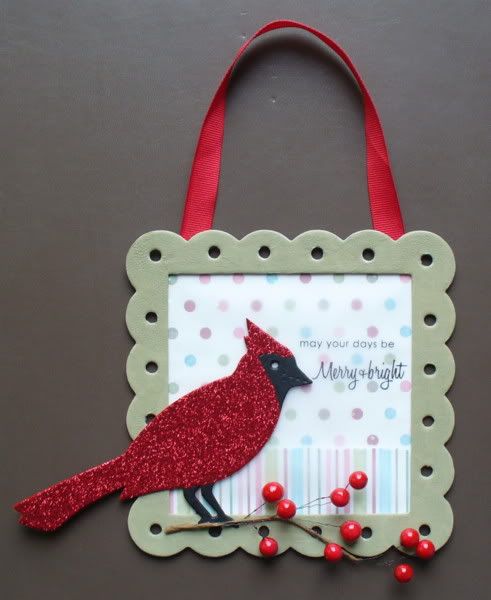
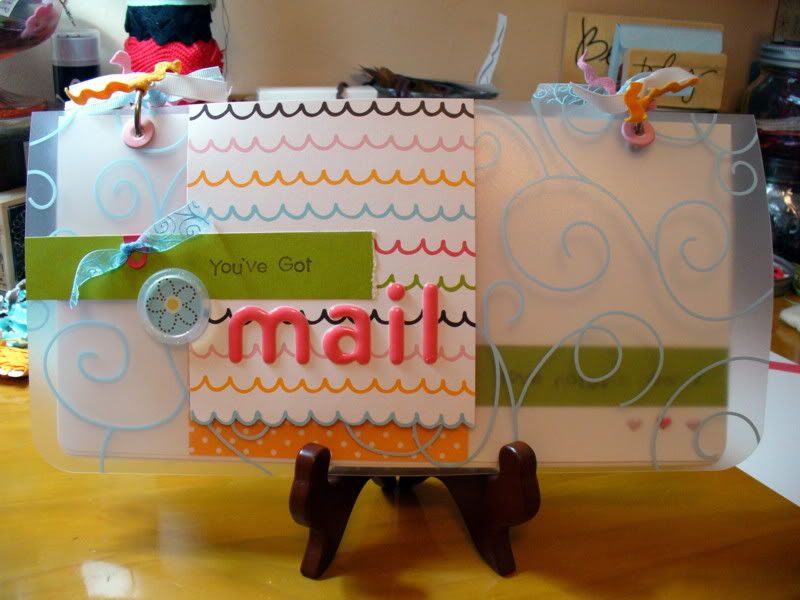
I love sending cards to my friends and family. It is so much fun to open the mailbox and see something that isn't a bill. I loved the bright happy papers from My Mind's Eye that were included in this month's kit from ScrapbooksPlus, so I decided to use them to make a trio of Christmas cards:


All of these cards were quick and easy to make. I love things that are simple -- especially this time of year! With all the decorating, shopping, traveling and parties this time of year there is no need to add create 1,678 intricate handmade cards that each take 34 hours to make to my schedule of events. If that's what makes you happy, then absolutely go for it. For me, something that comes together quickly -- but still looks lovely -- makes me happy.

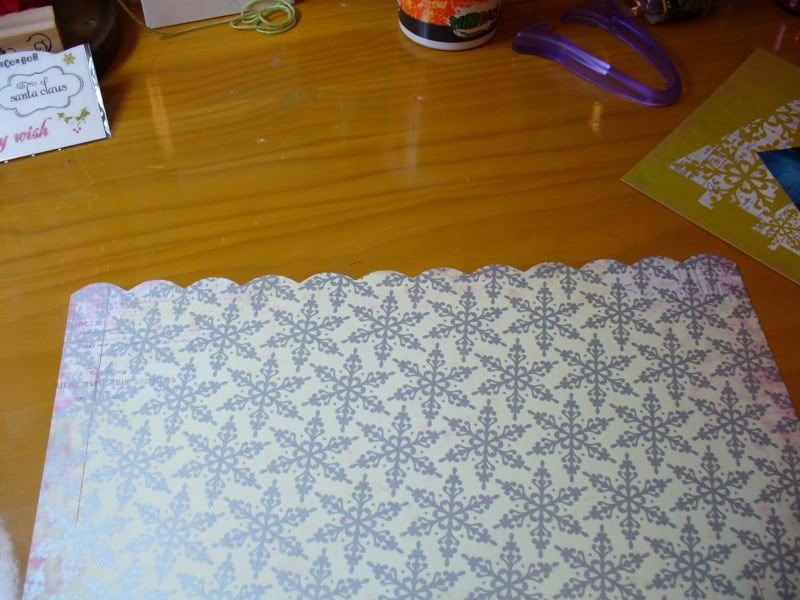
This first card is simply a punched circle and scalloped circle adhered to a cream cardstock base. Both patterned papers are from Pink Paislee and are available from ScrapbooksPlus. I added two square-punched pieces of patterned paper from My Mind's Eye. To make them look like gifts, I glued a piece of ribbon to each card. I tied a knot in a separate piece of ribbon and stuck it to them with a glue dot. A few pieces of dimensional adhesive gave it just the right pop and voila -- quick and easy and done!


This next card was even simpler. I punched four squares from the My Mind's Eye patterned paper available from ScrapbooksPlus and adhered them in a grid pattern to a cream cardstock base. I then cut a small slit in the fold of the card so I could wrap a piece of ribbon around the front. I used my Hero Arts "Merry Christmas" stamp on a piece of cream cardstock and punched it oput with a circle punch. I glues it to a piece of Pink Paislee paper which I punched with a scalloped circle. Quick and easy!


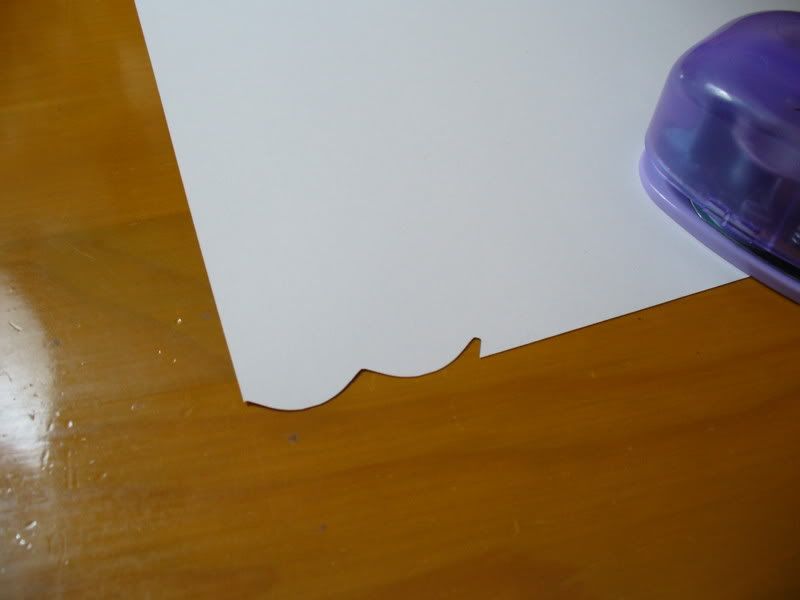
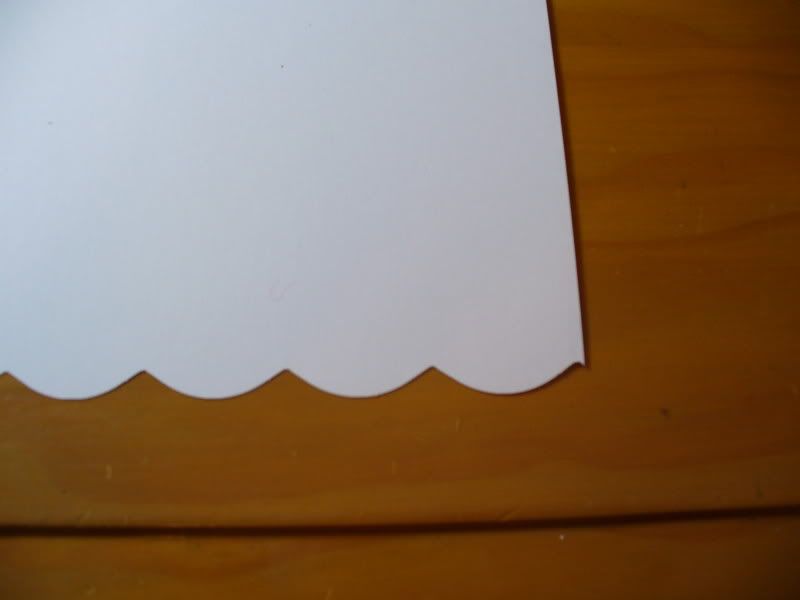
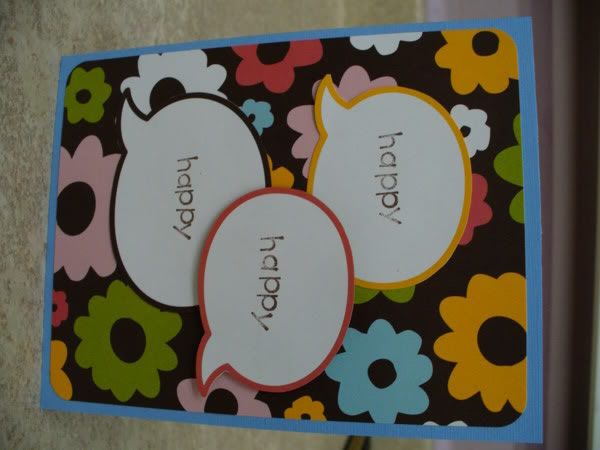
The third card was the simplest of all. Using my scalloped circle punch, I punched four circles from a combination of My Mind's Eye and Pink Paislee papers. I adhered three of the circles to the cream cardstock base. To the fourth scalloped circle, I added my Hero Arts stamp inside a punched circle out of same cream colored cardstock as the card base. I used dimensional adhesive to adhere the fourth circle & I was done!


Each of these cards would be easy to mass produce for many friends and relatives and was quick and easy to make. Also, they are not very bulky so they should go through the Post Office no problem without being chewed to smithereens by their sorting machine. Of course, you should always check with the Post Office to make sure your cards are not too thick before sending them off -- you don't want them to arrive looking like they were kicked there!

When you're planning your holidays cards for next year, remember that simple can still look beautiful & have fun!

Saturday, December 20, 2008

Stockings


For this LO is used the green die cut edge paper from Pink Paisley. I love the contrast of green and red for the holiday season and this paper worked perfectly! I used some silver Stickles to emphasize the edge of the green cardstock and make it pop. For the title I used some Thickers from American Craft to tie in with the silver Stickles. I used a white pen for my journaling that followed the edge of the paper and added some glittered foam tree stickers that I had from a craft that I did with my boys. For the snow flakes I went to ScrapbooksPlus and used their die cut machine- I cut them out in both acrylic and felt. The store has a bunch of different dies that you can use- it's a great resource. I sprayed some glitter onto the snowflakes (both of them) and put them hanging off the corner.

Thursday, December 18, 2008

Super Simple Scallops

Scalloped papers are very popular right now. This technique is an easy way to put a scalloped edge on any paper you have... and it is fast and easy. All you'll need is your paper and a corner rounder.

First you want to remove the paper guide from the bottom of the corner rounder. Generally this will just pop off. (I use some corner rounders from EK Success for this. If your corner rounder doesn't have a pop off guide, like my Marvy Uchida corner rounder, it will not work for this technique.)


Starting at one edge, place the paper as far into the corner rounder as it will go and punch. Then move to the side and repeat, being sure to line up the left-hand "point" of the punch with the right-hand side of the first "point." It will look like this:


Continue along until you have completed the edge.


Flip the paper over and admire your handiwork!


Here is my finished project.

I cut the large tree out and mounted it on pop dots so you can just see the snowflake paper peeking out from behind it. The tree is decorated with buttons and Kaisercraft pearls. The fabulous glitter letters are from My Mind's Eye.


thanks for stopping by!
erin

Wednesday, December 17, 2008

Christmas Journal

This year I decided to take a picture a day from December 1 through December 25. I wanted a mini album to chronicle everything I did this Christmas season -- both to remind me of what I did to prepare for the Holidays and also the fun events and parties that come around this time of year.

One thing I noticed about this book is that I didn't leave a ton of room for journaling -- it focused mainly on the pictures. And that's okay. But I thought that next year it might be fun to keep a journal of all the thoughts I have during this joyous season, so I created this mini album:


I started with this adorable Pink Paislee diecut sheet:


I loved that it looked like an ornament & I wanted the book to have the same shape when I opened it up, so I cut it in half:


Then I used a white gel pen to trace the shape onto a sheet of black chipboard and then cut it out:


After that was cut out, I glued the patterned paper to the cover with my ATG and inked the edges with Colorbox Chalk Ink in Dark Brown. Then I embellished it with some ribbon from ScrapbooksPlus and a stamp from Hero Arts:


On the inside I used number stamps from Autumn Leaves and journaling stamps from Art Warehouse to make a page for each day of December. I punched out a circle roughly the size of the numbers and placed it over the numbers as a mask while I was stamping the journaling lines to avoid getting any lines through my numbers:


When I was done with everything, I put it all together with my Bind-It-All. Once it comes down from the ScrapbooksPlus display wall in the classroom area, I will add it to my basket of mini albums and it will be ready to go for Christmas 2009! Now that's planning ahead!

Tuesday, December 16, 2008

Counting down the days!


There is nothing more that I my boys love to do more than count down the days until Christmas. It is something we have done with them ever since they were really little. I always have bought the calendars that you can get at the store, but have always looked for something that I could use year and year. I was so excited to see the new count down boxes that Karen Foster came out with this year. It was super fun and easy to decorate. It came with a template to use to cut out the front but I found that if I used my square punch I was able to do this much quicker. I also ended up using my fingertip craft knife from Fiskars to cut out the notch. I used the number stickers provided for the days and just embellished with bling, buttons and stickers and I was done! Enjoy!

Sunday, December 14, 2008

Retro Vibe

When I saw the American Crafts paper for November's kit, the colors totally reminded me of the 70's... especially the flower-print! I looked through my old pictures and found a picture of me and my grandmother around about 1973-ish... I think! I know were at her house in Houston, but that's it. I had to leave a space for the journaling and I've asked my parents to help me out with the details. If nobody remembers the specifics I have a backup plan to journal the story of why my sister and I called my dad's mom "mamasan" instead! :)


I love pulling out old pictures and getting them scrapped. Sometimes we get caught up in our new photos fresh from the printer/developer ... because they are fun and new, and it's easy to remember all the details. I think it's important to take the time to make a layout using older photos and, as we move into the holiday season, it's a great time to pull out some older pictures and ask family members for their memories. They may remember some great details or a funny story that you would have missed. So pull out something old (or at least from a year ago) and get that story scrapped!

Thanks for stopping by!
erin

PS. I just LOVE the buttons that were included in our kit. I loved them SO much that I bought a bag as well. I've used them on at least 4 or 5 layouts and I still have tons left. Check them out at the register! :)

Saturday, December 13, 2008

December Preview

It's almost mid-month and time for our December kit. So here's a preview of what you'll see starting the 15th:We've Pink Paislee's "Tinsel Town" collection, a few fun patterns from My Mind's Eye "Be Merry" collection, KI Memorie's Sheer Delight -- snowflakes!, Scenic Route chipboard and Thickers.

This month it's my turn to choose the kit, and I went for Christmas all the way. Seriously, it's hard for me to pass up a Christmas paper or embellishment. I just love the Pink Paislee collection -- it's a twist on the tradtional patterns. The My Mind's Eye papers perfectly complement the Pink Paislee papers adding fun and whimsy, from the cute trees to the snowmen. And I just can't get enough of the KI Sheers - more opaque than a transparency, this one has creamy snowflakes and a bracketed edge.

We'll be changing out the board on the 15th, so please stop by!

Tuesday, December 9, 2008

More Cards

And while we're on the subject of cards, here's a few more. The bold designs of the American Crafts paper are really perfect for cards - especially birthday cards. What could be better than paper with numbers?


And for this one, the clouds can easily double as frosting on a cupcake. I added a few hand-stitched candles with buttons for a cute children's birthday card.

Another Quote

OK. I, too, love the American Crafts quote bubble paper. And it's just as fun on a card as a layout.

For this one I decided to cut the middle quote out of the paper and back it with a piece of the KI Memories Sheer Delights. That gave me a place to put my short sentiment, but you could easily leave the Sheer Delights off and stick your sentiment on the interior of the card so that it shows through the cut-out area.

Sunday, December 7, 2008

Stitches, Stamps and Buttons


Ever get that overwhelmed feeling when you've bought a bunch of coordinated patterned paper because it was SO CUTE, but then when you get home, you just don't know how to put it all together to make it work? That's the way this DT Kit was for me. Terrific colors with bold, graphic prints that you just know look great together, but how do you get that LOOK? For me, I go back to my sewing experience....many of the designs by American Crafts seem to be right out of a fabric store. For this two-page layout, I thought about how I would put the papers together if they were fabrics for a quilt. Not too many strips with the white background, large patterns set in between smaller prints, all on a solid background. Then I added my "applique", cutting flowers from the patterned paper and giving them stitched stems and button root bulbs.
My original plan was to put the title on a 2"x24" plain brown strip at the bottom of the layout. You'll see that I used the entire package of buttons from the DT kit in the solid brown strip that I had planned to use for my LONG title. (You can find the buttons pre-packaged on the front counter basket at Scrapbooks-Plus.) I had to do something with that title block because I realized after the fact that my title - My Brown-Eyed Girl - would overwhelm the layout (particularly if I used orange letters for the whole thing!) . So I changed my plan. I used the American Crafts Thickers just for "GIRL". The rest is stamped with Provo Crafts and Heidi Swapp stamps to provide a more subdued look. The buttons were used to mask my "mistake", creatively covering my boo-boo. Considering I had no clue where I was taking this design when I started, I was quite happy with the result.

Saturday, December 6, 2008

Quoted!

Just like Nancy, I was excited to see the American Crafts paper with all of the little quote bubbles on it. I thought it would be a great way to add some of my daughter's actual phrases into a layout. When I saw these pics of my daughter modeling her new jeans, I knew I had just the right layout to do it with. She was so happy with the sparkly butterfly belt buckle that she exclaimed, "Mom, I'm just like Hannah Montana!" Too funny... and all from one little accessory! Putting the words in the bubble helps to feature it so that you get the idea without having to read the journaling at all.


I added some of the Cloud 9 foil edged chipboard letters for the title. They are oversized and really make a statement.

I also used theses bubbles on some quick and easy cards. Just stamp your message in the bubbles and you are set!


I used part of a bubble that was partially off the edge of the page on the inside under a scrap of floral paper. I like to put a little something on the inside of the card to tie everything together and give it a finished look (even though sometimes I'm too lazy to actually do it... hee,hee). :)
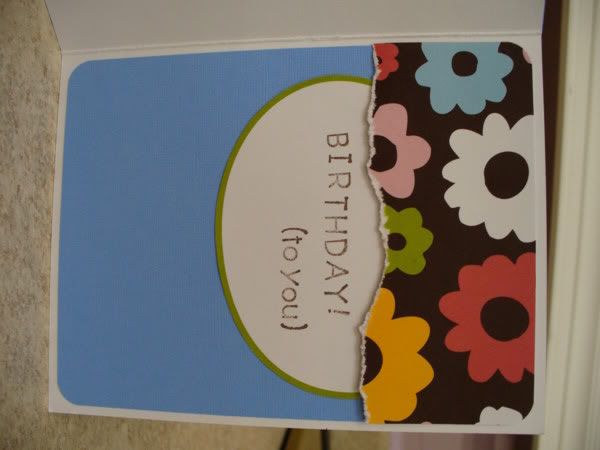
Thanks for stoppying by!
erin

Wednesday, December 3, 2008

Action!

I like to use the paper and embellishments in my projects to help emphasize my theme. For both of these layouts, there's a lot of movement and action in my photos -- playground activities and a race. In the first layout, the wavy lines and the dots help me convey action and movement. Specifically the dots and floating numbers reminded me of the kids running around the playground and the wavy lines of going up & down on the merry-go-round.

My second layout is from the Pyramid Challenge race in which my son participated. There were lots of kids running. I used a strip of the brown American Crafts paper with the colorful dots because it reminded me of all the kids racing together -- lined up en masse at the starting line and running together in a pack during the race.


How do you use the patterns in your projects?

Tuesday, December 2, 2008

Vote


Our kit included two sheets of the quote paper, and with the election falling right into our production week, I knew exactly what type of layout I wanted to create. I took my camera with me to the polling place, but when I entered the booth to make my choice, wouldn't you know that I had left my CF card in the car? I voted, ran back to the car and then asked the nice polling volunteers if I could take a picture of the booth. After a couple of calls, they gave me a sample ballot and I took a few photos. Once my husband got home, we went outside and he took the main photo of me with my voting sticker. (I could've used the tripod, but my husband was much faster.)

The photos were sized in Photoshop and printed on my Epson printer. I backed everything with orange card stock and stamped the word "vote" inside the bubbles with Pink Paislee Vintage Pop Alpha stamps using Stampin' Up! spots. (Stampin' Up! has great colors, and these worked well to match the card stock colors.)

I wanted to print my title and journaling directly onto the page, so I scanned it and used that as a guide. Once it was done, I sent a few test sheets through to make sure everything lined up correctly. Then I took a deep breath and sent the whole thing through, photos and all. It worked wonderfully.

Saturday, November 29, 2008

So Grateful


This month's kit came with this groovy quote bubble paper. Naturally, those little guys needed to be filled. But rather than focusing on one event, I decided to play with the grateful theme, gathering the visual evidence of the things for which I am grateful: Shopping with mom, Starbucks coffee, the ability to practice martial arts, trips with my husband, sales and family. The list goes on and on but this was a nice way to celebrate a few of those things. And it allows me to pair random photos together in one place.

First I gathered my photos, sized them in Photoshop, printed them out and matted them with white card stock. I added my captions next to each photo (the alien needs one, tho). Then I cut a piece of blue card stock and ran it along the side along with a piece of scalloped pattern paper. The American Crafts Thickers finished off the page along with the quote bubble from a previous DT kit.

More Sheer Delights!

Just like Leah, I was excited to find one of the new Sheer Delights from KI Memories in my kit this month. The translucent finish is really quite lovely and I think it's a little easier to work with than some of the clear products on the market.

I decided to use my Sheer Delight for a mini-album cover and simply cut it in half with my guillotine cutter - easy, peasy! The only moderately difficult part of the album was lining up the items from the cover page and the first page. I used my Xyron to adhere everything together... and you can't even see the glue through the back because of the finish. Between the extra-sticky Xyron glue and the flexible Sheer Delight sheet, I'm sure that this album will last for quite some time!


I filled the pages with notes and poems from my 5 year old daughter... she is always working on a project (I don't know where she got that from!) and I accumulate a lot of bits of paper that I can't bear to toss. Each page, after the title page is basically a strip of paper at the top and a mat for her "mail." The paper combinations vary, but since everything is from the same American Crafts line, the look is very cohesive.


I had a couple of piggie puppets mounted on popsicle sticks that I wanted to include... but they were too big for these pages. I decided to make a pocket page instead by cutting my cardstock to the correct width and then double the height of my other pages. I folded it in half and used dry adhesive for the top and red line tape for the left hand side. A little decoration and punching part of a circle in the end, help readers find the hidden puppets.


Thanks for stopping by!
erin