Sunday, September 30, 2012

A Purse Gift Card Holder

The Forever Young Cricut cartridge has lots of purses that you can make;  actual 3-D purses.  I had been wondering for a while what you’d do with them.  When my niece, who loves purses, was celebrating her birthday, it hit me that they could make cute gift card or money holders. 
I discovered they are easy to make.   In fact, once I thought of it I’ve made two. 

For the first one, I cut a purse (5 ¼” ) from Bright Blossom paper.  You simply fold it on the lines and glue together.  The paper I was using was not heavy so I cut a 2nd identical one out of plain cardstock and cut the handles off and glued inside the handles of the purse.  Using the thick white thread sold at ScrapbooksPlus and some adhesive, I wrapped the handles with yarn.  This takes awhile.  I glued a magnet under the edge of the purse flap and on the outside of the purse to hold it closed.  (The purse comes with a cutout to insert the flap, so the magnet is not necessary but I thought it would hold better.

Using Tim Holtz chain I affixed two labels (cut with the Sizzles Scallop Tags die) after stamping “Happy” on one and “Birthday” on the other.  I added a Tim Holtz Bauble.  On the other side I affixed Two Tim Holtz letter charms. I did “X” & “O.” 

The second purse is almost the same, except I cut a second purse out of cardstock that had texture and cut out the handles and the flap.  By gluing these on top of the purse, they look like leather trim  I added similar embellishments. 


These are really cute and you have lots of choices.  Check them out.  How much cuter to give a gift card in a little purse!

Saturday, September 29, 2012

Love

I mentioned on September 24th how much I LOVE the various shades of blue and yellow in this collection, and that, because of the color palette these papers are totally gender neutral. So, I thought I’d feature the layout I made using a picture of my husband so you can see firsthand how versatile this collection really is!! ;) Make sure you stop by the store today, this collection is going FAST!


Also, today I’m going to share with you my secret for putting together my layouts, cards, etc. I think the two questions I get most about my design team work are: Where do you get your ideas? And where do you start – i.e., there are so many layers and embellishments, how do you even begin? So here are my answers… ;)

First, where do you get your ideas? To gain inspiration I, almost daily, view dozens of blogs – both independent scrapbookers and company design team blogs (ex., Scrapbooks Plus ;) BoBunny, Basic Grey, etc.). By viewing these blogs I not only keep up on the latest trends, new products and techniques, I also get TONS of inspiration!! Easy enough, right?!?! So, if you are feeling uninspired hop on a blog of your favorite store or company and check out the cards, layouts, altered items, etc. being highlighted – you won’t stay uninspired for long!

Second, where do you start? Armed with inspiration I pull out a collection of paper and the coordinating embellishments. That’s it – I NEVER scrapbook with my pictures – I know CRAZY, huh?? But personally, I feel my pictures limit my creativity. Only after the page is complete do I select the pictures I want to put on my layout. In addition to not scrapbooking with my pictures, I also NEVER adhere any element down until I have the entire page laid out the way I want it. I cut all of the paper, lay out all of my embellishments, ribbons, flowers, etc. and continue to rearrange until I’m satisfied. Once I’m happy with the way my page looks I remove everything and begin chalking, sewing, and then adhering it down.

While I’ve described my way of scrapbooking, this is by new means the best way or right way. I always say there is NO right or wrong way to scrapbook. The key is to do what works best for you. So, if you’re feeling uninspired or stuck in a rut try getting inspiration from others and scrapbook using a new method!!


Paper
MME, The Sweetest Thing – bluebell

Embellishments
MME, The Sweetest Thing – layered sticker, chipboard elements, stickers
Webster’s Pages – letters
Wilton – dollies
Prima, Petaloo & Recollections – flowers
Celebrate It – lace

I hope you’re feeling inspired! Thanks for looking.
Erica 

Friday, September 28, 2012


Here's a simple way to add a little something extra to your layouts - fringe! I took a strip of this month's paper and used scissors to cut a fringe all across the strip. Then I added two strips of washi tape over the top.

Wednesday, September 26, 2012

My Mind’s Eye, the sweetest thing


My Mind’s Eye, the sweetest thing,
by Jen Allyson


For this week’s Make & Take, I used the Sweetest Thing by Jen Allyson – My Mind’s Eye, Tangerine.  This line as with most of My Mind’s Eye is wonderful; you can mix the many different papers and embellishments to come up with fun, spunky, colorful, and beautiful layouts.  This week’s layout was fun, colorful and spunky.  Stop by the store today and pick up the papers, instructions and free ribbons, everything you need to make this layout!

Monday, September 24, 2012

Beauty

If you haven’t purchased the My Mind's Eye, The Sweetest Thing, Bluebell Collection you should immediately!! I LOVE the various shades of blue and yellow in this collection, as well as all of the designs showcased throughout these fabulous patterned papers. Also a huge plus – these papers are totally gender neutral, in fact, I used the same papers to scrapbook a picture of myself and my husband...talk about versatility!! ;)


I think the two elements I love most about this layout are the chevron pattern and the punched border. Chevron patterns have become quite popular recently; it seems every collection now has at least one patterned paper featuring this pattern. And why shouldn’t they? It adds a fun, easy, and cheap detail to any layout. What I like about the chevron pattern is it’s a quick way to tie a two page layout together. Sometimes, with all of the patterned papers two pages side-by-side may look like they don’t go together at all, but by taking a few minutes to cut out a chevron pattern you can easily use half of the pattern on one page and half on the second page. By carrying over the same pattern on both pages, you now have a design element that matches and ties your two page layout together.


The second element I love most on this page is the punched border. I’ve found that border punches help focus your layout especially when you have a number of busy patterned papers or embellishments on your page. What’s awesome about the Martha Stewart border punches is that the punch is actually designed to cut both the corner and straight edges so that you have a perfect border. These punches are extremely easy to use and relatively inexpensive.

 Paper
MME, The Sweetest Thing – bluebell

Embellishments
MME, The Sweetest Thing – layered sticker, enamel dots
Prima, Petaloo & Recollections – flowers
Celebrate It – lace & pearls
Basic Grey - letters

I hope you’re feeling inspired! Thanks for looking.
Erica 

Sunday, September 23, 2012

Spooky & Scary: A Halloween Page

The All Hallow’s Eve line is perfect for Halloween pictures, especially if you’re not a fan of bright orange.  This line uses fall colors and Halloween themes to create lovely papers that allow your pictures to shine.  I chose this line for my Designer’s Choice paper and teamed it up with some other fun things to make a page for two horizontal pictures that would be perfect for some adult halloween pictures. 
Corrugated ATC cards are embossed with Sizzix Tim Holtz Alterations Texture Trades Spooky Things and then inked.  By affixing these to the page on only three sides, I made them a pocket for little journaling tags.  I used a Gluber and two types of ribbon to make a large flower and added some little words cut from the paper, some with Tim Holtz Idea-ology Memo Pins. 
The title is made with Tim Tim Holtz Idea-ology Alpha Parts News Print Letters.  If you haven’t tried, these you’ll want to.  There are lots of letters so you can spell the words you want.  Numbers are also included.  They are so great once, I started using I haven’t stopped.  All my most recent pages, have these letters on them. 
The complete instructions for how to make this page and the items you need are available at ScrapbooksPlus.  You can get a head start on this Halloween or do what I am doing and pull some of old photos out of box and put them on the page. 

Friday, September 21, 2012

SMILE!

I couldn't help but document these big bright smiles!  The Sweetest Thing - Blue Bell line went perfectly with the colors and tone in this photo of my daughter and grandson, Trey.  I did a lot of layering because there were too many papers that I LOVED in this collection!  No way could I narrow it down to just a couple.  I used the DMC Color Infusions, wired floss to add some dimension and something unique to my page.  It was super easy and glued right into place - fuss free - with 450 Quick Dry Adhesive.  Debbie carries both the glue and floss at ScrapbooksPlus!   Be sure to stop by and pick up this fabulous line of papers!

Thursday, September 20, 2012

Through the Years


I have been wanting to do a layout that features photos "through the years" and this collection has presented the perfect opportunity! I have found photos from each of the "1st Day of School" for my son from 2004 to the present and its so great to see how much he has changed. Unfortunately, this photo does not do the layout justice. You will have to see it at ScrapbooksPlus to see the detail in the layout. I am really looking forward to adding this layout to my scrapbook. I really love the blues and beige in this layout. Be sure to stop by the store to pick up this awesome collection!

Wednesday, September 19, 2012

Vintage Finds Make & Take -- A Little Glim & A Little Glam

Need a layout for some special pictures? Try this week’s Make and Take featuring Teresa Collins’s new Vintage Finds  collection. It includes beautiful papers and fabulous embellishments.  

To the stickers, bingo cards, glittery borders, labels, buttons, tickets, clocks, banners and other ephemera of the Vintage Finds collection, I added some chipboard keys and black rhinestones.  

As always, this Make and Take is easy to make (you can even do it while at the store) and you get a free element when you purchase the items to make this layout. This week’s free element is a vintage typewriter with silver trim made with the Tim Holtz Sizzix Die cut. 

The layout is designed for four 3 ½” x 5” vertical photos.   I think it would be great for old family photos, wedding or dance photos.      

Tuesday, September 18, 2012

Using Scraps

I had a great time creating with the embellishments from the Sweetest Thing line from MME.  When I pick up a new paper line to scrapbook with I always pick up a few coordinating embellishments.  I have not always done this.  I used to think I could make my own so much cheaper.  The reality is that if I want to get any scrapbooking done, I need to buy most of my embellishments.  Maybe I'm a slow learner and the rest of you already knew this but once I figured this out I found it makes scrapbooking more enjoyable for me!  I get more done and I also find that I use all of my embellishments by making cards with my scrap paper and embellishments.  This makes them a great value for me too because there is no waste!


The 'Happy' on this birthday card was premade and part of the embellishments pack that I used on a scrapbook page.  I pulled a Birthday stamp from my stash and made a quick and easy card from left over paper and embellishments!  What do you do with your left over papers and embellishments?


Monday, September 17, 2012

9/17/2012 9:23 PM Stop by the store this week and check out the products that came in last week!
  • Basic Grey- Aspen Frost: Paper, element stickers, diecut shapes, mini envelopes, 12x12 Collection pack, paper garland and 6x6 paper pad. Soleil: 12x12 Collection pack, 6x6 paper pad, fabric flowers, mixed brads and layered stickers. Hero Arts Aspen Festive Ornaments cling stamp and Aspen Happy Holidays clear stamp.
  • Bo Bunny- Rejoice: papers, 12x12 Collection Pack, buttons, Noteworthy, petals, combo stickers, brads, 12x12 chipboard, mini album and 6x6 paper pad. Mistletoe: papers, combo stickers, brads and buttons. Serenade: papers, combo stickers, Noteworthy, petals, brads and mini album.
  • Crafters Workshop- Life Shapes large & small 12x12 templates. 12x12 Greek Letters template. 6x6 Layered Butterflies, Layered beads, Window Screen and Aboriginal templates. 12x12 and 6x6 Chunky Chevron and Hexagons.
  • Graphic 45-Nutcracker Sweet 12x12 and 8x8 paper pads. Birdsong 12x12 and 8x8 paper pad, chipboard tags 1 & 2, Alpha and Elements stickers and Cherry Blossom paper. Hampton Arts Nutcracker Sweet #1 stamp set.
  • Kaiser Craft- Oval Window wood flourishes. Twig & Berry numbers sticker sheet.
  • Lawn Fawn- Dewey Decimal Collection Kit and Check This Out clear stamp set.
  • Reminisce- New Jet Setters stickers: Bahamas, Canada, China, Mexico, Ireland, Italy, Jamaica, England, France, Germany and USA. Making the Grade new papers and stickers. Here Comes Santa papers and stickers. Halloween papers and stickers. Autumn Harvest papers and stickers.
  • WeR Memory Keepers- Lucky 8 Mini Punches: Scallop, Flower, Celtic, Vine, Snowflake and Flourish.

This week’s in store special is 30% off Tim Holtz Distress Markers (single pens only, no sets) Be sure to sign up early for the crops this weekend if you plan on attending. Have a great week! Debbie

Sunday, September 16, 2012


Remember All the Good Times
I am a fond believer you can never have too many books.   I love all of My Mind’s Eye line; but in particular the “Petit Journal paper” was perfect for the cover of this book.  With all of the My Mind’s Eye line you find all the extra embellishments; which I put to good use in decorating the front and inside of my “Remember All the Good Times” journal.   I used the coordinating stickers, chipboard and titles to add fun embellishments to my book.  I did some pages single, other pages I adhered paper together to make for a stronger page.  I also used the basic grey flower on top of one of the wooded buttons for more of a pop look.  This paper is so great for girls or boys.  This fun book is for ME!  It includes pictures my great niece and pictures she drew for me, along with cards she sent me.  I plan to give the book to her eventually, but I will enjoy finishing it and keeping it around for a few years.  She will love it once it becomes hers; I know this since she loves all the books I give her.   I used the “Cinch” to bind the book with the “Cinch” coils.  Use the usual ribbons and trim for the spine, love those ribbons you can’t have too many.  A book is a great way to hold a child’s favorite cards to you, drawings, and notes they give you instead of keeping them in a closed drawer or box somewhere.  Give this book a try, it is easy to make and will bring a smile to your face every time you see it!

Saturday, September 15, 2012

Simple Layouts


Sometimes simple layouts are just what you need to tell your story. Here, the delicate patterns let the photos shine. I used three different patterned papers on this layout on top of a sheet of kraft paper. The banner was stamped and cut out from the same paper. I used a Distress Marker to color in the star.

Friday, September 14, 2012

Le Petit Journal


As soon as I saw this paper, I knew I wanted to do something with the Remember Journal paper to document some of my French experiences.  The paper had lots of blocks with decorations and space for journaling.  So I created a layout with pictures and stories that individually would not fill up a whole layout.

  I started  with the Remember Journal paper for my left page background.  Using a 2nd piece of the paper, I cut out the “Le Petit Journal” emblem and a row of the boxes from the right side.  I affixed the emblem with pop dots  directly over the one on the  background (after inking it).  I used the block of boxes for the right edge on top of  a piece of Playful Mischief.  I added a horizontal strip of Playful Mischief on the left and a narrow vertical strip from the Playful Lively page on the left. 

With the background complete, I added a few pictures and lots of journaling and then went crazy adding embellishments.  I used Playful Layered Stickers, Bright Chipboard, Everyday Decorative Brads, Smile Stickers and Playful Label Stickers.  The final touch was a couple of Tim Holtz Word keys with twine tied through them. 

Although this fit well with my French pictures, it would work well for any situation where you want to tell a story.  If you don’t want Le Petit Journal put a block of paper over it and put a picture, journaling or some other embellishment. 


Thursday, September 13, 2012

Fall for Copics

This month our Copic card and beginners class features some fun Fall images.  The oranges and yellows can be a bit tricky but I'll help you take the mystery out of it and create some fun cars in the meantime!  The class will be held at Scrapbooks-Plus on Sunday, September 16th at 12:30, followed by our Copic Club class where we will be coloring extra large images.  I hope you'll join us to learn the basics about Copic markers and make these fun cards!

Wednesday, September 12, 2012

Little Yellow Bicycle- Make the Grade


I had so much fun designing this"Back to School" layout.  This line by Little Yellow Bicycle is so cute it can be used for a kindergartener and yet there are designs that actually lend themselves much more to middle or high school.  There are papers that were inspired by standardized tests, cork board prints, and chalkboard prints complete with doodling!

My favorite part of this line is the Cork Sticker.  No, make that the Tear Out Tickets.  Ok, I pick both!!  The cork looks great on a page and from this pack you can make a few layouts.  The Tear Out Tickets are soo cute and make journaling a snap.   

Stop by the store today and pick up the papers, instructions and free embellishment, everything you need to make this layout!

Christmas in September

With roughly 90 days remaining until the holidays are upon us I thought I’d start my holiday preparation early – no time like the present right?!?! ;) I’ll admit, when I saw the My Mind's Eye, The Sweetest Thing, Bluebell Collection it didn’t exactly scream Christmas. In fact, I think it looks quite ‘springy’; nevertheless, I didn’t let a little thing like this collection not actually having a Christmas theme stop me from using it to make Christmas ornaments! While I love traditional red and green ornaments I like to use lots of colored ornaments on my tree. Blue happens to be one of my favorite colored Christmas ornaments; so after staring at the Bluebell Collection for the last few weeks designing my layouts the idea to use this paper to make Christmas ornaments popped into my head. 


So….are you feeling inspired? Are you ready to make your own holiday ornaments? If so, I’ll tell you in just 5 steps how you can make your own! **NOTE: The images shown in steps 1, 2, and 3 were obtained from Google images, as such they do not contain paper from the Bluebell Collection but are being provided to enhance the instructions.** 

Step 1: Purchase several paper mache ornaments. I selected ornaments of varying sizes and shapes. You can find paper mache ornaments for $1 (no joke - $1) at a local dollar store, Walmart, Michael’s, etc.


Step 2: Trace around the shape or make a template. For example, the star I purchased was flat so I laid it on top of my patterned paper, traced around it, and then cut the shape out. Because the other two shapes were not flat I sketched a patterned, cut the pattern out and then repeated the process I used for the star. I am NOT an artist by any stretch of the imagination – your sketch doesn’t have to be perfect – just something resembling the shape of your ornament.


Step 3: Adhere the cut out patterned paper shape to your paper mache ornament. I used a combination of hot glue and Helmar Quick Dry 450. Keep in mind the seams don’t have to be perfect!


Step 4: Once the paper is adhered to the shape place Scor Tape (or double sided tape) along the seams and add glitter – nothing like a lil’ BLING to hide those imperfections! ;)


Step 5: Add ribbon, flowers, pearls, pins, etc. as desired! The key: be creative; use those left over items that you only have 1 or 2 of. For example, I had two Tim Holtz Bauble Pearls left in a package so I used them on my ornaments, not only do they look AWESOME, but I also used up an entire package of something! Yippee, see, now I have an excuse to justify buying more! ;)


Paper
My Mind's Eye – the sweetest thing, bluebell

Embellishments
Ashland – flowers & leaves
Celebrate It – ribbon & pearls
Tim Holtz - bauble pearls
Melissa Frances - rhinestone broach

Thanks for looking! Enjoy.
Erica 


Monday, September 10, 2012

9/10/2012 9:57 AM Happy Monday to all! Hope you survived your first week of school and your kids are getting settled in to their routines. Be sure to come by the store and check out the new arrivals.
  • Authentique- Enchanted 12x12 Collection Kit includes 12 double-sided papers, detail sticker and element sticker. 6x6 Bundle includes 2 each of 12 designs.
  • Bella Blvd- Birthday Boy papers and Alpha + Bits stickers. Birthday Girl papers, Just Write journal stickers and Alpha + Bits stickers. Thankful papers, Just Write journal stickers and chipboard icons stickers. 3 new colors of Sophisticates papers. 4 styles of Button Market buttons.
  • Fancy Pants- Country Boutique papers. Little Sport papers and Fundamentals sticker.
  • Little Yellow Bicycle- Makin’ the Grade papers, Decorative Edge Cardstock, 6x6 paper pad, Fresh Verse cardstock stickers, cork sticker and Ticket/Journaling Card Book. (Megan has designed this Wednesday’s make and take with this new line!)

FYI this is the last week for the 30% discontinued Christmas paper so be sure to pick yours up by Saturday. Karen has posted a new Summer Smash Album class for October that you will definitely want to check out! There is still room in Sue B’s Graphic 45 Halloween class if you would like to sign up! Don’t forget to register for Susie’s Diabetes Crop at the end of the month.
Last but not least the Crops Plus crop at the Holiday Inn Dulles this weekend has a few open slots if you would like to sign up go to: ourcropsplus.com to register! ScrapbooksPlus will be a vendor and Megan is doing a layout class on Sunday featuring the Harvest Lane Collection by Simple Stories! This week’s in store special is 30% off all Lasting Impressions Brass Templates while supplies last! Have a great week. Debbie


Saturday, September 8, 2012

Angels Watching Over Me

Being the proud new grandma of a baby girl, I could not help but scrap my granddaughter!  The Sweetest Thing - Blue Bell line was heavy in blues so I just added in a sheet of paper from the My Minds Eye Sweetest Thing - Lavender line to bring in some pink!  The possibilities are endless with the Sweetest Thing collection.  With some distressing, inking and flowers this layout was perfect for a little princess!

Friday, September 7, 2012

Embellishments Plus

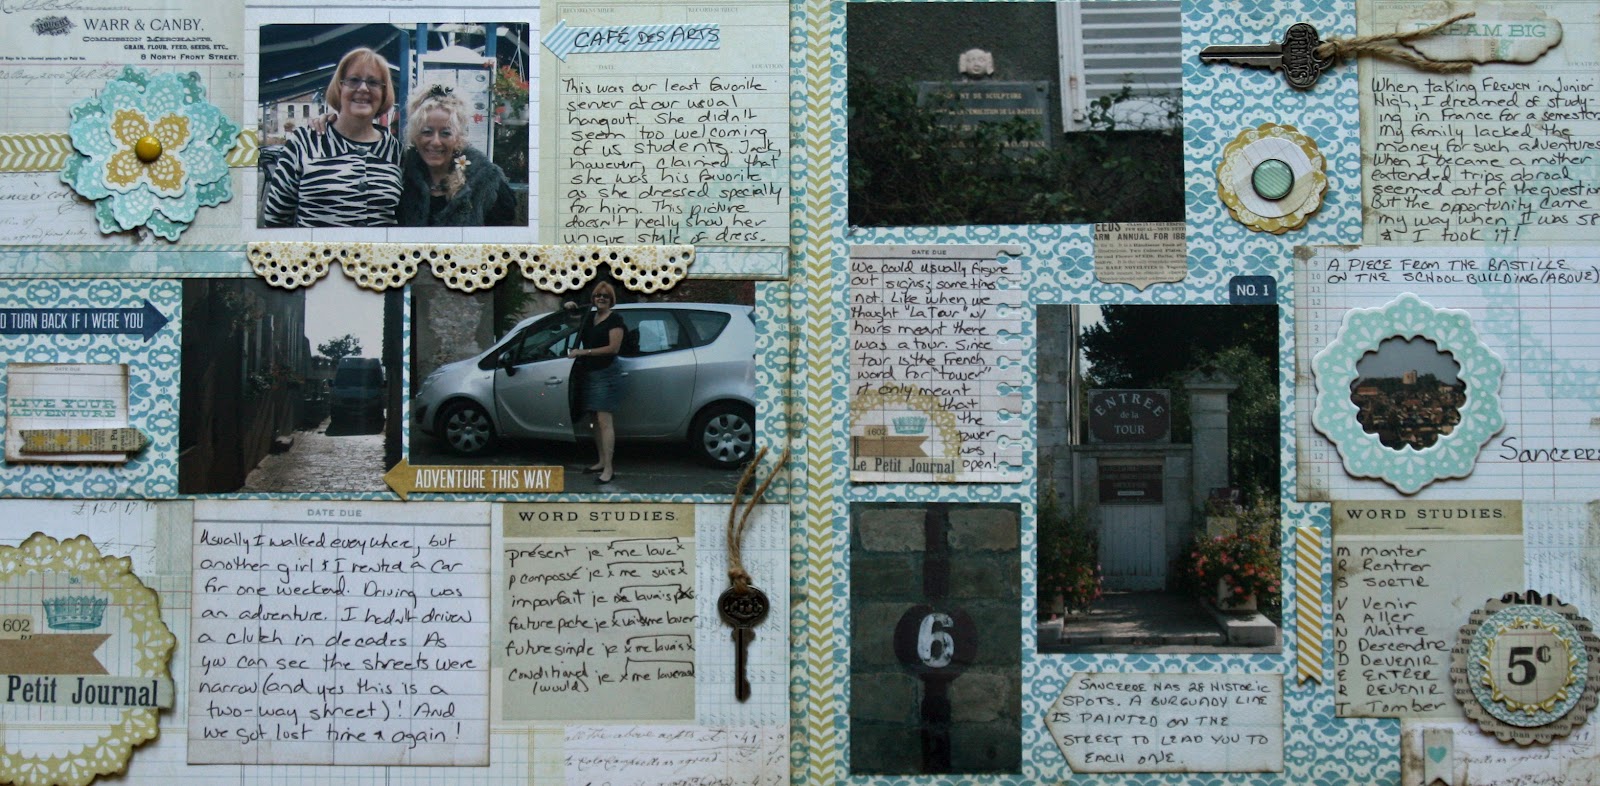
This bright paper made me happy -- just to looking at it.  Once I got started embellishing the embellishments I had a great time.  The end result is a lovely layout with 5 pictures from a wedding I recently attended and lots of room for journaling.  (You can’t see it in this picture because I hid it!). 

On a background of Smile Beam, I used a 11 ½” square piece of Bright Blossom.  I put the five 3 ½’ x 5” pictures on a piece of Smile Bouquet paper ¼” larger on all sides than picture block and added this to a piece of Smile Beam about ¼” larger on all sides than Smile Bouquet.  I inked the edges with Tumbled Glass Distress Ink

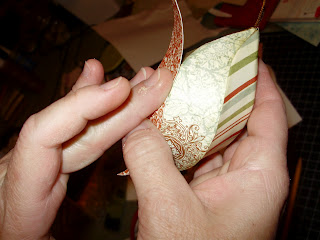
I used the new Tim Holtz Brushed Pewter Distress Stain to make the two silver (okay actually peweter) accents, one of which is a pull tag for the hidden journaling.  Here’s how you make them.  Cut  2”  X 4” and 2 x 6” pieces from neutral-colored cardstock.  Using the Sizzix Tim Holtz On the Edge Brackets Die cut one edge of each piece.  Put a piece of scotch or masking tape across the edge of the design (the part above the tape is what will show.)   Color the part above tape on each piece with Brushed Pewter Distress Stain. Quickly after adding 2nd coat, cover with clear embossing powder and heat emboss.  Affix the shorter strip to bottom left of photo block. Apply Range Wonder Tape ¼” around sides and bottom fof the photo block.  Affix to backgroung forming a large pocket for the journaling tag.  To finishe the pull tag, put a small brad from the Everday Decorative Brads in the center of the remaining strip.    Add piece of thread or ribbon around brad to pull in and out of pocket and you’ve got a pull tag.  (I colored white thread with the Brushed Pewter Distress Stain.)   Add journaling now or later.   (I printed mine on Playful Mischief paper and scalloped the top & bottom before affixing to pull tag.  I really like it with the scalloped edge showing just above the photo block.) I added the “Tell Me A Story” label  from the Label Sticker set.

I used embellishments in three corners.  Instructions for making them follow. 

Upper right – Start with Decorative Brad from the Everyday Decorative Brad set.   Attach to a 1”scalloped circle from Smile Beam paper and inked with Tumbled Glass Distress Ink with a pop dot.  Affix to a 1 1/2” scalloped circle from Smile Beam and inked with Tumbled Glass Distress Ink with a pop dot.

Lower right – Start with Bright Chipboard flower that is same flower as is in the background.  Affix to a 1 ½ ” Smile Beam scalloped circle inked with Scattered Straw Distress ink with a pop dot.  Affix to a 2.5 circle cut from Smile Beam and inked with Tumbled Glass Distress ink with a pop dot. 

Lower left –Start with a 3” circle of Smile Beam inked with Tumbled Glass Distress Ink and affix it to the background.  Add a 2.5” of Remember Record.  Ink a strip (approx 9 ½”)  of net ribbon (available at Scrapbooks Plus) with Brushed Pewter Distress Ink.    Fold into a bow and secure with two heart pins Little Yellow Bicycle Stick Pins.  To create the center, you start with a 1” scalloped circle of Playful Mischief (inked with Scattered Straw & Tumbled Glass) and insert a brad from the Everyday Decorative Brad set.  Insert this in the center of the bow you have made.  Add two smaller brads.   Using 450 glue or Glossy Accents affix the bow to the circles on the page.

A variation of this page could be made with a variety of the papers and embellishments.  And if you don’t to journal (and I know many of you don’t), either just use the brackets for embellishments and don’t make into a pull tag or use the pull tag for additional pictures instead of journaling.

Thursday, September 6, 2012

Everday is a Blessing


I just love these little faces!  I sent them off to school again this morning just before sitting down to blog.  {sigh}


The papers and other elements of the My Mind's Eye The Sweetest Thing collection came together so easily for me to create this layout.  I used a craft knife to cut the design out of the background paper and slipped my matted photo right behind the design to begin creating this layered effect.


Next I added two of the chipboard elements.  One fits right inside the other so I added pop dots behind the inside element to make it pop further than the outer element.  I also punched a circle out of one of the stickers to place over the center of the chipboard to change the look a bit and to change the sentiment since it worked better for my layout.


I used foam dimensional adhesive to pop the "Everyday is a blessing" card off of the page.  Before I added it to my layout I used an edge distresser to alter it a bit.  Then I slipped my journaling with ribbon accent right behind the edge of the card and adhered it to my layout.


I finished the layout by writing the date on this chipboard piece and adding it to the upper right corner of my photo.

Wednesday, September 5, 2012

Le Petit Journal


The Sweetest Thing line from MME was really fun to work with!  I enjoyed the embellishments as much as the papers.  As you an see from this mini composition book, I created a ''Le Petit Journal".  With back to school sales I was able to pick up a few of these extra cheap!  The "Le Petit Journal" notebook page is a sticker that coordinates with the collection.  The "No. 1" tab and aqua doily are also from the same sticker sheet.  The Dream Big is from the coordinating chipboard.  I created a closure form my notebook using a photo hanger on both the front and back cover.  The photo hangers, brads and ribbon are from my stash.  Stop in and check out all the amazing designs that coordinate with this line today!!

Tuesday, September 4, 2012

Soar Card

I had a blast working with the new My Minds Eye - Sweetest Thing line for the September Design Team!  For my card I used Copic Markers on my stamped image to match the Blue Bell paper line.  I really like how it turned out! You will find that this line is really flexible for your crafting needs, whether it is for card making, scrapbooking or altered projects.

Monday, September 3, 2012

End of Summer

It's the end of summer, but not the end of summer pictures! I grabbed a few of my favorite pool shots to pair with MME's the Sweetest Thing kit.


The yellow reminded me of sunshine while the blue chevron aludes to water (what else!). I did ink the top of the paper liberally with mustard stain Distress Ink to bring out the vivid yellow in the photos.

And, you might think that some of the embellishments look familiar. I loved these banners from last month's Basic Grey kit so much that I used them again!

ScrapbooksPlus is closed for Labor Day, but if you're like me you'll be there bright and early on Tuesday (yes, I'm ready for the first day of school)!

Saturday, September 1, 2012

September Design Team Collection


Well this year is surely flying by. Hope everyone has enjoyed a most memorable summer. We are engulfed in preparing one for college and others for high school and elementary. Lots of activity and to get this month started - we welcome My Mind's Eye The Sweetest Thing as the collection of choice for the Design Team at ScrapbooksPlus! Be sure to stop by the store and pick up your supplies. Debbie has ordered the entire line and embellies so come by and pick up yours soon!