Showing posts with label hidden journaling. Show all posts

Saturday, January 12, 2013

Displaying Travel Photos with BoBunny Snowy Day

The BoBunny Snowy Day line was designed and great for winter photos of all types and lots of the items include snowflakes, mittens and winter messages, but that doesn’t mean it isn’t great for other photos.  I loved the rich colors and was eager to use the papers, but I didn’t have winter photos of any type.  I did have lots of travel photos.  I decided that the blues, browns and golds would be perfect for a day in Briare, France, a lovely city on the Loire River. 

BoBunny has a wonderful line of dots and solids that cooridinate well with specific lines.   I used  the Slate Dot and Plum Dot in this layout.  The solid side of the Plum Dots was perfect for my pictures.  For Trim on top and bottom, I used the Slate Dot and punched it.  The Snowy Day Stripes had colors that I loved and only a couple of stripes related to snow so I just used this paper as accents and didn’t use the “snow” lines.  Some of the tags were without snowy messages so I used these.  When taken out of the “snowy” situation, the snowflakes on brads and papers, look like designs or the sun. 
                                                                                                                                                                                                                                                       
As with many of my travel layouts, I was challenged as I had lots of pictures I wanted to use and quite frankly I thought journaling would take away from the beauty of the layout.  My solution – hidden journaling.   The tab on the left with a brad is actually the pull for a long piece of paper that contains the story of this day.  Result:  The memories are preserved and the beauty of the pictures isn't  marred by text.  

As usual with BoBunny, this line has great chipboard, brads, buttons and jewels.  I couldn’t use them all in this layout, but I sure wanted to.  So if you ignored this month’s line because you didn’t think you had snow pictures, I encourage you to head to ScrapbooksPlus and check out these papers. 

Friday, December 14, 2012

Just Believe Christmas Memory Book

I loved the tags in the KaiserCraft Just Believe line and thought a little Christmas book would be a great way to use them.  As I got started, I found that there were lots of things about this line that worked well in this book, like the reverse side of the labels made great embellishments.  I found so many other embellishments that that I ended up only using a few tags.  I think this would be a great gift for a grandmother.  Just add a few pictures of the kids at Christmas.

The covers and all pages were made with  5” x 8” Tim Holtz Idea-ology Grungeboard, although any chipboard would work just as well.     

To make the covers, cut the Grungeboard to 5” x 7 ½”.  Affix the desired paper to both sides the Grungeboard using a glue stick and a brayer.  After affixing paper, cut the edges with the Tim Holtz Sizzix On the Edge
Scallops die.  (It has two edges and I made the front cover with one and the back with the other producing designs that were different but coordinated.)

 I also used the Grungeboard for the pages, but again chipboard would work.  For pages, heavy cardstock would work.  The pages are  5” x 6 ½” and the paper is applied with glue stick and brayer. 

 Decorating the pages can be done anyway you like.  I decorated each page with a variety of items – journaling items, tag, buttons, bows, die cuts, even the reverse side of the paper label .  I made a fun embellishment for the cover with Spellbinders Spectacular Spin die and a center of Peeled Paint Stickles.  These are really fun to make. See blog for December 7th to learn more about this.  On each page, I created photo corners with the Martha Stewart Crafts Embossed Punch and affixed them so I could add pictures later. (This makes it really easy if you give the book to someone who is not a crafter.) Once all pages were decorated, I punched holes in each page and used a binder ring to hold together.  On the top outside ring, add  three charms from the BoBunny Rejoice button set on Tim Holtz Charm Clasps.  Tie ribbon between each charm on top ring and on the bottom ring.  Tie ribbon to the rings between each page so the pages lay better. 

For those that want to make one, just like the one on display at ScrapbooksPlus, I’ve included a list of what I used for each page. Except for the items listed below all of the items are from the KaiserCraft Just Believe .  I loved the reverse side of the label strips on this paper and used some of them as embellishments for the book.  The items used that are not part of the KaiserCraft line are: Turquoise Metallic paper, ribbon (red & cream) and buttons, all of which are available at ScrapbooksPlus. 

Part of the fun is using leftovers and having fun so this should be just a guide. 


Paper
Photo Corners
Photo Mat
Embellishments
Front Cover
Winter
N/A

Snowflake square; inked with Silver IncaGold
Inside Front Cover
Starlight
Keepsakes
 4” x 6” Keepsakes
Tag w/cream ribbon
Page 2

Starlight
Magic

Friends & Family formed with letter stickers; Snow tag  with cream ribbon inside Snowflake square.
Pages 3 & 4
Wish List
Magic

Strip from Hymm paper; Button
Pages 5 & 6

Remember
Hymm

Poinsettas made with Tim Holtz tattered poinsetta die and Magic paper; Tag; Buttons (leftovers); Tree made with letter stickers
Page 7

Remember
Turquoise Metallic

A small and large tag on left side with cream bow. Strip from Magic paper.
Inside back cover

Winter
Turquoise Metallic
4x 5 ½ Remember  

Strip from Magic paper.
Tag with cream ribbon horizontal in right corner.
Back Cover
Wish List
N/A
N/A
Snowflake square, Tag, Button


Friday, September 7, 2012

Embellishments Plus

This bright paper made me happy -- just to looking at it.  Once I got started embellishing the embellishments I had a great time.  The end result is a lovely layout with 5 pictures from a wedding I recently attended and lots of room for journaling.  (You can’t see it in this picture because I hid it!). 

On a background of Smile Beam, I used a 11 ½” square piece of Bright Blossom.  I put the five 3 ½’ x 5” pictures on a piece of Smile Bouquet paper ¼” larger on all sides than picture block and added this to a piece of Smile Beam about ¼” larger on all sides than Smile Bouquet.  I inked the edges with Tumbled Glass Distress Ink

I used the new Tim Holtz Brushed Pewter Distress Stain to make the two silver (okay actually peweter) accents, one of which is a pull tag for the hidden journaling.  Here’s how you make them.  Cut  2”  X 4” and 2 x 6” pieces from neutral-colored cardstock.  Using the Sizzix Tim Holtz On the Edge Brackets Die cut one edge of each piece.  Put a piece of scotch or masking tape across the edge of the design (the part above the tape is what will show.)   Color the part above tape on each piece with Brushed Pewter Distress Stain. Quickly after adding 2nd coat, cover with clear embossing powder and heat emboss.  Affix the shorter strip to bottom left of photo block. Apply Range Wonder Tape ¼” around sides and bottom fof the photo block.  Affix to backgroung forming a large pocket for the journaling tag.  To finishe the pull tag, put a small brad from the Everday Decorative Brads in the center of the remaining strip.    Add piece of thread or ribbon around brad to pull in and out of pocket and you’ve got a pull tag.  (I colored white thread with the Brushed Pewter Distress Stain.)   Add journaling now or later.   (I printed mine on Playful Mischief paper and scalloped the top & bottom before affixing to pull tag.  I really like it with the scalloped edge showing just above the photo block.) I added the “Tell Me A Story” label  from the Label Sticker set.

I used embellishments in three corners.  Instructions for making them follow. 

Upper right – Start with Decorative Brad from the Everyday Decorative Brad set.   Attach to a 1”scalloped circle from Smile Beam paper and inked with Tumbled Glass Distress Ink with a pop dot.  Affix to a 1 1/2” scalloped circle from Smile Beam and inked with Tumbled Glass Distress Ink with a pop dot.

Lower right – Start with Bright Chipboard flower that is same flower as is in the background.  Affix to a 1 ½ ” Smile Beam scalloped circle inked with Scattered Straw Distress ink with a pop dot.  Affix to a 2.5 circle cut from Smile Beam and inked with Tumbled Glass Distress ink with a pop dot. 

Lower left –Start with a 3” circle of Smile Beam inked with Tumbled Glass Distress Ink and affix it to the background.  Add a 2.5” of Remember Record.  Ink a strip (approx 9 ½”)  of net ribbon (available at Scrapbooks Plus) with Brushed Pewter Distress Ink.    Fold into a bow and secure with two heart pins Little Yellow Bicycle Stick Pins.  To create the center, you start with a 1” scalloped circle of Playful Mischief (inked with Scattered Straw & Tumbled Glass) and insert a brad from the Everyday Decorative Brad set.  Insert this in the center of the bow you have made.  Add two smaller brads.   Using 450 glue or Glossy Accents affix the bow to the circles on the page.

A variation of this page could be made with a variety of the papers and embellishments.  And if you don’t to journal (and I know many of you don’t), either just use the brackets for embellishments and don’t make into a pull tag or use the pull tag for additional pictures instead of journaling.

Tuesday, June 12, 2012

Mother's Day Layout with Recipes

I created a 2-page layout to capture a special Mother’s Day that I spent with my aunt and several other mothers.  It was a potluck where everyone brought something so I thought it would be nice to include a picture of all the mothers along with the  recipes for the item each brought.  

The background is Alora Squiggles  I chose one of the less busy backfounds since I was going to have so many pictures.  I used one of the Cut Outs to make a frame for the title.  I cut off the two outer frames so it would fit my page better and used the Combo Stickers for the title.

A holder for each person’s recipe was made from Alora Wish and affixed to the background with  1/8” Wondertape so the recipe cards would fit and the tape would hold as the cards are pulled in and out.  I made the recipe cards by cutting rectangles from Blue Alora Dimples and  cutting the top with the Sizzix Tim Holtz on the Edge File Folder die.  (This die is great to make all kinds of file folders of any size you want.)   Each recipe can then be printed on white paper and glued to the recipe card. 

I put a picture of a Mom on each recipe holder and their name (made with a labelmaker) on each recipe card.  Some of the pictures were made with a circle punch and a slightly larger circle punch made the photo mat.  To call attention to the hostess I used a chipboard frame for her picture.  Each recipe holder was decorated  with a variety of Alora items – chipboard, stickers, brads, journaling cards and jewels.  I also used three different Bazzill Half the Edge strips.  These come in a package of 2 each of 10 different designs in a variety of colors.

I think with this page I'll remember the special day that my aunt hosted so that all the mothers she knew had a special Mother's Day.

Friday, September 30, 2011

Creating More Journaling Space

Sometimes things fall into place when you just go with the flow.  I was struggling with the school theme of this month’s papers.  I really liked the papers but I didn’t have any school pictures to scrapbook.  After much thought, I decided that I would use the paper with books and just use a title about learning, such as “Learning Outside the Classroom” and started to work on a page with pictures from a August trip to Springfield, Illinois.  As I was working on the page it dawned on me that the paper fit perfectly – our favorite place was the Lincoln Presidential Library and Museum.  No need for special title.  Simply the Lincoln Presidential Library and Museum. 

For the most part the two-page layout is fairly straight-forward so I’ll just highlight a few things. I used the Life Documented Flash Cards for journaling.  One titled “Life Documented” for the place, city  and date.   I used Cosmo Cricket Tiny Type for the actual words.  I love using these as they are small enough they don’t take up too much space and I don’t have to worry about handwriting.  To list the things we saw in Springfield, I used a flash card with numbers.  These Life Documented Flash Cards have many uses.  I urge you to get a page or two before they are gone.

However, I still did not have enough space to tell the story of the day and display all the pictures that I wanted so I created a journaling flap. To make the flap, I used a plain piece of cardstock for the page base.  On the right side, I affixed strips of Study Hall & Letterman’s Jacket.  I then attached a 12” x 9 3/4” piece of the Fencing paper on the left side of the cardstock, affixing the top, bottom and left edge.  On the right edge, I affixed the piece of the Fencing paper only 2” from top and bottom, thus creating a flap in which to insert the journaling.  

For the journaling, I typed it on a piece of Oxford Dean’s List.  I folded it in half so it would be a little more durable and trimmed to size needed.  You could of course add more pictures on this.  I made two tabs for the journaling page using two pieces of ribbon (also folded in half).  I affixed these with Tim Holtz snaps.  You might prefer to use your stapler as the stamps are a little thick when inside the flap.  The ribbon shows when the flaps inserted.  This ribbon came from ScrapbooksPlus and is so elegant.  With other papers, twine would work well also.  That’s how simple it is to make extra space for that precious journaling of special moments.

I embellished the page with pencil stickers and Tim Holtz Idea-ology philosophy tags.   I used ones to express meaning.  I threaded a double string of brown floss through holes and tied.  (I used threaded needle to get the thread in the holes.) I affixed with Glossy Accents.  As usual,  I inked things liberally.  For this page, I used Black Soot Distress Ink.

Wednesday, May 20, 2009

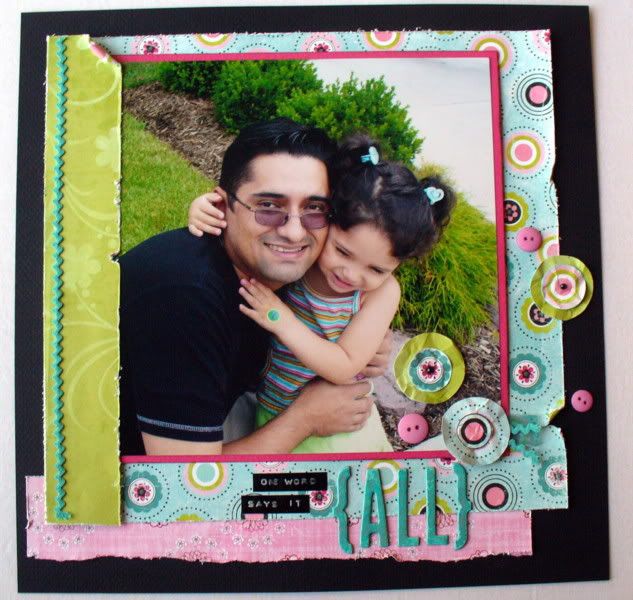
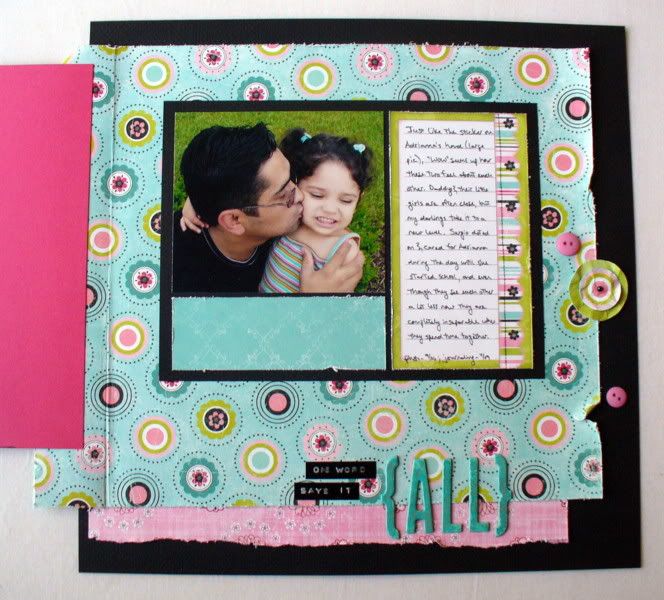
Easy hidden journaling

Most scrapbookers admit that journaling is an important part of a layout. Some of us start with our journaling and some of us fit it in at the end, but all of us know that it's a necessary part of recording our stories.

I personally tend to be a "fit it in at the end" kind of journaler. Sometimes I find myself editing what I want to say to get it to fit around the photos and embellishments I've already placed on the page. That's where hidden journaling is so handy. It lets you put in everything without having to save tons of space. This month I created a space for hidden journaling and an extra photo with an easy hidden journaling technique. All you need is a large photo and some double-sided patterned paper.


For this layout I cut a large photo mat out of the double-sided patterned paper with about an extra inch and a half on the left-hand side, which I folded over the front. Then I matted my photo with a piece of solid cardstock. I put my adhesive on the top left-hand edge of the photo, laid it in place on the large mat, and folded over the flap to glue it in place perfectly. Underneath the photo I have a block of extra patterned paper, another photo, and my journaling block. You could easily have all journaling or more photos here too!


thanks for stopping by!

erin
PS. My AC Thickers were too green for this paper... so I sprayed them with Robin's Egg Blue Glimmer Mist to alter the color slightly. As an added bonus, the letters got a bit splotchly looking from the beading of the Glimmer Mist on the surface. I think it helps them match the distressed edges of the paper!