Friday, January 30, 2009

Snowy, Glittered Frame


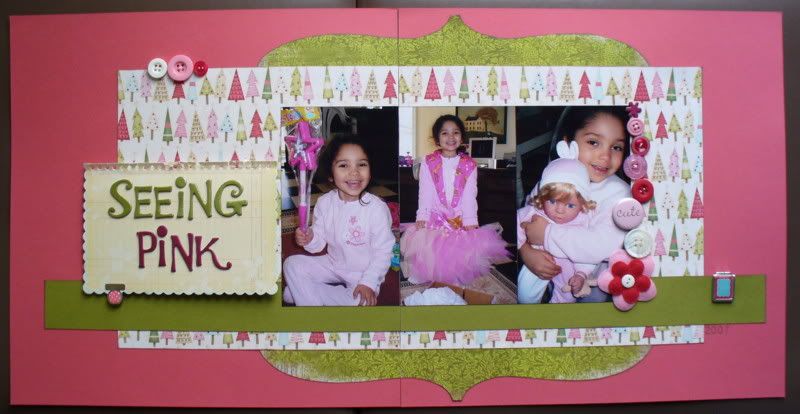
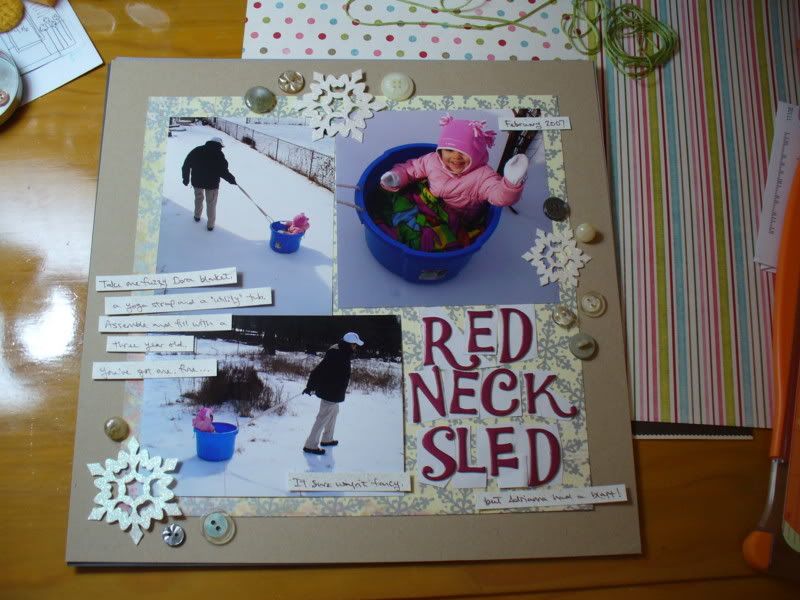
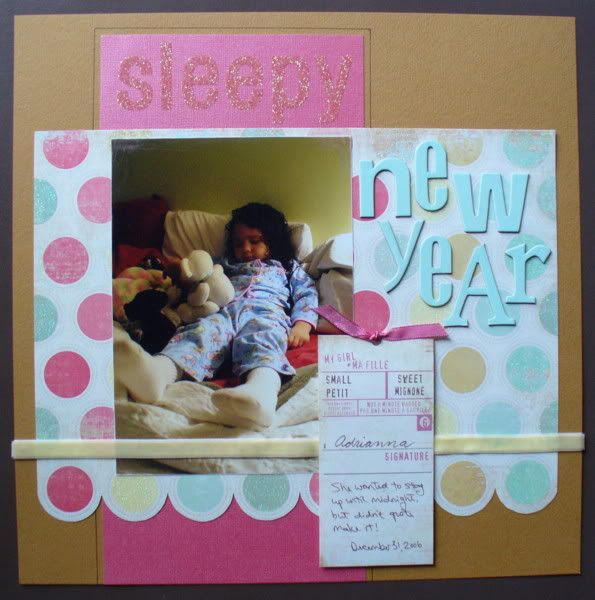
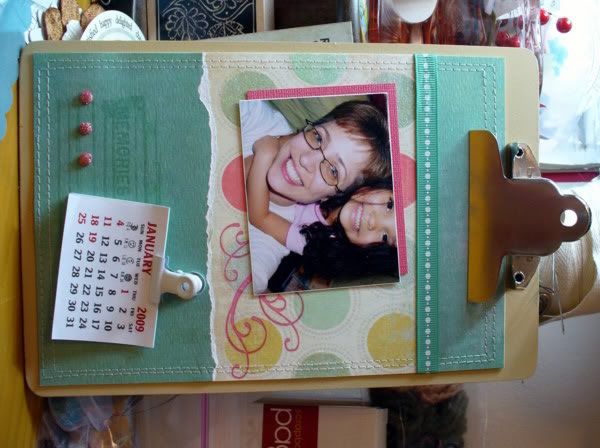
I enjoyed working with the My Mind's Eye glittered papers this month. When I first spotted Suzy including them in the kits, I knew I had to create a glimmering snowy frame for a focal photo. I use a lot of circle frames in my scrapbooks and find the Martha Stewart glitter a great way to highlight a photo. For this frame I used the Martha Stewart Aquamarine glitter. I first cut a large circle from blue bazzil card stock using the Fiskars shape cutter and circle templates. I sprayed the frame with a light coating of Elmers craft adhesive and sprinkled the glitter on. Once the glue dryed, I tapped off the excess and "set" it with a light spray of White Rain hair spray. I decorated the frame with flourishes cut from the Accu-cut machine at Scrapbooks-Plus, punched snowflakes, and bling. The result can be stunning.

You can create frames like this with any color glitter and decorate with various scraps - flowers or butterflies cut from patterned paper, punched pieces of carstock, buttons, brads...whatever you have left over from other projects. I typically triple mat a smaller photo (3 1/2 x 5) to place inside the frame. And the result is always the same - an eye-catching layout. I hope you try this in your own books - it really is easy - you'll love them, too!

Thursday, January 29, 2009

More Easy Scallops


I *love* scalloped-edge paper... I think a lot of us do! One of my favorite, totally easy ways to create a scalloped edge is to just work with a geometric pattern on your patterned paper. On this layout I selected the large sparkle dot paper and used the circles as my guide.

First, I trim the edge close to where the finished scallop would fall. It's important to trim the extra first. You don't want a lot of paper in the way when you are trying to cut or else you will end up with lopsided curves.

Next I take my smallest, pointiest scissors and freehand cut the curves. Usually I will cut most of the curve going down into the point. Rather than try to turn the scissors in the point, skip up to a part of the next curve where you can easily cut and trim along the pattern down to the next point. Repeat all the way across.

Finally, come back from the other side and trim the final half of each point. Check your curves and tweak as needed! Voila! Custom scalloped-edge paper! :)

thanks for stopping by!
erin

PS. I used double-sided sticker letters for "sleepy" in the title and used one of the journaling tags from My Mind's Eye to finish it off.

Monday, January 26, 2009

Quick Tip: Make Your Own Glittered Brads

This month's kit included some fabulous Doodlebug glitter! The thing that sets Doodlebug's glitter apart from other manufacturers is the mix of colors in each color. The pink glitter really has a mix of pinks and iridescent glitter that gives it a lot of depth and interest.

I decided to take some of the hot pink brads and create glittered brads. All you will need is glitter, glossy accents or other clear dimensional glue, reverse action tweezers (ones that hold your item except for when you squeeze them), and glitter.


First choose your brads... use a colored brad that is close in color to your glitter to help hide any imperfections. Holding your brad with the tweezers, squeeze the Glossy Accents onto the brad to cover. It will be a little thick and that's okay.

Carefully dip the brad into the glitter. Turn and dip again to be sure to coat all the way around the edges. If your glue gets a little squished and looks lopsided, just gently press it back into shape.


Set the brad aside to dry. I sometimes use a piece of Styrofoam to hold the brads.... I couldn't find any, so I poked a few small holes in the paper on the top of my sewing thread. It worked perfectly!


Here they are in my finished project:

thanks for stopping by!

erin

Friday, January 23, 2009

Video: Another Valentine's Day Card

Here is another Valentine's Day card I made, and since it is just as easy to make two cards of a particular design as it is to make two, I decided to make another video of the second card to share with all of you. I hope you enjoy it!


Supplies Used:
Scrap Cardstock (3.5"x3.5")
Cream Cardstock (3"x3" & 5.5"x8.5")
Brown Cardstock (3.5"x3.5")
My Mind's Eye Laundry Line Collection: Curiously Large Spots Paper (2"x12") and Winding Vine Paper (4"x5.25")
Art Warehouse: Life Defined (Clear Stamps)
Hero Arts: Friendship Messages (Clear Design)
Clearsnap: Colorbox Fluid Chalk Ink in Chestnut Roan

Tools Used:
EK Success Empressor (embossing tool)
EK Success Paper Shaper (7/8" Circle)
Fiskars 12" trimmer
Marvy Uchida CR Corner Punch (corner rounder)
Marvy Uchida Clever Lever Mega Craft Punch (2.5" scalloped circle)
Marvy Uchida Clever Lever Giga Craft Punch (3" circle)
Post-It Notes by 3M
Spouncer by Plaid

Please note that if there is a discrepancy between a measurement I give on the video and a measurement given in the supply list that the supply list is correct. Also, I forgot to show this step in the video, but on the sample I inked the edges of the flower in the Chestnut Roan as well as the card base. I think it makes the flower pop more, so I would definitely recommend inking it as well! For some reason I was a mess when I filmed this video -- skipping steps and messing up measurements -- sorry for any confusion! Note to self: do not film videos for blog when you are awake at 1:00 in the morning and making cards because you can't sleep.

Thanks for watching & thank you for shopping at ScrapbooksPlus. Have fun creating your own custom Valentine's Day cards!

Sunday, January 18, 2009

Winter Layout

I really like the My Mind's Eye paper in the January kit. It has texture and shimmer. To match with these papers we had vellum in several muted colors. I had a hard time deciding which ones to use, so I decided to use a little bit of everything (well, almost everything).

Since my daughter pretty much only wears pink -- and the brighter the better -- I changed my photos to sepia-toned so they wouldn't clash with the beautiful papers. Under my photos I layered strips of each - some cut, some torn and two edged with punches. Then I just journaled all around the entire photo/paper block.

On the left-hand side I used a creamy vellum paper, a punch and my Slice to make snowflakes. The scan doesn't really show them off, so here's a better shot:

Friday, January 16, 2009

Video: Quick Valentine's Day Card

I posted earlier about creating a good supply of cards by always making two of each card you create. I was doing that this weekend with a Valentine's Day card I made, and decided to make a video of the second card coming together to share with all of you. I hope you enjoy it!


Supplies Used:
Black Cardstock (4.25"x11")
White Cardstock, Smooth (for stamping,2"x2" & 3"x3")
Hot Pink Cardstock (2.5"x2.5" & 3.5"x3.5")
Scenic Route Loveland Collection: Chickadee Street (1"x4"), Garnet Street (1.25"x4")
Scenic Route Background Papers: Blue Grid in White (0.75"x4" & 4"x5.25")
Inkadinkado: Hearts (clear stamps)
Hero Arts: Friendship Messages (Clear Design); Bracket and Tags (Clear Design)
Colorbox: Fluid Chalk Ink in Dark Peony

Tools Used:
Fiskars 12" trimmer
EK Success Empressor (embossing tool)
Marvy Uchida CR Corner Punch (corner rounder)
Marvy Uchida Clever Lever Extra Jumbo Craft Punch (1.5" scalloped circle)
Marvy Uchida Clever Lever Super Jumbo Craft Punch (2" scalloped circle)
Marvy Uchida Clever Lever Mega Craft Punch (2.5" scalloped circle)
Marvy Uchida Clever Lever Giga Craft Punch (3" scalloped circle)
Post-It Notes by 3M

Thanks for watching & have fun creating your own custom Valentine's Day cards!

Wednesday, January 14, 2009

Under the Tree


Susie and I must be on the same design wave, because each month, we produce at least one piece that is darn near identical to the other - at least in terms of design. Her single page "Christmas Present" is extremely similar to my two-page "Under the Tree". We used the bracket mat the same way and the trees are similar. Even my conceptual "present" - the multi-photo collage on the right page - hints at the anagram in her title. How cool is that! I like her use of the red to frame the bracket paper from Pink Paisley - and the buttons on her trees - I may add a little of that to my work later.

If you like these die-cut patterned papers, a great way to use them is to overlay them off- centered across two pages. Create a photo collage in a square block on the right page and a single, larger focal photo on the left. This design allows you to show off the design of the paper in your layout and incorporate lots of photos in balance.

Monday, January 12, 2009

Make Your Own Star Book

Stars are everywhere during the holiday season and I've always wanted to make a Christmas star book of my own. I found several websites with directions and put together what I liked from each to make one that was just what I wanted.
To make this you'll need:
  • Two 4 x 4 pieces of chipboard
  • Two pieces of paper for the cover cut to 5.5 x 5.5
  • Items to decorate the cover
  • Seven pieces of cardstock cut to 4 x 8
  • Seven pieces of cardstock or patterned paper cut to 3.5 x 6.5
  • Seven pieces of patterned paper cut to 3 x 5.5
  • Red line tape or other really strong glue
  • Bone folder
  • Ribbon to close your book


First cut all of your pieces and lay them out. If you want to ink the edges, now is the time. I wanted to use the pink patterned paper as my second layer... but I only had one sheet of it so I cut strips just to cover the exposed portion of the light green cardstock. This added quite a bit of bulk... so I wouldn't recommend using a patterned cardstock on top of cardstock. It's much easier just to buy extra paper instead! :)


Second, fold all pieces in half and make a nice crease with your bone folder. It's really important that all your pieces are cut exactly to size and folded exactly in half. After I cut all my pieces I stacked them together to make sure that they matched. It's easy to correct at this point... once all the glue is on and the pieces are attached it'll be too late. Take a moment to check before moving on to save yourself a headache later!


Next, apply red line tape to the short sides of the two smallest-sized papers (the 3 x 5.5 and the 3.5 x 6.5).

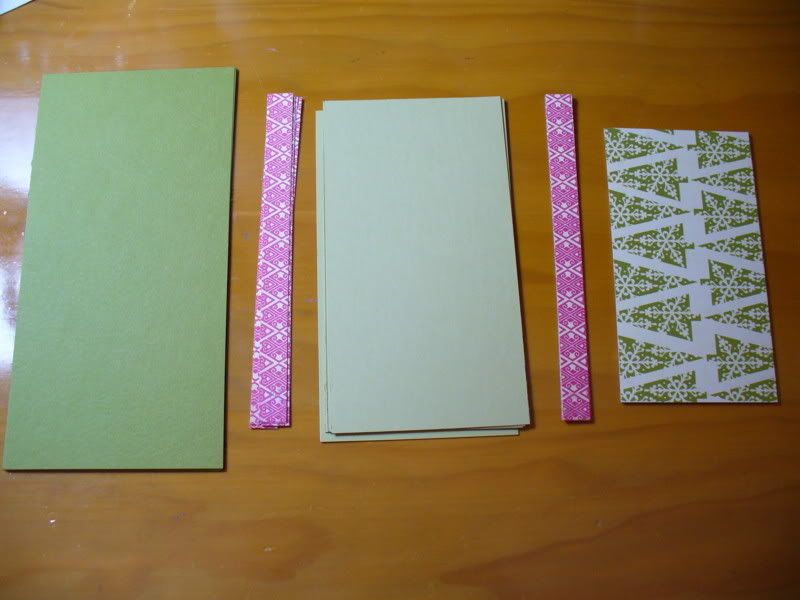
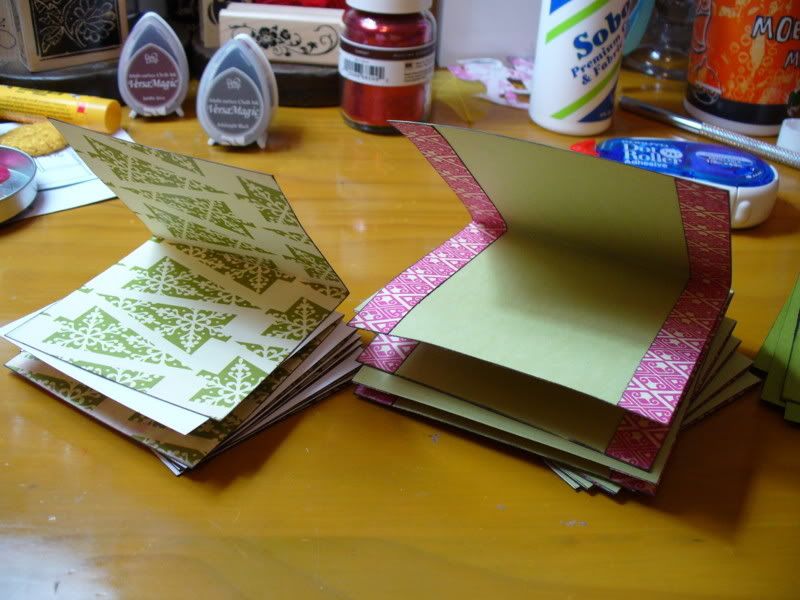
Working on one edge at a time, remove the cover from the adhesive and center the small piece on the medium piece. Repeat for the other side.

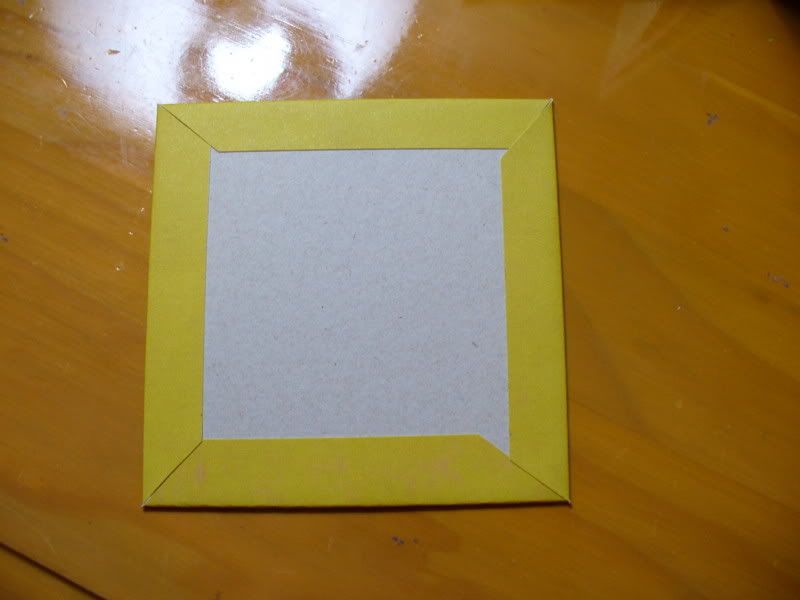
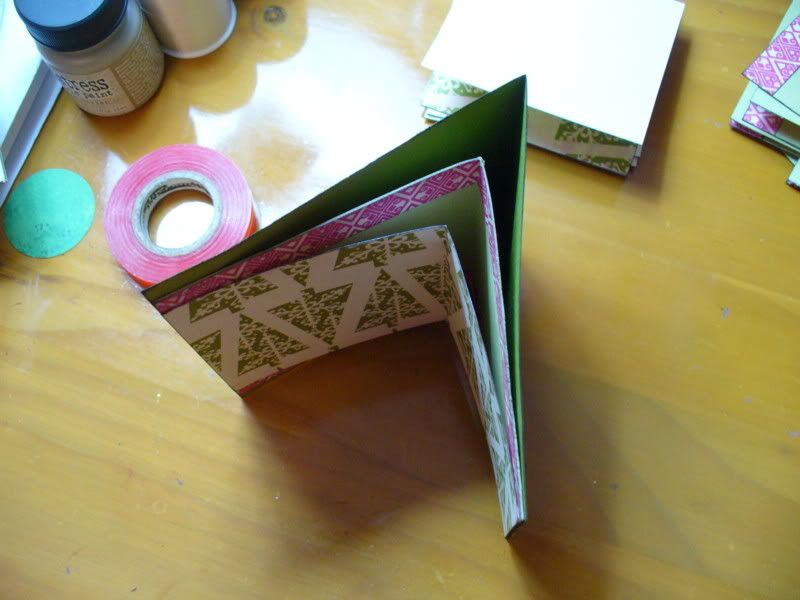
Then remove the adhesive from one side of the medium piece and center it on the large piece. Repeat for the other side. This is what your first piece should look like...

... and from the top:

Now repeat for your other pieces until all seven are done!

Once all your pieces are ready, you can adhere them together.


Working on one at a time, place your red-line tape on the back of one short edge, line it up with the next piece and glue it together. If any of your patterened paper has a directional pattern, make sure there all right side up!
Keep gluing pieces together until everything is attached....


Now, your ready for the covers. Glue the chipboard into the center of the 5.5 square paper and cut the corners off at an angle.

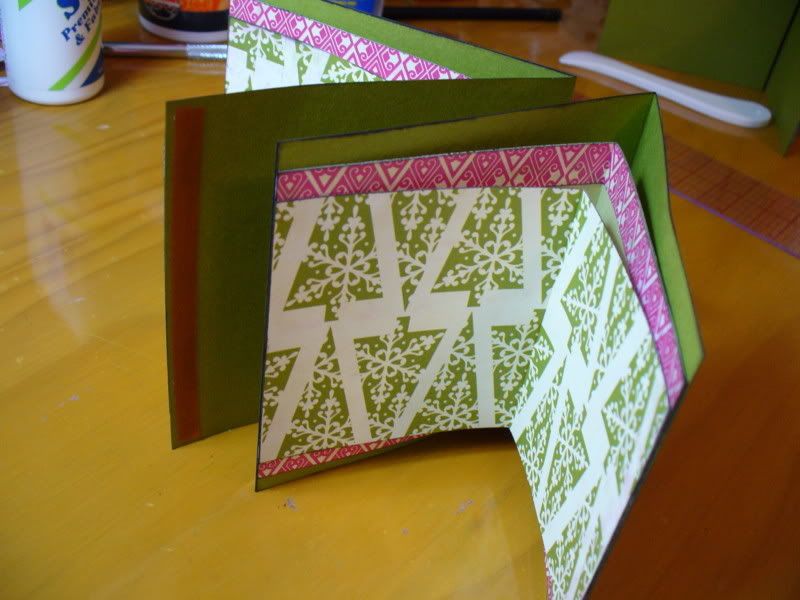
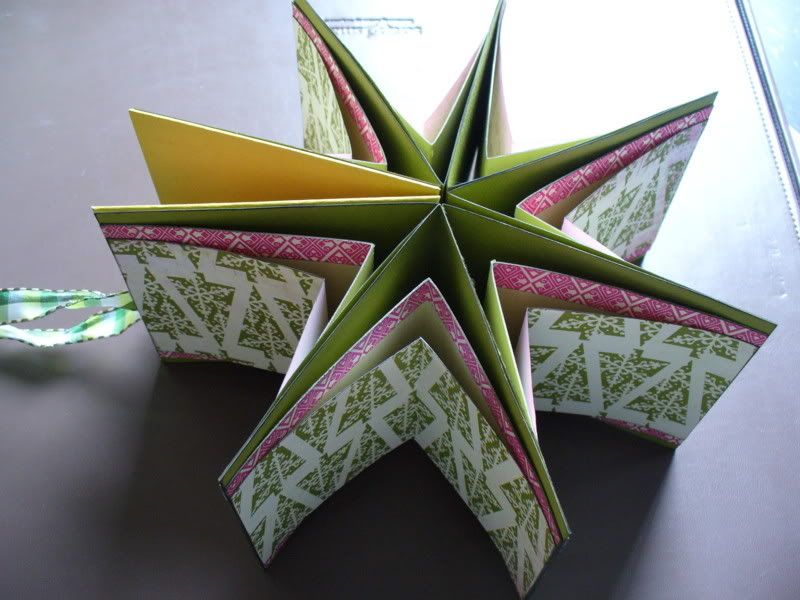
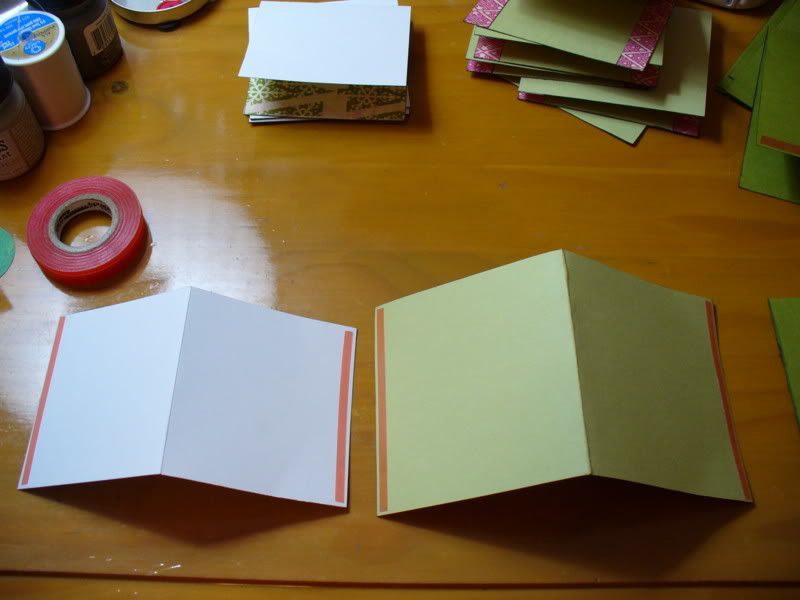
Fold over the remaining paper to have a nice, clean corner. It doesn't have to be perfect in the center, since that part will be hidden... just make sure that the corners look great.

  1. (If you want to add ribbon, now is the time to do it. You have two options:
    Glue two lengths of ribbon to the back of the chipboard. When the covers are on you want the ribbon to point toward the outside of the star. This will let you tie the book open or closed.
  2. You can also place one long piece of ribbon underneath the front cover only. This will allow you to tie the book closed with the ribbon crossing over the back cover. The ends will hand loose when it's open.

Attach the covers and decorate. I used a chipboard Thicker shape from American Crafts to frame a tree cut out of the Pink Paislee patterned paper and covered with Glossy Accents.

Now you are ready to fill it up with your photos. I'm planning to get some 2x2 and 3x3 prints of all my favorite Christmas ornaments and jot down why they are special to me. It'll be great to pull out each year!

thanks for stopping by!

erin

Sunday, January 11, 2009

December 5 Snow


The layouts required for this month's submission were fun to put together as there were so many design options with the choice of papers Deborah assembled. For my one page layout, I wanted to preserve - and emphasize - that lovely scalloped border of the snowflake KI Sheer transparency. I used a little cream colored acrylic paint to "distress" the edges to make them pop a bit more. I traced the piece onto the powder blue Bazzill Bling cardstock, cut that out and used cream paint on its edges, too. I matted the sheer piece onto the cardstock and turned the pieces crooked on the My Mind's Eye dotted background page so the edges would have even more emphasis. I used the paint to make a brushed frame around my son's picture and added a little ribbon, MME striped strips, buttons and snowflakes to finish. The tag for journaling is a bit stark, so I may add a little paint to warm it up when I get the design home. Otherwise, I like the result - albeit a bit different than my usual one-pagers.

And to answer the question - yes - it has snowed every Dec 5 (even if it was just a dusting) since 2002. This year we got a dusting in Dec 6, so the pattern has been broken. The only reason I would possibly know this "fact" is because I scrapbook the first snow each year - no matter how small the accumulation is. Another reason to scrapbook! Enjoy!

Saturday, January 10, 2009

Snow generous!

Another gift card holder from Susie!
I used MME's Be Merry Collection for this one. The "paper" is really a nice weight card stock. Candy Stripes is the basis of the card. I added a strip of pastel trees across the front (Trim the Tree). The scalloped edge is Bazzil Bling with a Martha Stewart edge punch. A Snowman (Jack Frost) provides a fun focal image. On the inside of the card I added some Velcro to keep it closed.
Perfect for that special someone with a winter birthday! Just stamp an appropriate sentiment on the bottom right corner.
(Pssst! Mine is in January)

Thursday, January 8, 2009

Pretty in Pink


When we got the My Mind's Eye papers, I was thrilled to see that they were holiday themed AND pink. With a little girl in the house, our Christmas unwrapping extravaganza is inevitably full of pink. Traditional colors are great... they are some of my favorites... and having papers that included not only the red and green, but also pink was just what I was looking for! Almost all of the pictures I took last Christmas had a shot of pink in them, so I picked out some of the "pinkiest" to showcase.

To maintain the Christmas feel, I chose a red cardstock base that had a pink hue to it that would complement the pinks and reds in the My Mind's Eye tree paper. I used just the edges of the Pink Paislee die-cut paper to be a bracket above and below my row of photos. To further the "pink" theme, I colored the first half of my title with an American Crafts green metallic marker. It covers great, dries fast, and lets to customize your Thickers easily!
thanks for stopping by!
erin

Tuesday, January 6, 2009

Christmas Cookies

I actually started this layout knowing exactly what I was going to do with the 2nd page. Although I don't think she blogged it, Lisa created a beautiful 1 page layout with the September kit that really stuck in my mind and I have been waiting for the opportunity to scraplift!
The basis of her layout was a simple 3x3 grid pattern, so I cut 9 pictures into 3" squares. My photo mattes are a little different than hers though, because mine are actually flaps, cut 3.5" x 4" ,scored and folded at 1/2" from the top. I inked the edges because - well, I just like the way it looks!
.
Under each flap I plan to include a recipe for each of the cookies we baked that day. I have to add that I had no idea my daughter stuck her tongue out when she was really concentrating. I caught her at it a couple of times that day! The Scenic Route chipboard provides nice little accents for my series of photos.
.
The first page went together really easily because all of the papers in MME's Be Merry Collection are so cute. I kept with a very linear layout, but got a little funky within the title block...adding some of those snowmen and trees I like so much - and I just had to jumble the thickers when I added the title!

Monday, January 5, 2009

Christmas Present

I said before I loved the trees in this month's pink paislee Tinsel Town Collection. I'm afraid I got carried away cutting them out and ended up adding them to this layout, creating a cheerful and elegant little forest across the bottom of the Polar Express paper. Initially, I wasn't sure about the color of this paper for Christmas, but it quickly grew on me and this is one of my favorite holiday layouts. I decided I really wanted to pull the color red out of the photo. The die cut paper was easy to trace, creating a nice red border. I loved that the red chipboard parentheses from Scenic Route were exactly the same shape as the die cut. They provided a unique way to add emphasis to my journaling. A little red ribbon, a few buttons, and a sprinkling of chipboard stars and sentiments finished it off - my reflections on Christmas Present and the gifts in my life have been saved for posterity.

Sunday, January 4, 2009

Building a Good Supply of Handmade Cards

I mentioned in a post last month that I love to send my friends and family handmade cards in the mail. I also like to keep a supply of handmade cards on hand for all occasions so that if I forget about a birthday, anniversary, holiday or other event, I can quickly grab a card, write an appropriate greeting & get it into the mail or bring it with me to a gathering.

The easiest way to start building a good supply of cards for all occasions is to make two or three of every card you create. When making cards, it seems to me that it is just as easy to make two as it is one. So, once I decide on a card design, I make sure I gather enough supplies for two. That way I can easily make two cards -- one to send and one to have on hand for emergencies or when I just don't have time to make one. I've also noticed that my husband likes to go through the card stash when he needs one for a friend or work colleague and grab one -- it really cuts down on last minute trips to CVS or Walgreen's!

This month I needed a thank you card and a birthday card, so I decided to make two of each. When I was done, I had two cards ready to mail & two cards to slip into my on hand supply. It's great for the last minute or when you just don't feel like creating something new.

Saturday, January 3, 2009

December Layouts

My layouts with the December kit were fun to make. I liked the whimsical patterns of the My Mind's Eye paper and the Pink Paislee paper was just gorgeous.

My first layout -- what do you do with those mall Santa photos? I usually like the photo and hate the boarders. For this one I found a digital bracket and stretched it until it was just a bit larger then my photo, then printed it out to use as a template for cutting the blue paper. I then coated the paper with Stickles. I also cut the green Pink Paislee paper; I wanted a bracket on three sides, so I used an extra piece to trace on the back. This one was finished up simply - lots of paper layers, a bit of machine stitching and a Scenic Route chipboard piece as my title.


My two-page layout is mostly made up of the Pink Paislee paper from the kit. I only wanted one set of trees on the background, so I covered up the trees on my second page with a long strip of "Jack Frost" paper. And to stretch out my supplies, I first carefully cut out that 2nd set of trees and used them on a card!

And, on my third layout I used cardstock and the KI Memories Sheer Delight as my background. I used a bit of cardstock and my Slice cutting tool to make a few accents. This is a gas station near my house. I wish I could have put a 360 degree picture on the layout - they seriously get into decorating! Lights, lights and more lights along with every inflatable decoration out there. If you've been down Old Keene Mill Rd you know the one I'm talking about. We love it and my kids look forwards to seeing what they'll come up with next.

Friday, January 2, 2009

Quick Tip: Keep Your Camera On Your Scrap Table

I think all of us have worked on a layout and once it was all laid out perfectly, we've gone to glue everything in place and forgotten exactly how we placed everything or mis-glued, messing up our hard work. I have gotten in the habit of keeping my digital camera on my scrap table and using it as part of the scrapping process. Once I get everything laid out and I'm happy with it, I snap a quick picture of my desk. When I go back to glue everything down, I refer back to the photo, zooming in where necessary.


This layout had a number of buttons on it... and I kept moving this one here and that one there. Finally I was satisfied, so I took a quick picture. When I have a heavily embellished layout or a layout where I'm using my last scrap of a paper, this really helps save me some time and energy! Do I always put everything right where I had it before... nope, but at least I'm doing it that way on purpose instead of by accident! :)


Another bonus, looking at the layout in the camera gives you a different perspective... and sometimes once I've taken the shot I realize that I'm not a hundred percent happy with it and I need to rethink my plan.


thanks for stopping by!
erin

Thursday, January 1, 2009

Photo-A-Day

Happy New Year!
Are you up for new challenge this year? How about a resolution to take at least one photograph per day for all of 2009? What a great way to document through photographs, the little things as well as the big things, that happen to you this year. I did this last year and got all the way 'til August. This year, I plan to go all the way! The real challenge of this is pulling it together. Last year I used a digital template to lay out my pages each week. The template cost only $10 and it was easy - even I could do with my PhotoShop version 3.0 (They sell 7.0 these days!). This year, though, I'm going more traditional. I've bought Heidi Swapp's "Month" Clear stamps (Debbie can get them for you at Scrapbooks-Plus) and am planning a monthly double page layout - calendar style - for all my pictures taken each day. I'll print them in a smaller format so they will fit nicely on the spread. I've posted a couple of sample pages from the digital format I used last year over on my blog (Click here or go to the link on the right). My problem with this format last year was that it required not only taking a picture each day, but me putting together a weekly "accounting" of the events and the journaling. Since I'm not a digital scrapper, this process wasn't as "pleasant" for me. Because I found the digital process a bit tedious, I would get behind pulling it together each week - and then in August I was so far behind that well...you know what happened!

But it's a new year! Since I like my patterned paper, glitter, stamps and glue, I'm thinking every supply I will need for this project I can buy at Scrapbooks-Plus - and I can certainly manage a picture a day and only one two-page spread. And I'll make a commitment to post my monthly spread on my Blog to motivate you to do yours for the month! I challenge other design team members (and our blog readers) to join me in 2009 in a Photo-A-Day!

Oh so easy ornament


Here's a cute little ornament that was really easy to put together. I cut the triangle box out of Bazzil Bling with my Cricut using Tags, Bags, Boxes & More (TBBM) - love that cartridge! The little snowmen from the MME Be Merry Jack Frost paper were easy to trim out...and I am in love with the little trees from Pink Paislee's Tinsel Town Collection! I decorated each face of the box, using pop dots and a chipboard sentiment to add some depth. The bottom flap opens to hold a little treat...so it is actually an ornament and a gift box! Just one sheet of each design has lots of trees and snowmen, so I can make lots of these to share with neighbors and friends!