Sunday, December 30, 2012

Storing Christmas Memories


If you’re like me you have hundreds of pictures from Christmas, some adorable and others not such great pictures but you can’t throw them away because they have a special memory to you.  And then there’s a special tag that one of the younger members of your family made.  There’s a program from a Christmas play that you want to save and the menu and receipes from your Christmas dinner.  Of course you could make layouts that include all of this memorabilia, but this is a time consuming project and you’ll likely not find the time. 

I have a way of storing all these memories quickly so they’ll all be available when you want them – Scrappin’ Folders.  This way you have an attractive folder that displays some of the great pictures, two pockets for other memorabilia and a CD pocket so all the pictures are preserved. When you want any of these items you’ll know exactly where they are.

You can use any line of cooridinated papers, but Simple Stories papers are always so easy because the variety of coordinated colors and messages allows you to put together pages in the perfect to tell your story.  The Handmade Holiday line is perfect for Christmas.    It is festive, has lots of borders, vellum picture frames, journaling blocks and stickers so it is easy to customize to your special Christmas.   

One of my favorite parts of the Scrappin’ Folder that I made with Handmade Holidays line is the  little matchbooks for notes and little pictures that are attached them with magnets so I can remove to look inside but they always go back in the same place.

To make a Scrappin' Folder, you cover the outside of one folder with paper and the inside of the other.  You decorate each.  I add a couple of pockets to the inside – one for a photo CD and one for a small book I make by just folding 12” x 12” paper to make a book with 4” x 6” pages. You then glue the folders together at the bottom using a permanent and strong glue.  Using Wonder Tape you affix the sides, leaving a pocket on the front and back.  I make a file folder for each of these pockets.

If you prefer, I’m teaching a class at Scrapbooks Plus on  January 12th from 11:00 – 4:00pm.  In one afternoon, you’ll make a Scrappin’ Folder for either your Thanksgiving or Christmas memories.    In this class, you’ll learn how to make such a folder with just a few supplies.  You’ll use lots of tools and techniques, including the Tim Holtz Vagabond and dies, Martha Stewart Scoring Board, inks, punches, magnets. 

And you’ll leave with either a Thanksgiving or Christmas Scrappin’ Folder.  With your class fee, you’ll get a full Collection Kit (either Autumn Lane or Handmade Holidays), extra paper and instructions.  A sample of each is on display at the store so let us know which one you want when you sign up.  You’ll just need to bring basic tools, a paint brush and a variety of adhesives.

Sign up at the store or by calling 703.263.9503. 

Friday, December 28, 2012


Got a bunch of photos from Christmas that need scrapping? Here's a couple of ideas for you using Kaisercraft's holiday line.


I loved the diecuts paired with this photo of our tree from last year. And below, I mixed photos of my kids holding their letters to Santa with some of them opening gifts Christmas morning. I changed the Christmas morning photos to black and white -- you focus more on their faces this way (plus their jammies really clashed!).


Can you make a double-page layout from scraps? YES! A great way to conserve paper when you have lots of photos is to use old sheets you no longer love to start your background. Doing this in my layout, above, let me use two half-sheets of paper to make this double-page layout.

Tuesday, December 25, 2012

Merry Christmas!!!!


The Design Team would like to wish everyone a wonderful and safe Christmas and holiday season!!

Monday, December 24, 2012

Peace & Joy

Ever struggle to come up with the perfect title to describe your layout? And then, once you think of a title you have to find letters that match your layout? You look at your letters and realize that you don’t have enough “E’s” to spell your word. I struggle with this it seems on every layout!! J But not this month…why? Because Kaisercraft did all the work for me by providing me the Love, Peace and Joy wooden titles you’ll see on my layouts this month. Even better, these titles come completely bare. Each title can be painted, colored, glittered, etc., the possibilities are endless.


I decided to cover mine with winter white glitter. To obtain the same look use Inkssentials Glossy Accents; apply a thin even layer over the entire word. Make sure your layer is even and that it covers the entire face of the word. Once the word is covered, sprinkle glitter over the Glossy Accents, covering the word. You’ll notice right away if you’ve missed part of the word with Glossy Accents. In that case, just apply a thin layer to that part and add more glitter.


Paper
Kaisercraft, Just Believe

Embellishments
Kaisercraft, Just Believe – collectables
Ashland & Petaloo – flowers
Viva Peal Pen – peals
Celebrate It & Offray – ribbon
Wilton – doilies

I hope you’re feeling inspired! Thanks for looking.
Erica 

Sunday, December 23, 2012

Creating A Great Layout without Great Pictures

The most interesting story from last Christmas in our family was the challenge my son and niece had in putting together a ping pong table for my nephew.  Even though it was an important aspect of our Christmas that I wanted to journal, I did not have great pictures so I couldn’t tell the story with pictures.  Using a little creativity, I created a layout that tells the story in an attractive way with only two small pictures and not great ones at that.  Perhaps this layout can inspire you to tell some stories even though you don’t have great pictures.  Alternatively, you could use this layout  with a large picture in the photo box.

I used the KaiserCraft Just Believe Magic paper for the background and added an almost square piece of Keepsake paper to the right bottom corner.  I punched the left side with  a small scallop edging punch. 

I really like the metallic paper (sold at Scrapbooks Plus in a variety of colors) so I used the turquoise metallic paper for title and accents.  Since I didn’t have good pictures, I made a large title the focus of this page.  I cut letters in three different sizes, three fonts and two different papers with my Cricut.  To add a graphic representation of their rush against time, I added an alarm clock cut with the Tim Holtz Sizzix Movers and Shapers.  I made a photo mat using a 6” square of metallic paper  and a slightly smaller square of Keepsakes.  I added two small photos and a subtitle using the line’s Alpha Sticker set. 

I printed the journaling on a 2 ½” x 11” piece of Hymm paper.  I punched the bottom with the same edging punch used on the background.   To add some focus, I added a strip of the metallic paper at the top of the journaling and punched the bottom with the edging punch.  I added the label strip from Keepsakes paper to the metallic strip and added natural-colored small rickrack at the top.  To add the final touches, I added the date from the sticker set and ½ of one of the journaling blocks from the Collectibles set.

Saturday, December 22, 2012


Molly

This festive layout is easy to duplicate I chose Kaisercraft’s Just Believe Keepsake with the red flourish side for the background page.  I cut various size strips out of the Kaisercraft’s Just Believe Hymn, Magic, and Dream papers.    Mat pictures over several different layers of the Kaisercraft’s Just Believe paper.  I created one larger mat for the left side of the layout.  I used a scallop punch to punch out two decorative scallop medallions for two of the Just Believe die cut collectables.  I also used the cricut cartridge to cut our medallion which I layered over one of the scallop punched medallion and then on top I placed the rose die cut.  I added the “Christmas Cheer saying” from the die cut pack as my pre-done journaling block.  I used several of the Kaisercraft’s Just Believe “rub-ons” on the right side of the layout page.  I titled the page with the “December 25th” title and placed the Kaisercraft’s die cut shelf like a mantel under it.  At the bottom right of the page I added a green and white pearl embellishment flower to finish off the layout.  Just a note, the green embellished flower came from one of the grab bags that I purchased recently at Scrapbooks Plus Yard Sale, love the flower.  Keep an eye out for Scrapbooks Plus next yard sale coming this spring.
 

Friday, December 21, 2012

Christmas Card


Have you ever needed to create a simple, yet elegant card in a hurry?  Well, the Kaisercraft Just Believe collection is just what you need if you are looking to put together Christmas cards for your friends and family this holiday season!  I find that sometimes less is better in elegance.  I used cut outs from various papers in this line and added a simple red reindeer Tim Holtz die cut. By keeping it simple, I was able to bring it together quickly!

Thursday, December 20, 2012

Two page layout holiday sample


Have you had a time where you had fabulous papers but not a clue what to do with it?  That was me initially with this collection.  I knew I wanted to use the hounds tooth papers, the music sheet papers and the beige background sheet ... and of course there's always the black or brown that I like to add to my layouts.

For this layout, I placed the hounds tooth paper on my table as a background.  I reduced the size of the music sheet, beige backing and black cardstock sequentially and made large cut outs in the corners.

The rest involved embellishments and photos!  Have fun!!

Wednesday, December 19, 2012


For this layout I used quite a few of the die cuts from Kaisercraft to accent a photo of our Christmas tree last year.  To give it depth, I adhered the top die cut with foam dots, then added a bit of bling.

Tuesday, December 18, 2012

Count on Kaiser Craft for quick cards

Time is getting short now!  Have you gotten your holiday cards out the door yet?  I made this quick card by layering together a 6x12" piece of Kaiser Craft paper and several coordinating papers.  I finished it off by using several of the embellishments that coordinate with the paper line and by using the words on the opposite sides of the bar code strip on the papers.  These can be a wealth of embellishments for cards, smaller projects and layouts.  Be sure and take a peek at them when you cut them off before throwing them away.  Many manufacturers are starting to print on the backside which literally gives you 'no scrap' scrapbook papers.

So pick up a few Kaiser Craft papers and a pack of embellishments and start layering for quick cards!

Saturday, December 15, 2012

"Vintage" 70's Layout


Kaisercraft's collection was perfect complement to my childhood photo from the '70s (shag carpeting and everything!) I layered some of the paper underneath my photo and notched several of the perforated tags to make banners, accenting the layout with a Kaisercraft wooden element.

Friday, December 14, 2012

Just Believe Christmas Memory Book

I loved the tags in the KaiserCraft Just Believe line and thought a little Christmas book would be a great way to use them.  As I got started, I found that there were lots of things about this line that worked well in this book, like the reverse side of the labels made great embellishments.  I found so many other embellishments that that I ended up only using a few tags.  I think this would be a great gift for a grandmother.  Just add a few pictures of the kids at Christmas.

The covers and all pages were made with  5” x 8” Tim Holtz Idea-ology Grungeboard, although any chipboard would work just as well.     

To make the covers, cut the Grungeboard to 5” x 7 ½”.  Affix the desired paper to both sides the Grungeboard using a glue stick and a brayer.  After affixing paper, cut the edges with the Tim Holtz Sizzix On the Edge
Scallops die.  (It has two edges and I made the front cover with one and the back with the other producing designs that were different but coordinated.)

 I also used the Grungeboard for the pages, but again chipboard would work.  For pages, heavy cardstock would work.  The pages are  5” x 6 ½” and the paper is applied with glue stick and brayer. 

 Decorating the pages can be done anyway you like.  I decorated each page with a variety of items – journaling items, tag, buttons, bows, die cuts, even the reverse side of the paper label .  I made a fun embellishment for the cover with Spellbinders Spectacular Spin die and a center of Peeled Paint Stickles.  These are really fun to make. See blog for December 7th to learn more about this.  On each page, I created photo corners with the Martha Stewart Crafts Embossed Punch and affixed them so I could add pictures later. (This makes it really easy if you give the book to someone who is not a crafter.) Once all pages were decorated, I punched holes in each page and used a binder ring to hold together.  On the top outside ring, add  three charms from the BoBunny Rejoice button set on Tim Holtz Charm Clasps.  Tie ribbon between each charm on top ring and on the bottom ring.  Tie ribbon to the rings between each page so the pages lay better. 

For those that want to make one, just like the one on display at ScrapbooksPlus, I’ve included a list of what I used for each page. Except for the items listed below all of the items are from the KaiserCraft Just Believe .  I loved the reverse side of the label strips on this paper and used some of them as embellishments for the book.  The items used that are not part of the KaiserCraft line are: Turquoise Metallic paper, ribbon (red & cream) and buttons, all of which are available at ScrapbooksPlus. 

Part of the fun is using leftovers and having fun so this should be just a guide. 


Paper
Photo Corners
Photo Mat
Embellishments
Front Cover
Winter
N/A

Snowflake square; inked with Silver IncaGold
Inside Front Cover
Starlight
Keepsakes
 4” x 6” Keepsakes
Tag w/cream ribbon
Page 2

Starlight
Magic

Friends & Family formed with letter stickers; Snow tag  with cream ribbon inside Snowflake square.
Pages 3 & 4
Wish List
Magic

Strip from Hymm paper; Button
Pages 5 & 6

Remember
Hymm

Poinsettas made with Tim Holtz tattered poinsetta die and Magic paper; Tag; Buttons (leftovers); Tree made with letter stickers
Page 7

Remember
Turquoise Metallic

A small and large tag on left side with cream bow. Strip from Magic paper.
Inside back cover

Winter
Turquoise Metallic
4x 5 ½ Remember  

Strip from Magic paper.
Tag with cream ribbon horizontal in right corner.
Back Cover
Wish List
N/A
N/A
Snowflake square, Tag, Button


Thursday, December 13, 2012

Where do you keep your holiday receipts?

Where do you keep your holiday receipts?  Are some here, some there, some no where to be found?  The latter is typically what happens to me if I'm not organized.  I made this fun folder to keep my holiday receipts in this year just in case of return or worse yet, malfunction, of a Christmas gift.  A stylish way to ensure I keep my receipts in one handy place!
The folder itself is from Heidi Swapp.  These are sold at the store in a pack of 3.  This is the medium sized one.  I really liked the bracket type look to the folders and simply covered them with our Kaiser Craft papers.  Then I added two places for receipts- one on either side of the folder.
These were constructed by using premade square envelopes.  I cut off the closure flap and glued them together.  I used Kaiser Craft papers to create the exterior of my envelopes, making accordian edges on the sides to cover my envelopes.  Before gluing down the side shown above, I added a ribbon to use as a tie closure to keep my folder in tact.  I also created tabs so I could add labels to further organize my receipts.  The exterior (shown in the first photo above) is covered with coordinating Kaiser Craft cardstock embellishments. I inked them and popped the front flower up to give it some dimension and interest.  Then I tied a pretty bow and I am all set to start organizing my receipts once I do some holiday shopping!

Wednesday, December 12, 2012

Wednesday Layout


This week's Wednesday layout features Carta Bella's Christmas Day collection, with some sparkly glitter tape from American Crafts. Stop by the store to get your supplies, instruction sheet and free element.

Gift Tags


Want to make a handmade holiday gift of sorts, be it a tag, card, etc., but are running short on time? No worries, I have the perfect solution. Kaisercraft’s Just Believe Perforated Specialty - To Froms 12x12 paper is the answer. This paper, like the name, is already perforated; all you have to do is pull the tags apart and begin working. I kept my tags simple by layering both the smaller and larger tags together, using scrap pieces of paper and a few Kaisercraft collectibles to give dimension to each tag. I finished my tags off with pearls (using my Viva Pearl Pen), and an assortment of ribbons and bows. Each tag took me roughly 10 minutes to complete, so, in less than an hour you could have a number of lovely, handmade holiday tags complete. These tags are sure to add a personal touch and a beautiful detail to any package, as well as WOW your family and friends. J


Paper
Kaisercraft, Just Believe

Embellishments
Kaisercraft, Just Believe – collectables
Viva Peal Pen – peals
Celebrate It & Offray – ribbon

I hope you’re feeling inspired! Thanks for looking.
Erica 

Tuesday, December 11, 2012

The Christmas Card Photo Shoot


 I wanted to include my Christmas card photo shoot in my scrapbook and this line by Kaisercraft was the perfect collection for the project.  I used several different patterned papers along with my priceless pics of this fun photo shoot to create my layout.  I'm not sure why but I always like to use lots of different patterned papers for Christmas layouts.

To embellish the page I used some of the tags from the tag sheet and several of the diecuts.  I used different adhesives to attach them to my layout.  I used ATG for some to adhere them flat against the layout and dimensional adhesive for others.


I also cut elements out of the patterned papers and used them to embellish my layout.  For example, I cut the "Christmas Memories" embellishment in the upper left corner of my layout out of the Snowflakes paper.
 
 I also cut the "Christmas" for my title block from the Snowflakes paper.  Then I used the alphas from this collection and my printer to create the rest of my title. 


     I hope this inspires you!

Monday, December 10, 2012

Holiday Cards


I have found that this Kaisercraft line is chock full of extras that work well together to make a fabulous holiday card.  They have well coordinated papers and embellishments to make your job so much easier.  I toyed with adding some bling to this card so if you are interested in scraplifting this one, please do consider it.  I think it will a very nice touch.

Saturday, December 8, 2012

Grinchmas

This was such a fun page to put together and Kaisercraft products make it so easy! The Just Believe collection is the perfect line for Christmas, but it can also be used for non-Christmas memories.  My family's trip to Universal Studios last Christmas resulted in some very bright photos.  I love that they look great with this collection and it actually helps tone them down some.  This layout came together quickly!  I layered several papers and created interest and dimension by using my tear ruler, tags, ribbons and stickers available with the Just Believe line.  I can't wait to see what you create with this fabulous collection available at Scrapbooks Plus!

Friday, December 7, 2012

Spectacular Spin in Wurzburg

Kaisercraft’s Just Believe Collection was a great line for a two-page layout on a day in Wurzburg, Germany during a Holiday Markets cruis.  I had a lot of pictures so wanted to design a layout that could be used for several photos.  This one displays five.

The left and right backgrounds almost identical.  Each is made using four pieces of paper (both sides of Hymm & Magic paper)  On the left side, they are  squares of 12” , 11 ½” , 10 ¾” and 10 ¼”.    On the right side, I made the Magic pages just a little smaller (10 ¾” x 10 ½” and 10 ¼” x 10”) and added a 10 ¾” x 1 ½” strip from Glisten that has an interesting design that coordinates well with the other papers. On the second side of Hymm, I punched two sides with a stamp around the page punch so that they meet in the middle.

A few of the die cuts from the Just Believe Collectables added some charm, but the real highlight of this layout is three embellishments made with the Spellbinders Spectacular Spin die.   I saw this die at ScrapbooksPlus and knew I had to use it.   What is unique about these dies is that you cut out the design with the die, then you fold certain parts and tuck them so they stay.  The result is a fun design that looks kind of like a quilt square.  I used the Keepsakes paper, producing a nice contrast with the red on one side and a white with green on the other.  The sets includes three dies (1 ⅝”, 2 ⅝” & 3 ¾”). I used one of each in the layout, adding a button for the center and putting some light cardstock on the back as I used them in places that I didn’t want the background to show through. 

The title was created with the Winter Wonderland Cricut cartridge using Keepsakes for the shadow and Hymm for the letters.  I wanted to show what I purchased so I added a little arrow cut with Tim Holtz Sizzix Movers and Shapers die and wrote “My Purchases” on it to point from the bag to a tiny picture on a small die from the Just Believe Collectables.  I think it actually looks better without this, but for me telling the story is always the most important part.

Thursday, December 6, 2012

Let it snow! Let it Snow!... no really, Let it snow


 I'm looking outside at these beautiful sunny days and honestly wishing that we would have some winter weather already! 
So, since it doesn't seem that a snowy day is in our near future I decided to get my winter wonderland fix by scrapping with these beautiful blue papers and fun snowflake accents.


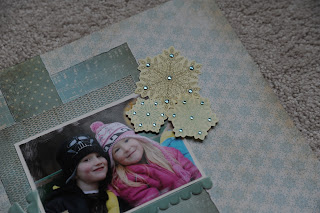
I especially loved these little snowflake die cut accents.  I made them my own by adding a little bling after misting them with iridescent gold Glimmer Mist.  It was quick and easy and a fun way to alter an already made embellishment.  I also popped them off of the page with dimensional adhesive.  I placed one snow flake right on the page, I used pop dots on another one to pop it off slightly and I used a thick foam adhesive on the other to pop it off more so the embellishments are on three different levels.

So, while these papers are great for Christmas cards, layouts and projects they are also great for winter/ snow pages.  I hope I've inspired you!!


Wednesday, December 5, 2012

Wednesday Make and Take


Today's Make and Take features BoBunny's Rejoice Collection.  Please stop by Scrapbooks Plus to pick up your papers, embellishments, and free element so you can complete this beautiful Christmas layout!  Detailed instructions are available at the front desk. Happy Wednesday!

Snow Angels


I was inspired to scrap a few photos of my then very young daughter making snow angels with her Daddy (just before the big blizzard a few years ago) by these great papers from Kaiser Craft as well as the pretty snowflake embellishments.  I put together a simple layout that uses just a few colors so my pictures wouldn't be lost on the pages.  I further enhanced the Kaiser Craft embellishments with a sparkle, ink on the edges and spritzed white paint.  I also used the backside of a few of the embellishments from the pack-- the bracket under the photo on the left page and the journaling tag.  The creamy color matched my snowflakes and the reverse had Christmas sayings which didn't really work for my layout.  I always try to look at my embellishments in different ways- sometimes the backside is the best side!

I cut the other snowflakes on my Cricut and using a border punch from a grey blue cardstock-- then spritzed them with white paint and added more sparkles.  The white paint I spritzed was Studio Calico's Mister Huey.  It is nice and thick and opaque.  It looks like snow.  I had fun spraying and thought it looked like a snowball hitting a window before it melts.  So fun!
 As I am typing this we are having a very unusual 60+ degree day here in Northern Virginia.  With so little snow last year, I actually am looking forward to a bit of snow this year.  As in these pictures, a few inches suits me just fine-- within a few weeks of these pictures we received several consecutive storms with several feet at a time, accumulating to over 4 feet at once!  I do hope we don't repeat this year or any time soon!  Happy Winter!