
This month's kit included a couple of sheets of the new chocolate brown Coredinations paper. How great... my two favorite colors all in one piece of cardstock! I've picked up quite a few sheets of it on my own, as well as some of the White Wash colors. This paper is a lot of fun to use. Once you get some, you'll be hooked as well!
The easiest way to use the paper is just to tear it. Some people aren't the tearing kind, but this paper may convert you. When tearing there are a couple of options... careful and controlled or wild and crazy. Here is the breakdown:
I tend to be wild and crazy... especially since I don't like to measure. In fact, if I tear paper and it's too "straight" I will usually start over so I can have more "visual interest" to my piece. I usually tear it approximately where I want the paper edge to be and then adjust the rest of the layout around it. There's no real technique, just grab and pull slowly.
Now, if you are more careful and controlled there are tearing options for you. One option is to get a tearing ruler. Fiskars makes some with different shaped edges. I have a double-sided tearing and centering ruler with a large deckled edge and a small deckled edge... the best of both worlds: you'll get the torn look, but it'll be right where you want it. Another option to get a controlled tear is to wet the paper along your tear line using a dropper. This is useful if you are tearing patterned paper and want a particular portion of the pattern to show.
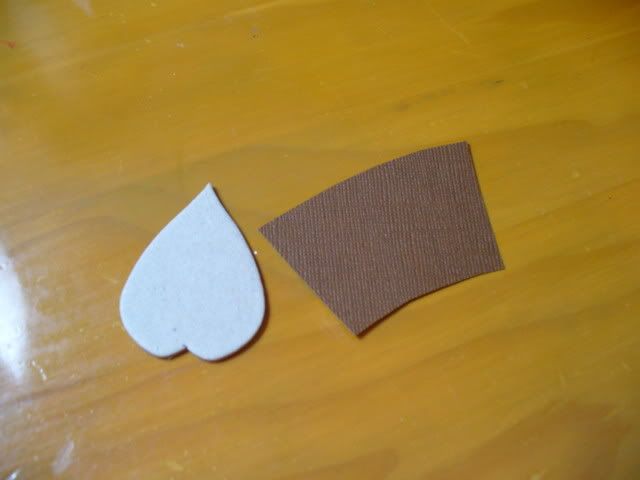
Past tearing and want to do more? You can do lots of different things with this paper. I used it to create a matching leaf shape for this layout. Here is the step by step:
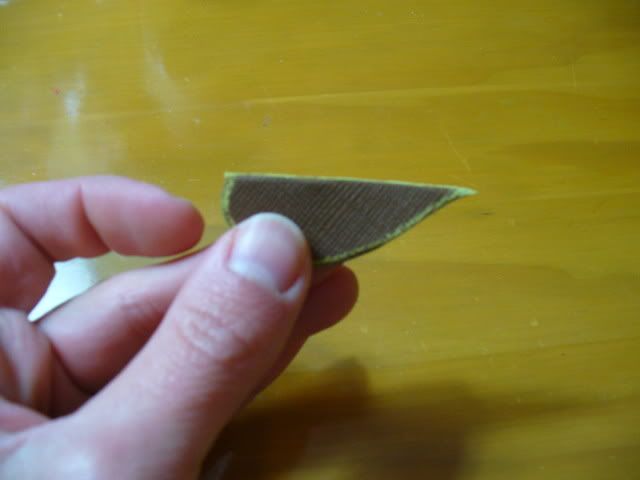
First I took one of the Maya Road chipboard petals (which are kind of leaf-shaped) and a scrap of my Coredinations paper.
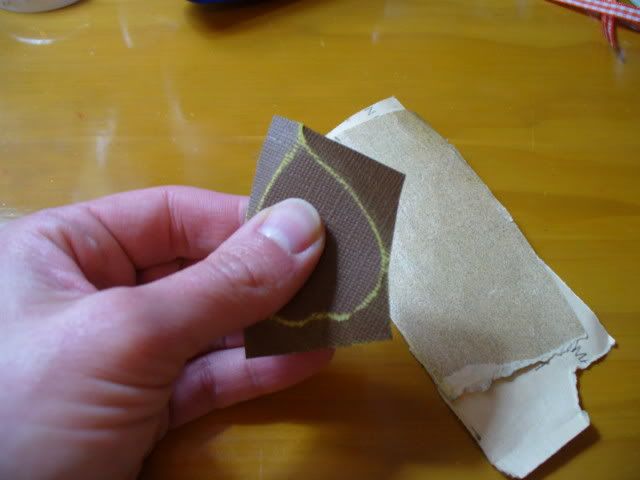
I laid the paper over the chipboard shape and sanded around the edges with 150 grit sandpaper.
Then I cut it out.
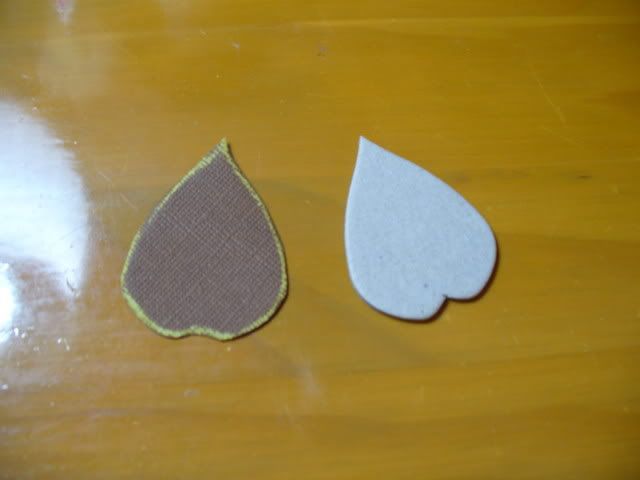
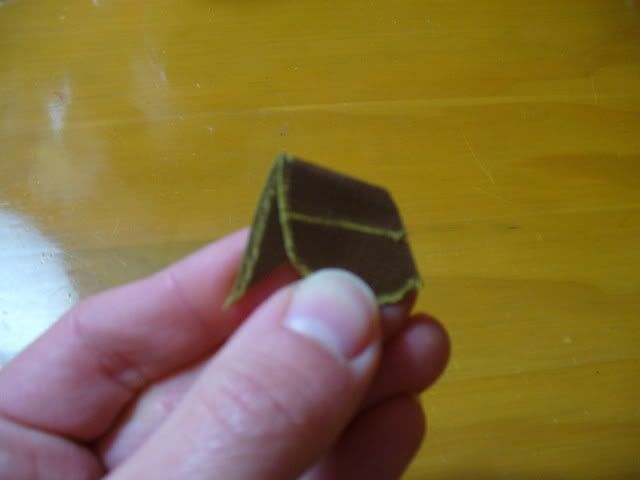
Next I folded it in half and sanded down the center fold.
I added veins to the leaf by folding the entire piece at an angle and sanding it. Then I flipped the fold to the other side to add the matching vein. I did three veins on each side.
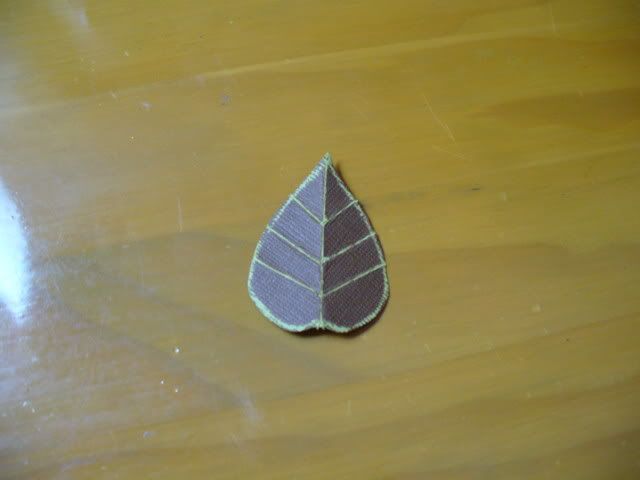
Here is the finished leaf!
Thanks for stopping by!
erin
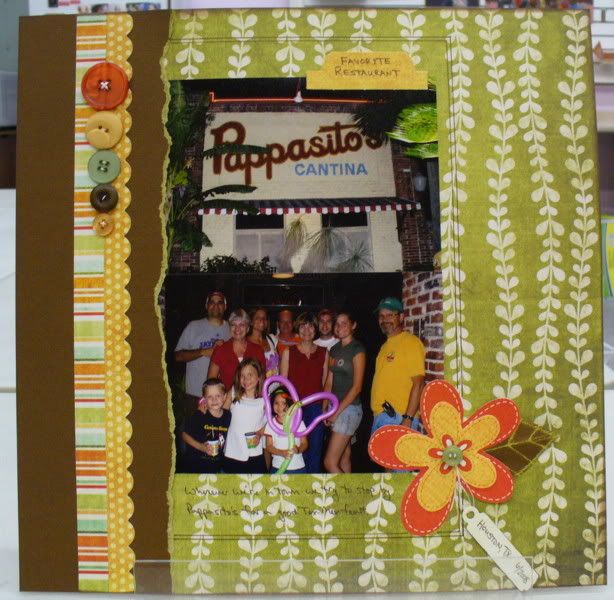
PS. For this layout of my favorite restaurant in Houston, I took a picture of the sign painted on the building to use as my title. This is works great for vacation shots too, when you don't want to forget where you were... just take a picture of the sign and you'll have it right with all of your other shots to remind you!
4 comments:
Now THAT's a VERY COOL TIP!
Thanks for sharing:)
I agree with Loretta - great tip! I also have to add that I love the way you have the hang tag dangling off of the button in the center of the flower. Very cute - great layout!
I've used the Coordinations paper sanded around letters for titles as well - what a cool paper! Love the leaf!
I love the leaf! That is a great way to use this paper.
Post a Comment