
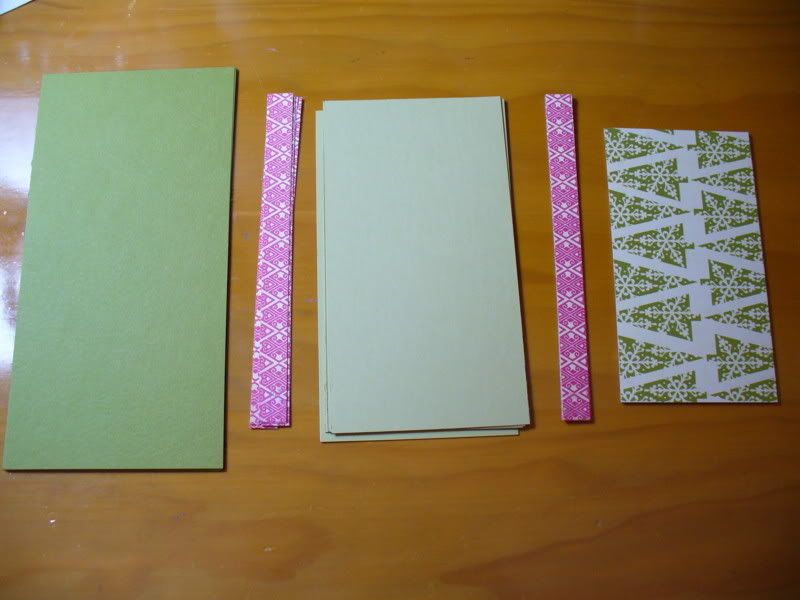
- Two 4 x 4 pieces of chipboard
- Two pieces of paper for the cover cut to 5.5 x 5.5
- Items to decorate the cover
- Seven pieces of cardstock cut to 4 x 8
- Seven pieces of cardstock or patterned paper cut to 3.5 x 6.5
- Seven pieces of patterned paper cut to 3 x 5.5
- Red line tape or other really strong glue
- Bone folder
- Ribbon to close your book
First cut all of your pieces and lay them out. If you want to ink the edges, now is the time. I wanted to use the pink patterned paper as my second layer... but I only had one sheet of it so I cut strips just to cover the exposed portion of the light green cardstock. This added quite a bit of bulk... so I wouldn't recommend using a patterned cardstock on top of cardstock. It's much easier just to buy extra paper instead! :)
Second, fold all pieces in half and make a nice crease with your bone folder. It's really important that all your pieces are cut exactly to size and folded exactly in half. After I cut all my pieces I stacked them together to make sure that they matched. It's easy to correct at this point... once all the glue is on and the pieces are attached it'll be too late. Take a moment to check before moving on to save yourself a headache later!
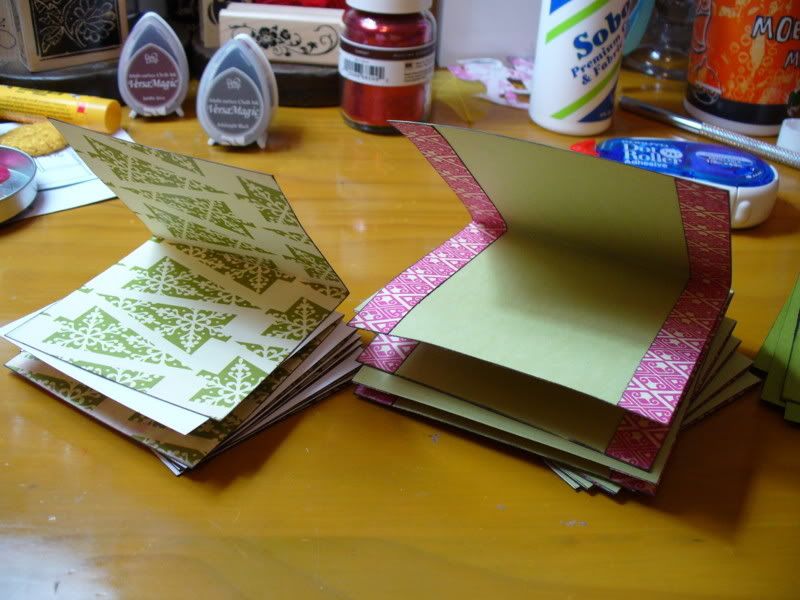
Next, apply red line tape to the short sides of the two smallest-sized papers (the 3 x 5.5 and the 3.5 x 6.5).
 Working on one edge at a time, remove the cover from the adhesive and center the small piece on the medium piece. Repeat for the other side.
 Then remove the adhesive from one side of the medium piece and center it on the large piece. Repeat for the other side. This is what your first piece should look like...
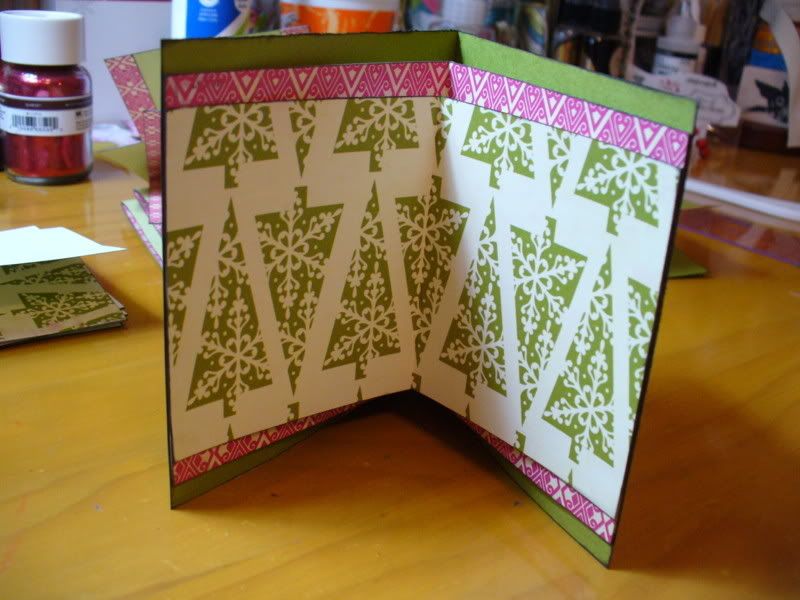
... and from the top: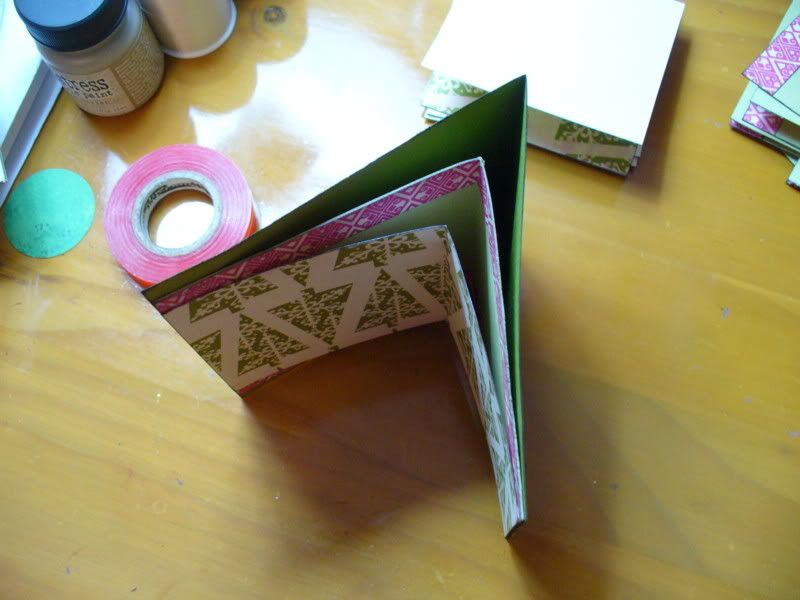
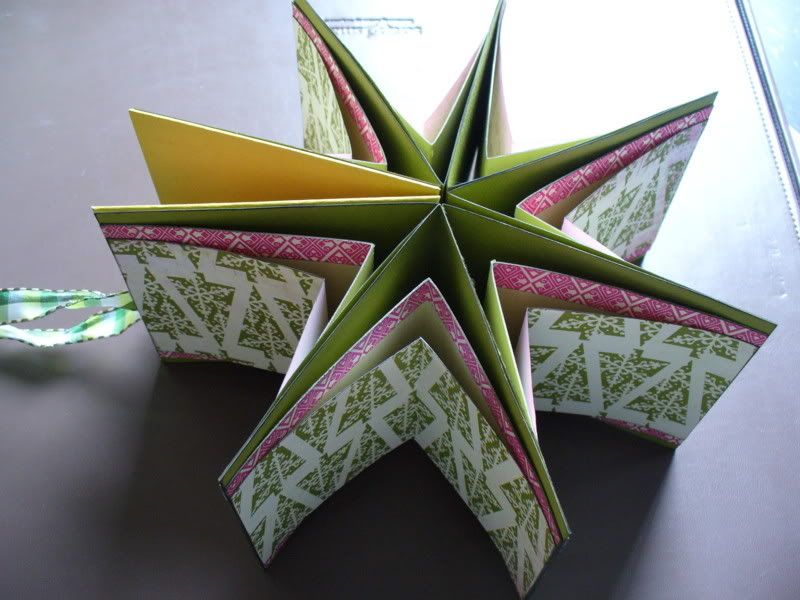
Now repeat for your other pieces until all seven are done!
Once all your pieces are ready, you can adhere them together.
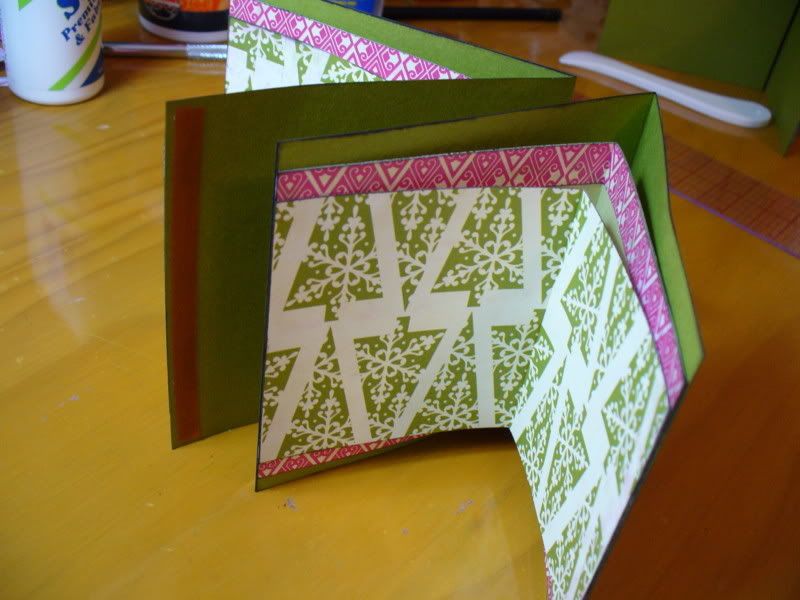
Working on one at a time, place your red-line tape on the back of one short edge, line it up with the next piece and glue it together. If any of your patterened paper has a directional pattern, make sure there all right side up!
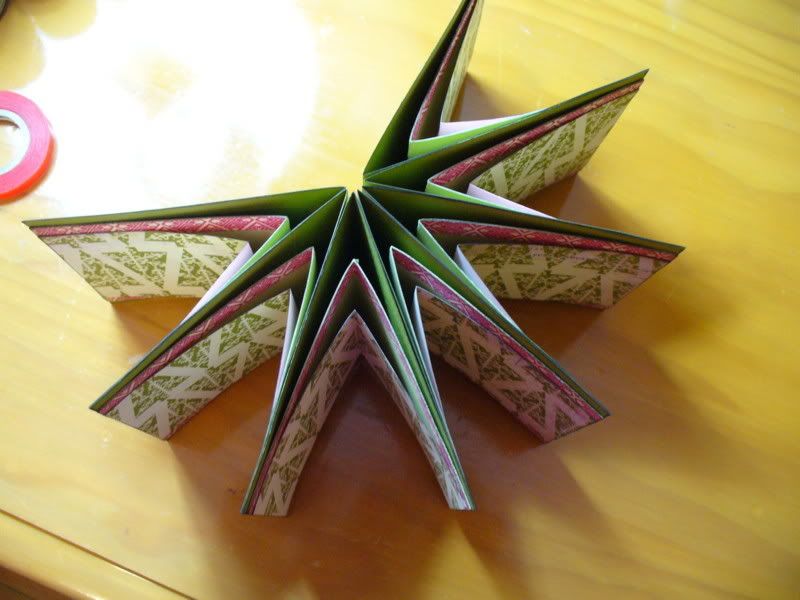
Keep gluing pieces together until everything is attached....
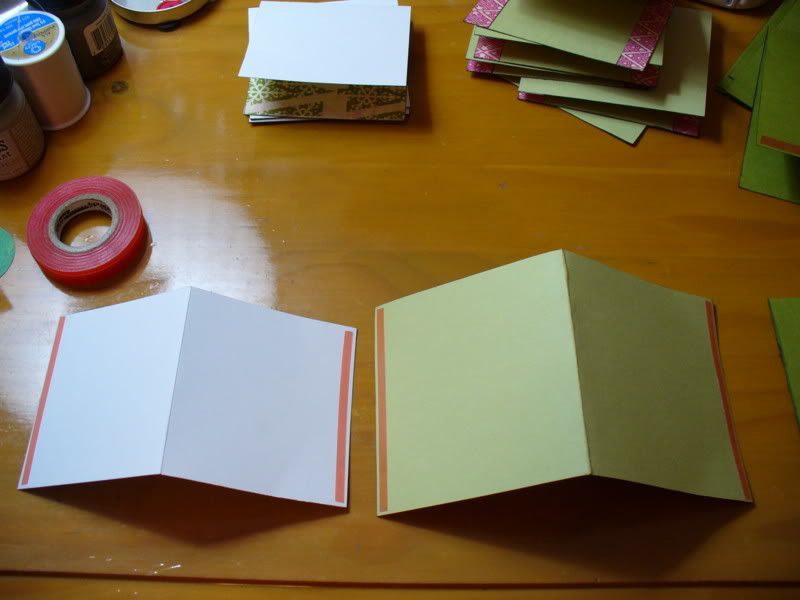
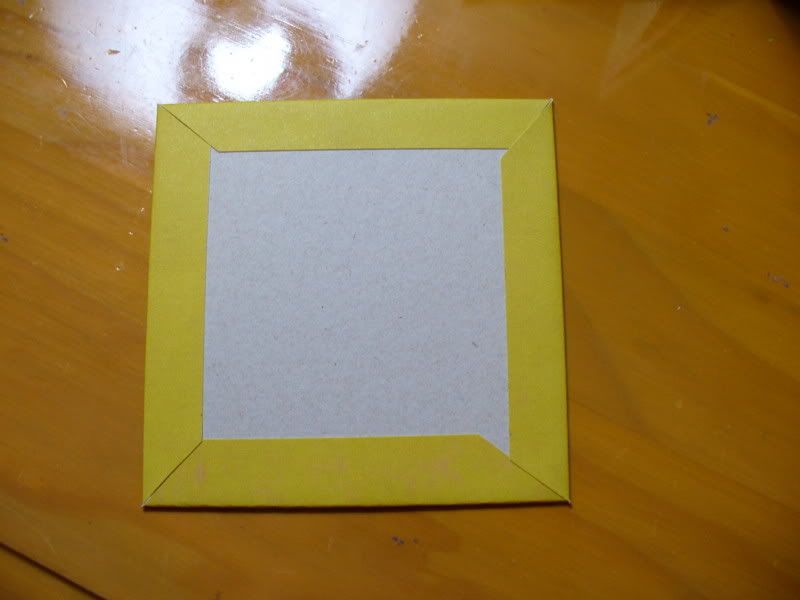
Now, your ready for the covers. Glue the chipboard into the center of the 5.5 square paper and cut the corners off at an angle.
 Fold over the remaining paper to have a nice, clean corner. It doesn't have to be perfect in the center, since that part will be hidden... just make sure that the corners look great.
- (If you want to add ribbon, now is the time to do it. You have two options:
Glue two lengths of ribbon to the back of the chipboard. When the covers are on you want the ribbon to point toward the outside of the star. This will let you tie the book open or closed. - You can also place one long piece of ribbon underneath the front cover only. This will allow you to tie the book closed with the ribbon crossing over the back cover. The ends will hand loose when it's open.
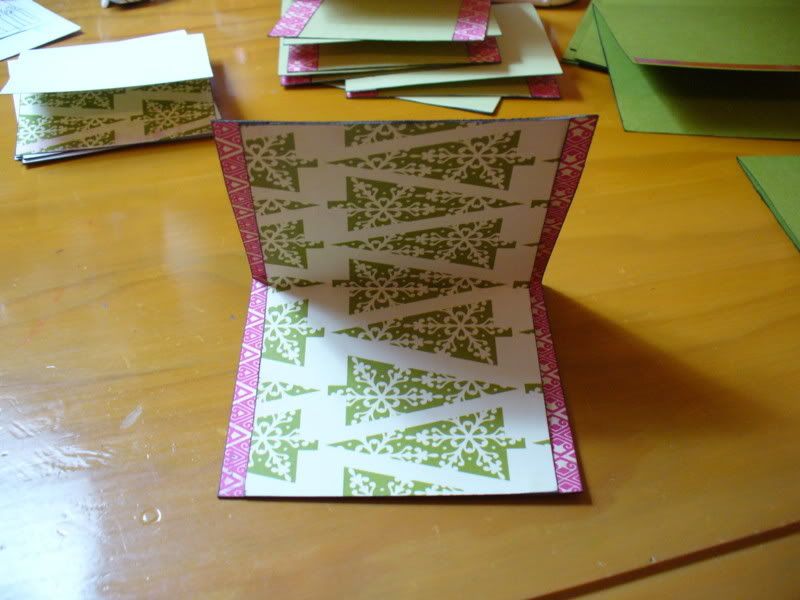
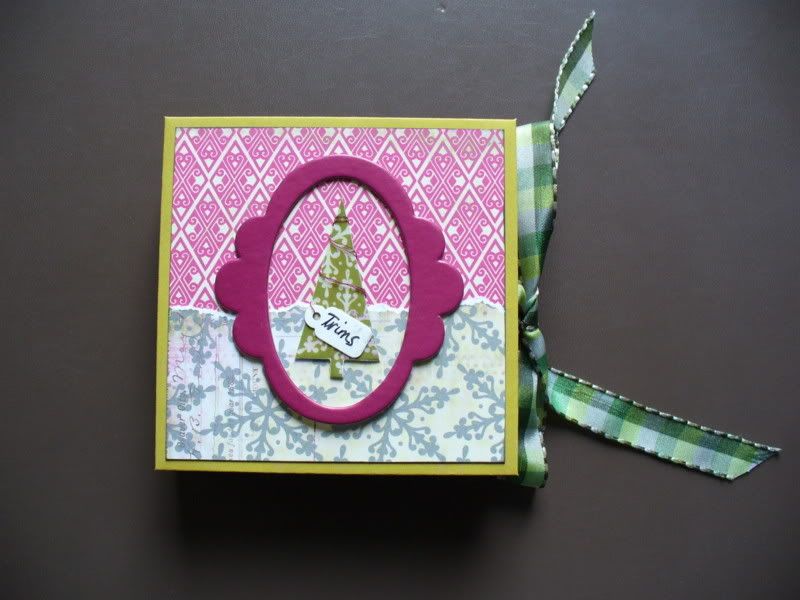
Attach the covers and decorate. I used a chipboard Thicker shape from American Crafts to frame a tree cut out of the Pink Paislee patterned paper and covered with Glossy Accents.
Now you are ready to fill it up with your photos. I'm planning to get some 2x2 and 3x3 prints of all my favorite Christmas ornaments and jot down why they are special to me. It'll be great to pull out each year!
thanks for stopping by!
erin
3 comments:
Love the idea about the ornament book! I am going to be scraplifting this!
This is gorgeous -- thanks for the great tutorial. I love the effect of these mini albums!
Your instructions are very clear and I got some great ideas. Thank you.
Post a Comment