
 I have been wanting to try an Exploding Box for ages, and when I got this month's kit with the 29th Street Market papers from My Mind's Eye I knew I had the perfect foundation. I would have to say it is a misnomer to call it paper, it really is card stock...beautifully decorated on both sides! The patterns and colors seemed kind of timeless so I decided to use my parent's honeymoon from 1947 for my subject.
My Scor-Pal made it easy to set up the box. I used 12", 11.5" and 11" square papers/cardstock, which I scored 4" in from each side. Then I cut out the corners and put them aside to use later. The lid was made with 8.25" cardstock which was scored 2" in from each side. The corners were NOT cut from the lid...they were scored diagonally, folded in, and glued.
I loved this project because there are 21 different panels to decorate so you could use as many different techniques as you wanted. I will just show you a few of my favorites.
 I used my Fiskars edge punch to create the lacey top of this panel and backed it with a strip of paper to show off the detail and protect the delicate cuts. I used ribbon to create a frame for this picture of my mother and detailed it with a tiny heart shaped brad. Don't you just love her bathing suit?
 I created another set of panels to tell a story...My mom & dad were walking along the boardwalk in Virginia Beach when one of the arcade "barkers" tried to guess her weight. He was wrong and she won a prize...a little plaster figurine we call "Peep" that has been sitting on her windowsill for years. I used an Autumn Leaves stamp for the journaling block, another stamp for the arrow and a rub on for the little chick...I am going to have my mom write in the story so I have her handwriting. This is a perfect example of how you don't have to have a picture to tell a story.
I also wanted to keep my mom's handwriting from  the edges of this picture of my father, so I trimmed it down to fit on the panel. (This is actually a color xerox, which is why I was comfortable cutting it.) I used a chipboard wave which I covered with paper and edged with Snow-Tex from DecoArt to create the foamy look - by the way, you can cut this wave yourself at Scrapbooks Plus using the dies in the classroom.
 the edges of this picture of my father, so I trimmed it down to fit on the panel. (This is actually a color xerox, which is why I was comfortable cutting it.) I used a chipboard wave which I covered with paper and edged with Snow-Tex from DecoArt to create the foamy look - by the way, you can cut this wave yourself at Scrapbooks Plus using the dies in the classroom.
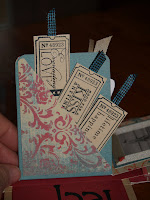
It was soooo much fun to make! And it only took 4 pieces of paper/card stock...the corners you cut out at the beginning are more than enough to decorate all the panels with bits & pieces, pockets & tags. I will include a few more detail shots so you can see variety of panels you can make. These make such nice gifts - weddings, anniversaries, graduations.


2 comments:
I love the "peep" story ~ that's such a great thing to have to remember. These papers worked perfectly for that faded, vintagey look we want with our heritage photos.
I think it turned out great and the papers are wonderful for such a project!
Post a Comment