
Now the Hambly sheets are clear... so you have to think of how you will attach them early on in the design process. You can always hide your adhesive by placing it behind overlapping pieces. Other ideas are to sew them on, staple them, use brads or eyelets to attach them, or use adhesive over the entire back - like a Xyron - to make it less noticable. Both of the projects I made using my Hambly pieces hid the glue behind overlapping parts.
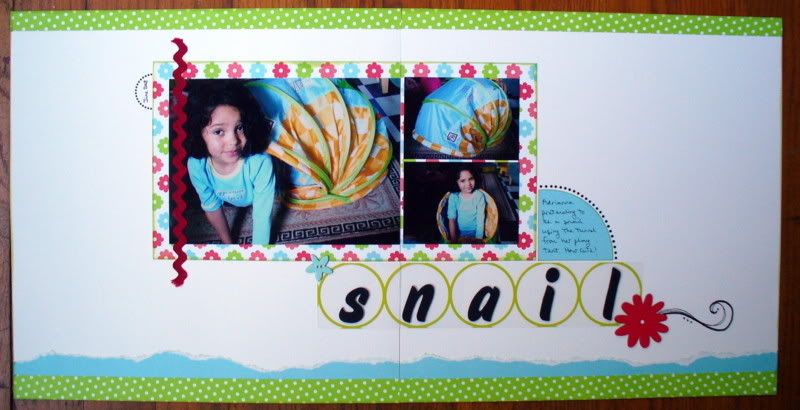
The first project was a 2 page layout. I decided to use the circles in the Hambly overlay to hold each of the letters of my title. I love the American Crafts paper because all you need is just a little bit and it has a great impact... and you have lots of scraps left for other projects! A little rick rack, some American Crafts rubons, and doodling finished it off.
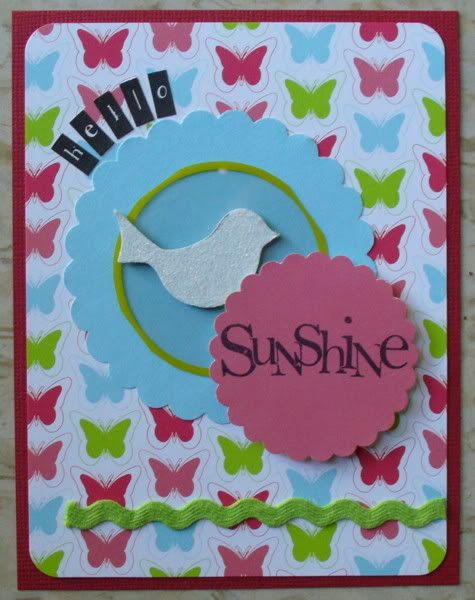
The second project was a card front. I cut out just one of the circles from the overlay and used it as an accent to my large punch and as a home for my little, chipboard birdie. The birdie is painted white and sprinkled with a little bit of white glitter. The card also features the "Sunshine" stamp from Imaginesce. Love these stamps and I am a little addicted to picking them up... they are so cute and inexpensive that they are irrisistible!
A note on cards: I usually make just the front of the card and then attach it to a purchased plain white or cream card. This way it's easy to get a nice square front ... because sometimes the cards aren't perfectly square. It also helps keep the inside neat since you can hide stitching and brad backs without the inside of your card looking messy. Plus, as a bonus, you can always easily write on the inside even if your card front is a dark color!
Happy scrapping!
erin
1 comment:
I haven't really used the transparencies for other than journaling until I heard my fellow DT members rave over them. I really like the effect on your title for the Snail layout - I wouldn't have guessed it was a transparency unless I looked closely (I would have thought you hand-cut all those circles!)
Post a Comment