Friday, January 30, 2009

Snowy, Glittered Frame


I enjoyed working with the My Mind's Eye glittered papers this month. When I first spotted Suzy including them in the kits, I knew I had to create a glimmering snowy frame for a focal photo. I use a lot of circle frames in my scrapbooks and find the Martha Stewart glitter a great way to highlight a photo. For this frame I used the Martha Stewart Aquamarine glitter. I first cut a large circle from blue bazzil card stock using the Fiskars shape cutter and circle templates. I sprayed the frame with a light coating of Elmers craft adhesive and sprinkled the glitter on. Once the glue dryed, I tapped off the excess and "set" it with a light spray of White Rain hair spray. I decorated the frame with flourishes cut from the Accu-cut machine at Scrapbooks-Plus, punched snowflakes, and bling. The result can be stunning.

You can create frames like this with any color glitter and decorate with various scraps - flowers or butterflies cut from patterned paper, punched pieces of carstock, buttons, brads...whatever you have left over from other projects. I typically triple mat a smaller photo (3 1/2 x 5) to place inside the frame. And the result is always the same - an eye-catching layout. I hope you try this in your own books - it really is easy - you'll love them, too!

Thursday, January 29, 2009

More Easy Scallops


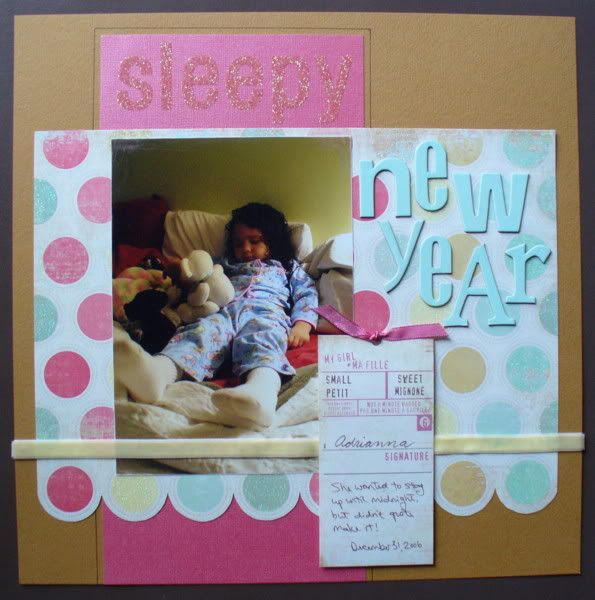
I *love* scalloped-edge paper... I think a lot of us do! One of my favorite, totally easy ways to create a scalloped edge is to just work with a geometric pattern on your patterned paper. On this layout I selected the large sparkle dot paper and used the circles as my guide.

First, I trim the edge close to where the finished scallop would fall. It's important to trim the extra first. You don't want a lot of paper in the way when you are trying to cut or else you will end up with lopsided curves.

Next I take my smallest, pointiest scissors and freehand cut the curves. Usually I will cut most of the curve going down into the point. Rather than try to turn the scissors in the point, skip up to a part of the next curve where you can easily cut and trim along the pattern down to the next point. Repeat all the way across.

Finally, come back from the other side and trim the final half of each point. Check your curves and tweak as needed! Voila! Custom scalloped-edge paper! :)

thanks for stopping by!
erin

PS. I used double-sided sticker letters for "sleepy" in the title and used one of the journaling tags from My Mind's Eye to finish it off.

Monday, January 26, 2009

Quick Tip: Make Your Own Glittered Brads

This month's kit included some fabulous Doodlebug glitter! The thing that sets Doodlebug's glitter apart from other manufacturers is the mix of colors in each color. The pink glitter really has a mix of pinks and iridescent glitter that gives it a lot of depth and interest.

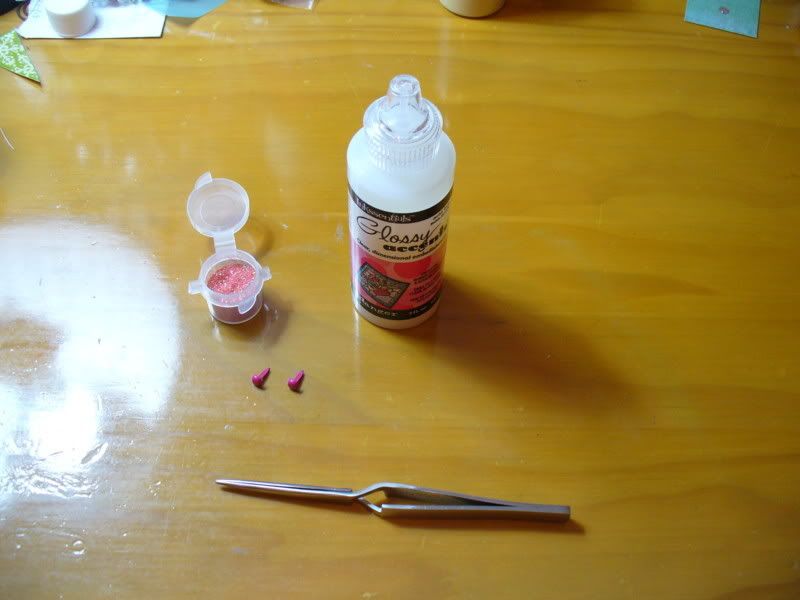
I decided to take some of the hot pink brads and create glittered brads. All you will need is glitter, glossy accents or other clear dimensional glue, reverse action tweezers (ones that hold your item except for when you squeeze them), and glitter.


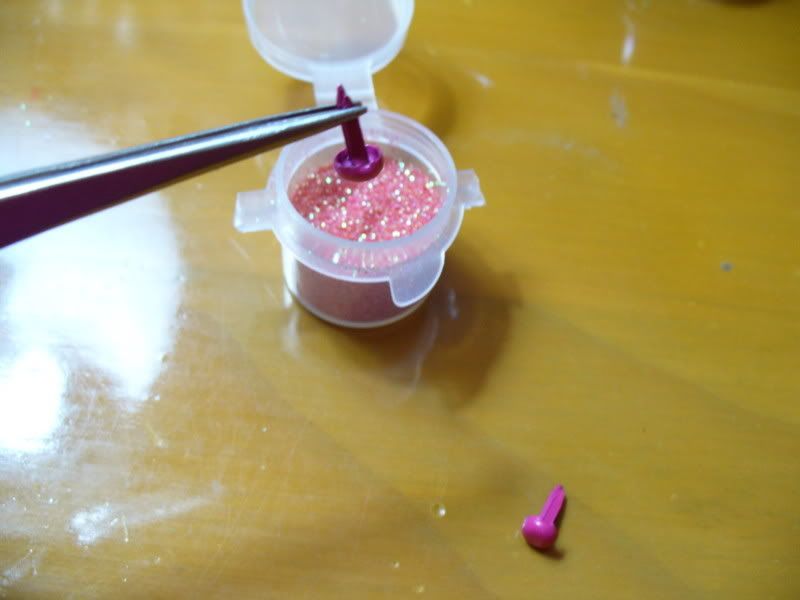
First choose your brads... use a colored brad that is close in color to your glitter to help hide any imperfections. Holding your brad with the tweezers, squeeze the Glossy Accents onto the brad to cover. It will be a little thick and that's okay.

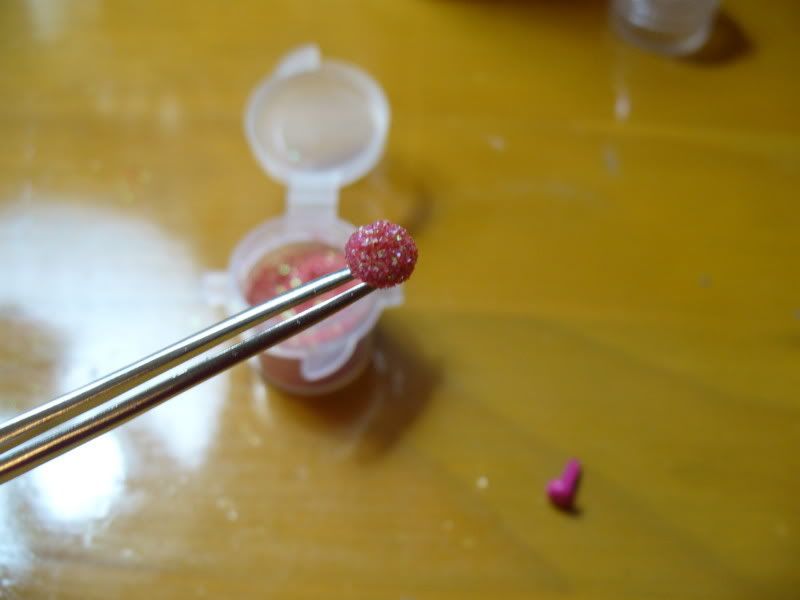
Carefully dip the brad into the glitter. Turn and dip again to be sure to coat all the way around the edges. If your glue gets a little squished and looks lopsided, just gently press it back into shape.


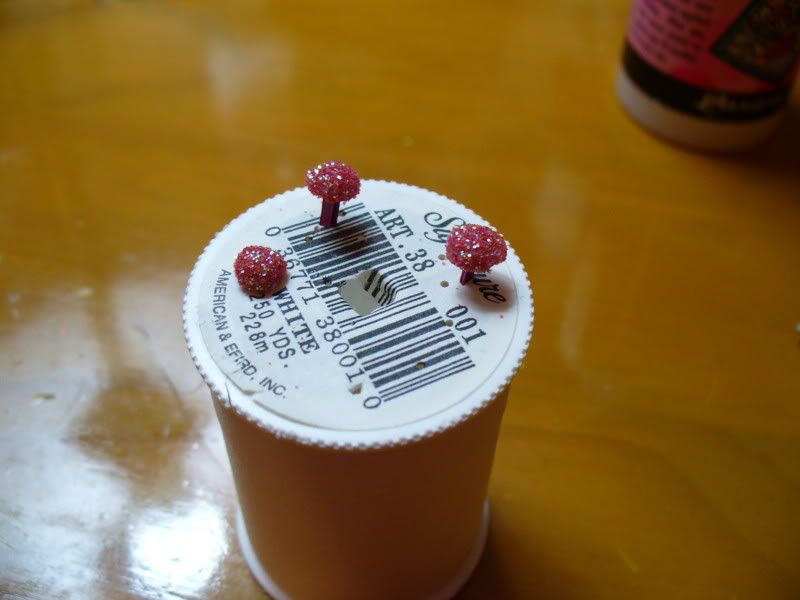
Set the brad aside to dry. I sometimes use a piece of Styrofoam to hold the brads.... I couldn't find any, so I poked a few small holes in the paper on the top of my sewing thread. It worked perfectly!


Here they are in my finished project:

thanks for stopping by!

erin

Friday, January 23, 2009

Video: Another Valentine's Day Card

Here is another Valentine's Day card I made, and since it is just as easy to make two cards of a particular design as it is to make two, I decided to make another video of the second card to share with all of you. I hope you enjoy it!


Supplies Used:
Scrap Cardstock (3.5"x3.5")
Cream Cardstock (3"x3" & 5.5"x8.5")
Brown Cardstock (3.5"x3.5")
My Mind's Eye Laundry Line Collection: Curiously Large Spots Paper (2"x12") and Winding Vine Paper (4"x5.25")
Art Warehouse: Life Defined (Clear Stamps)
Hero Arts: Friendship Messages (Clear Design)
Clearsnap: Colorbox Fluid Chalk Ink in Chestnut Roan

Tools Used:
EK Success Empressor (embossing tool)
EK Success Paper Shaper (7/8" Circle)
Fiskars 12" trimmer
Marvy Uchida CR Corner Punch (corner rounder)
Marvy Uchida Clever Lever Mega Craft Punch (2.5" scalloped circle)
Marvy Uchida Clever Lever Giga Craft Punch (3" circle)
Post-It Notes by 3M
Spouncer by Plaid

Please note that if there is a discrepancy between a measurement I give on the video and a measurement given in the supply list that the supply list is correct. Also, I forgot to show this step in the video, but on the sample I inked the edges of the flower in the Chestnut Roan as well as the card base. I think it makes the flower pop more, so I would definitely recommend inking it as well! For some reason I was a mess when I filmed this video -- skipping steps and messing up measurements -- sorry for any confusion! Note to self: do not film videos for blog when you are awake at 1:00 in the morning and making cards because you can't sleep.

Thanks for watching & thank you for shopping at ScrapbooksPlus. Have fun creating your own custom Valentine's Day cards!

Sunday, January 18, 2009

Winter Layout

I really like the My Mind's Eye paper in the January kit. It has texture and shimmer. To match with these papers we had vellum in several muted colors. I had a hard time deciding which ones to use, so I decided to use a little bit of everything (well, almost everything).

Since my daughter pretty much only wears pink -- and the brighter the better -- I changed my photos to sepia-toned so they wouldn't clash with the beautiful papers. Under my photos I layered strips of each - some cut, some torn and two edged with punches. Then I just journaled all around the entire photo/paper block.

On the left-hand side I used a creamy vellum paper, a punch and my Slice to make snowflakes. The scan doesn't really show them off, so here's a better shot:

Friday, January 16, 2009

Video: Quick Valentine's Day Card

I posted earlier about creating a good supply of cards by always making two of each card you create. I was doing that this weekend with a Valentine's Day card I made, and decided to make a video of the second card coming together to share with all of you. I hope you enjoy it!


Supplies Used:
Black Cardstock (4.25"x11")
White Cardstock, Smooth (for stamping,2"x2" & 3"x3")
Hot Pink Cardstock (2.5"x2.5" & 3.5"x3.5")
Scenic Route Loveland Collection: Chickadee Street (1"x4"), Garnet Street (1.25"x4")
Scenic Route Background Papers: Blue Grid in White (0.75"x4" & 4"x5.25")
Inkadinkado: Hearts (clear stamps)
Hero Arts: Friendship Messages (Clear Design); Bracket and Tags (Clear Design)
Colorbox: Fluid Chalk Ink in Dark Peony

Tools Used:
Fiskars 12" trimmer
EK Success Empressor (embossing tool)
Marvy Uchida CR Corner Punch (corner rounder)
Marvy Uchida Clever Lever Extra Jumbo Craft Punch (1.5" scalloped circle)
Marvy Uchida Clever Lever Super Jumbo Craft Punch (2" scalloped circle)
Marvy Uchida Clever Lever Mega Craft Punch (2.5" scalloped circle)
Marvy Uchida Clever Lever Giga Craft Punch (3" scalloped circle)
Post-It Notes by 3M

Thanks for watching & have fun creating your own custom Valentine's Day cards!

Wednesday, January 14, 2009

Under the Tree


Susie and I must be on the same design wave, because each month, we produce at least one piece that is darn near identical to the other - at least in terms of design. Her single page "Christmas Present" is extremely similar to my two-page "Under the Tree". We used the bracket mat the same way and the trees are similar. Even my conceptual "present" - the multi-photo collage on the right page - hints at the anagram in her title. How cool is that! I like her use of the red to frame the bracket paper from Pink Paisley - and the buttons on her trees - I may add a little of that to my work later.

If you like these die-cut patterned papers, a great way to use them is to overlay them off- centered across two pages. Create a photo collage in a square block on the right page and a single, larger focal photo on the left. This design allows you to show off the design of the paper in your layout and incorporate lots of photos in balance.