Wednesday, April 1, 2009

It's April 1st!

And it's time for a new kit. This month we're featuring the Bloom&Grow collection from My Mind's Eye. I don't know about you, but I've been simply dying for spring this year -- and these are just perfect for springtime.

There's two different color groups in this collection, which makes it easy to please everyone. The first group (below) has more teal and orangish red in it. We've paired these with brown American Crafts Thickers, Pebbles Candy Dots, Maya Road chipboard, Co'ordinations Cardstock and some fun new products from Bazzill Basics - paper leaves and Just the Edge paper strips.

The second group is more girly with lots more pink. Along with the Co'ordinations cardstock, Bazzill Basics leaves, Just the Edge strips, Pebbles Candy Dots and Maya Road chipboard we've got Heidi Swapp large foam alphas.


We'll be changing out the design team wall tonight -- no tricks! Please stop by and check out what our design team has created with these great products.

Sunday, March 29, 2009

Circles EVERYWHERE...


I typically really struggle with double layouts. I just don’t do them so I am always looking for inspiration. I found this sketch some place or another ( I believe it was Creating Keepsakes) and it caught my eye. I would be able to display lots of different papers as well as display lots of pictures. I used different sized plates as the templates for my circles.
This layout was simple but fun. I think I may add another circle to do some journaling.

That brings up a question – do you ever go back and add things to your layouts or do you just let it be and move onto something else?
Posted by Picasa

How To: Ribbon Flower Centers

I love collecting paper and fabric flowers, but sometimes I fall prey to just collecting them and not actually using them. In fact, I have a drawer full of little jars full of flowers and a little metal bucket of overflow with those that don't fit. I've been collecting for years, but only using occasionally. I'm sure I'm not the only one!

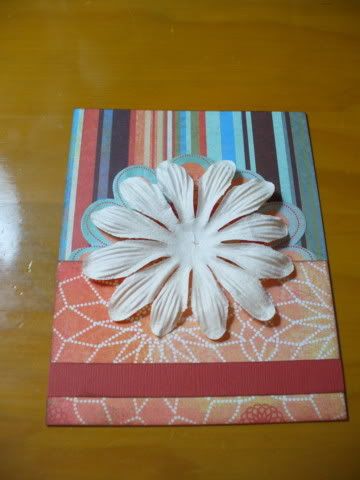
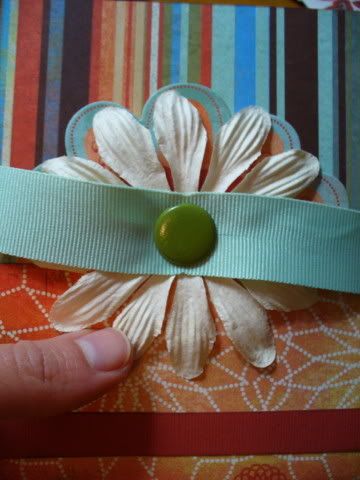
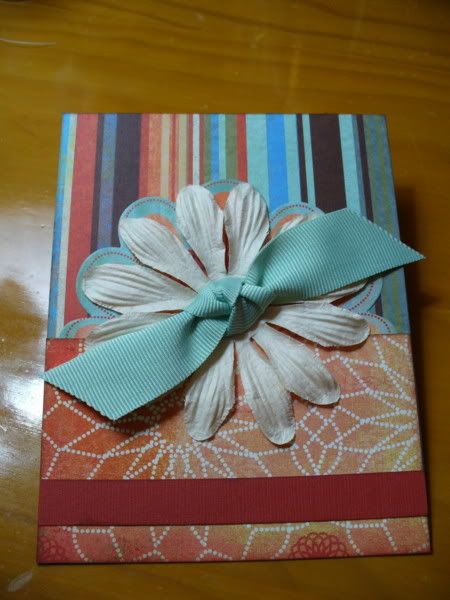
When a pair a large blossoms ended up in our kits this month, I vowed that I would put them to good use. An easy way to make an extra special card is to feature a beautiful flower on it. For this card I used the peacock cardstock sticker from Basic Grey's Marrakech line underneath the flower to add an extra layer. You can't even tell that it's a peacock since peacock's tail looks like a flower peaking out from behind the real thing! I used a piece of knotted ribbon as the flower's center and took some step by step photos to show you an easy technique.

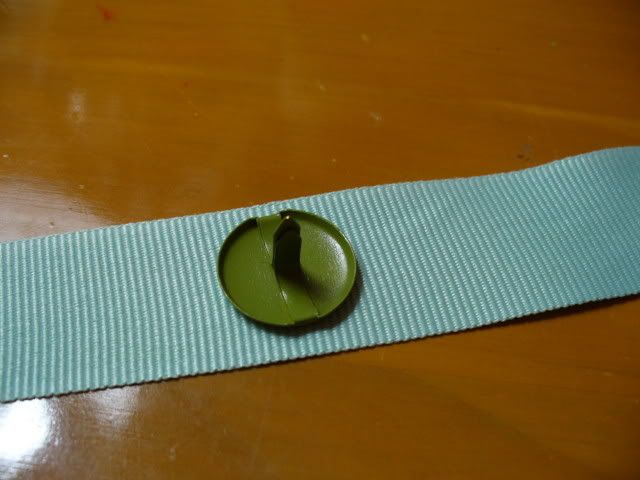
First, you'll need some ribbon - anything opaque will work for this. Find a brad in your stash that is a little bit smaller in diameter than the width of your ribbon. I usually try to find a brad that is a similar color to my ribbon just in case it shows a little bit.


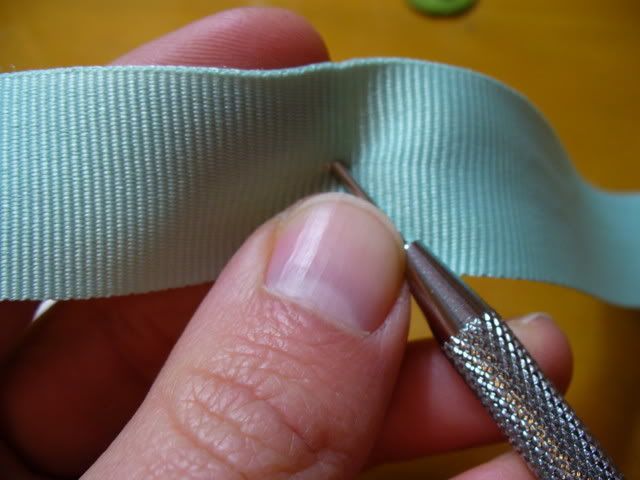
Now take your paper piercer and make a hole in the center of your length of ribbon.

Gently push the brad through the hole...


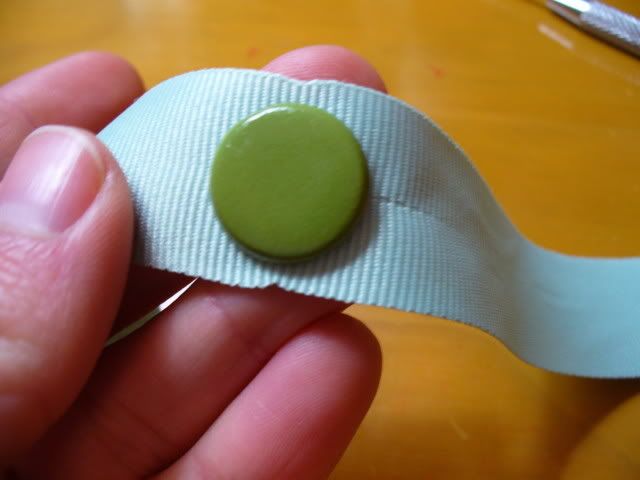
... and place the brad and ribbon together on your project, attaching it securely.


Now you just tie a half square knot and trim the ends of the ribbon and you have a beatifully embellished card with a nice, full knot in the center that won't come loose after a little handing by USPS! :)
thanks for stopping by!
erin

Friday, March 27, 2009

That Was New York by Esther


When our family last visited New York in May 1995, there was a magnificent skyline, including the dominate Twin Towers. The Empire State Building gave us a vantage to take photos of the city. Our trip was planned to attend the Broadway play, "Having Our Say" at the National Theatre. Yellow taxis offered daring rides in Manhattan. We saw MOMA, the Statue of Liberty, and the Empire State Building. I posed next to a bronze statue outside our hotel.
The journaling was printed on photo paper on the computer in Microsoft Publisher fonts Ariel and Broadway. The boxes of text were given a dark background fill. Each text box was trimmed to fit the spaces.


I used the striped paper from the Marrakech line to offer color and emphasis of direction. The blue cardstock is Basic Grey Marrakech blue. Dark rectangles lend themselves to support the vertical skyscrapers in the photos. When you want to accent the photos, leave the background solid.

Birds of Paradise

I have been in a tropical state of mind this past month, so it's not surprising that I created this minibook for my altered project. When I travel, I love to photograph nature (and birds are my particular favorite subject!). While in Hawaii last year, I had wonderful opportunity to get some great (and some not so great!) photos of the birdlife on the islands. So I made a small (6x6) reference guide of sorts to document not only the picture of the bird, but information about where and how we saw it as well as some interesting educational facts about the bird for my kids (and me) to remember.
To create the book, I first cut into equal quarters some of the small-print patterned paper and coordinating Bazzill cardstock. I used these 6x6 sheets as the pages of the book. I glued the patterned paper back to back, but used the cardstock as single sheets. I then cut remaining cardstock and patterned paper scraps (as well as a few full sheets) by 5 1/2" x 5". At the top of each pocket I used a circle punch to cut a half circle that would make it easier to pull the tag. To adhere, I used my Zipdry glue on three edges leaving the top open for the journaling tag. I did every page the same way. I printed all my photos 3 1/2"x 5" so they would be the highlight of the page (since I print at home, I trimmed a bit of the edge away so they were just a little under 5" wide. This allowed the bottom of the pocket to act as a mat for the photo).After getting the photos on, it was time to create my tags. I used cream 8 1/2"x 11" card stock and my computer for the journalling. I set my MS Word software up in a double column format set at 3" each for the text. I typed up all my information--the bird name in English and in Hawaiian if it had one, when and in what situation we encountered the bird and any facts that I had learned through my research that I wanted to remember. I formatted the text so that, when printed, it would fit nicely in the pockets with a lot of space on the top for the "pull". I inked the edges of each tag with my Quick Quotes Powder Puffs inks and used buttons, ribbon, or hand cut embellishments from the paper, to create the pull tab. And of course I decorated each page just a little bit. I put it all together with a clear acrylic cover, made three holes with my Cropodile, added rings and ribbon (these are the new beautiful Glimmer Ribbons from Creative Impressions that Scrapbooks-Plus has new in the store.)
Since I've just returned from another trip with tons of snorkeling and scuba pictures, I may have to create another album just like it for all my pictures of FISH!


Wednesday, March 25, 2009

Coaster Mini-Album


For my altered project, I went to my stash of Outback coasters and the Zutter Bind-it-All. I got the idea off of a website awhile ago and since then, always take a few coasters with me when we go out to eat. I decided to make a quote book. I took 5 coasters, inked and papered them, then punched and bound them together. Once the book was assembled, I stamped various friend quotes onto cardstock and then adhered and embellished each page. The cardstock stickers that coordinate with the Marrakesh line are great for this. I used Prima flowers on the front and some of the cardstock stickers underneath it.

I love making little quote books as gifts, they are fun to make. There are some great stamp sets out there with quotes for friends, mothers, etc. There are also great websites that have quotes you can type up and print out. These are also a great way to use scraps, use larger pieces to cover the coasters and your scraps will make great embellishments.

Tuesday, March 24, 2009

Cards!!


Cards!!!  I love to make cards, espiceally when I can use awesome matching stickers!!  I loved this set that came with the kit this month.  The key to making a sticker work is ALWAYS to ink the sticker! Now maybe you can find more uses for those stickers that we all have laying around!