Showing posts with label flowers. Show all posts

Saturday, February 2, 2013

Exploding Box & Cards

Most people love to get handmade cards and gifts. I think it is especially nice for Valentine's Day.  On Saturday, February 9th Scrapbooks-Plus will offer a class in which you'll make four Valentine-themed items using a scoring board and BoBunny’s Love Letters line. 

You’ll make an exploding box that would be a great Valentines gift for one of your loves – grandmother, mother, daugter, husband.  It looks like a box but when you open it up out pops all kinds of spaces that are decorated.  You can add messages and pictures specific to the receipient. You could even include a gift card in one of the pockets.  If you have a child away at school one of these with gift cards would be most welcome. 

In addition, we’ll make a newly popular “matchbook,” which can serve the same purpose as a card, but is oh so cute. 

 A card and matching envelope will complete our projects. 

Although these projects are great and reason enough to take a class, but the real purpose of making these is to learn about a scoring board.  After making these item, you can decide whether this is a tool you need in your papercrafting tool box.  Whatever you decide, you’ll have completed some projects, learned how to make some new items and had a fun afternoon. 

This class is part of a series I'm teaching to share new tools and techniques so that we are continuing to expand our papercrafting skills.  I always feel that I make better decisions when I get to use somehting before I buy it and you'll definately gain that experience with this class.  And you'll have a lot of fun!

The class is on February 9, 2013  from 10:30am – 2:30pm with a cost of $45.   The items are on display at the store if you'd like to look at them up close.   To sign up stop by or call Scrapbooks Plus at
703-263-9503.   Space is limited.

Saturday, June 30, 2012

Thanks A Bunch Card


Although we all love receiving cards,  we just don’t send them often enough.  Wen I first saw, the Mason (or if you prefer Ball) Jar stamp with the message “thanks a bunch” I knew I wanted to make a thank you card with a bunch of flowers.  The BoBunny Alora line of paper made this easy.  


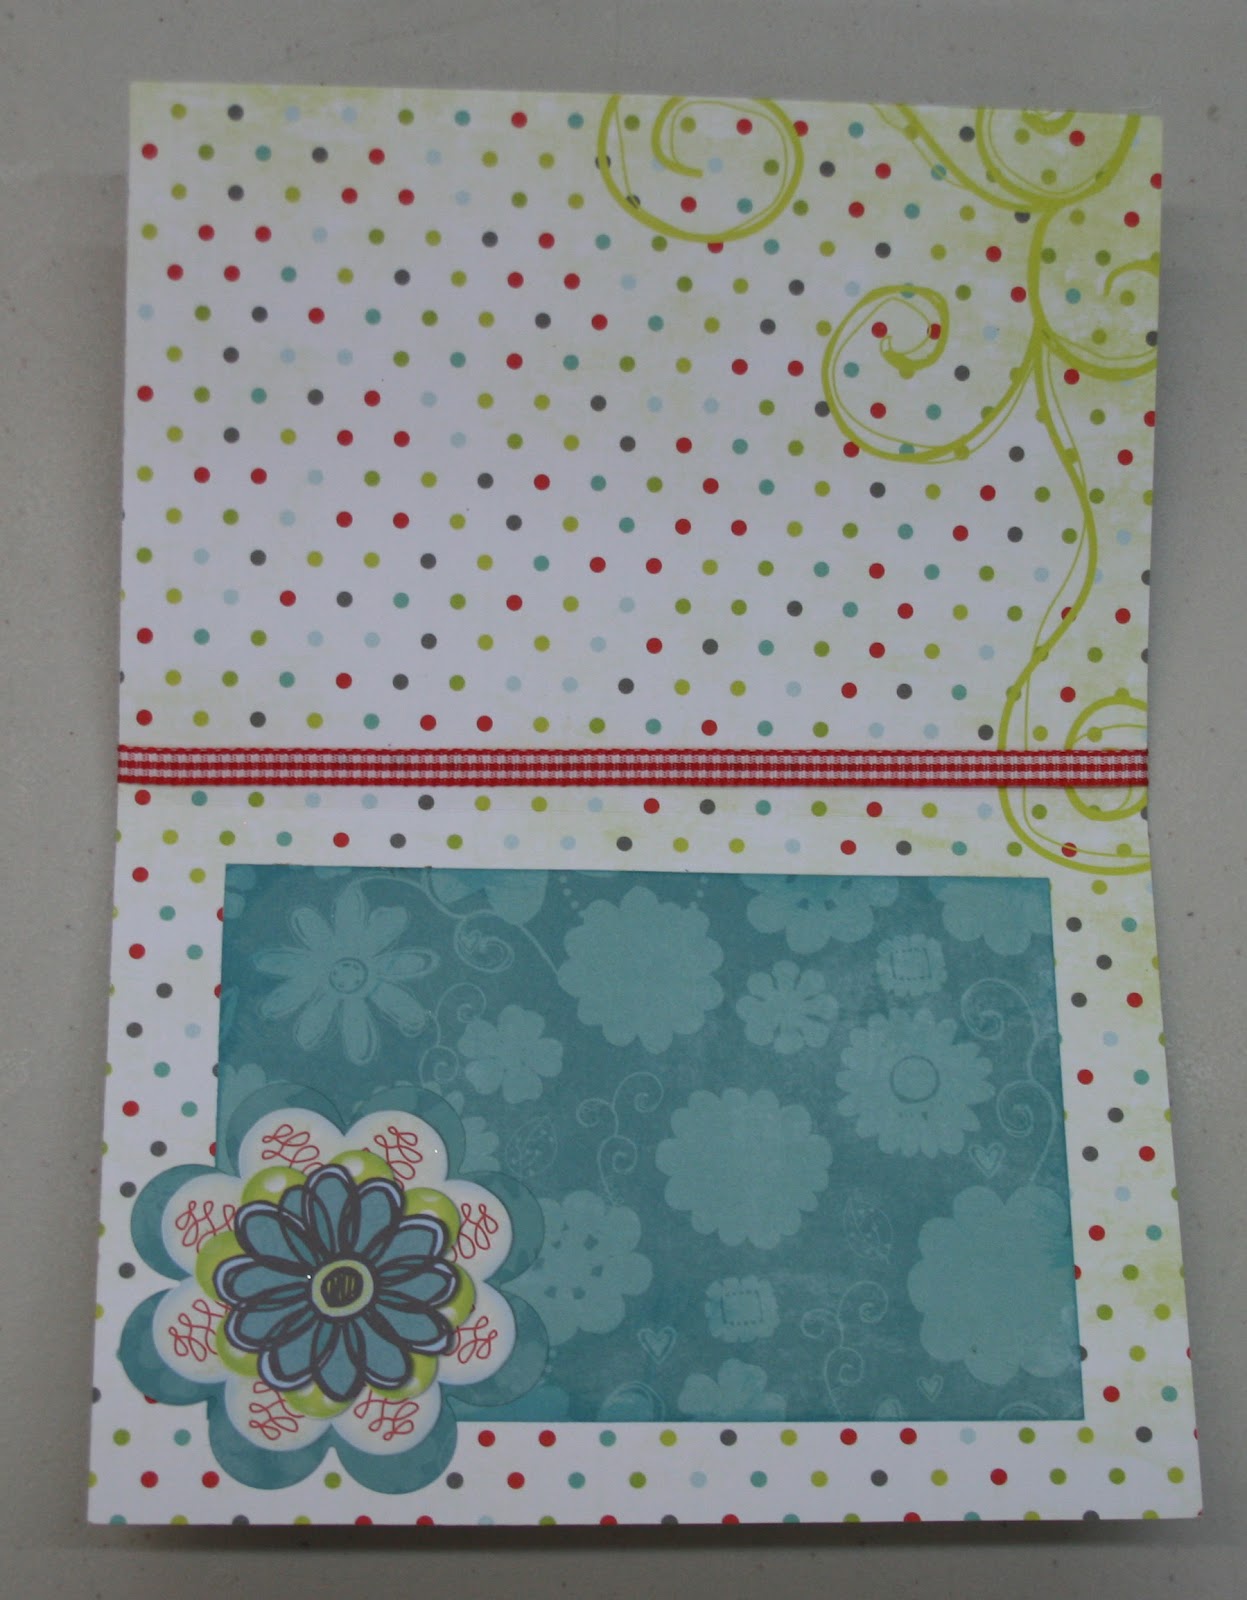
I used the Alora Stitches paper to make the card base.  (This meant the inside is polka dots of various colors with a cute flourish in the corner if you cut it out just so.)  I cut a rectangle slightly smaller than the rectamge; from the red side of Alora Wish.  I cut a square of four flowers from Alora Cut Outs.  


I stamped the Mason jar with VersaMark and embossed with Stampendous shabby green embossing powder.  (This embossing powder is great as it has different types of flakes so you get a much more interesting texture than with solid embossing powder.  It comes in several colors so check it out at Scrapbooks Plus.)  To add a little more, I used an Inkssentials Embossing pen and the same embossing powder to make the centers of the flowers match the jar.  (To use the pen, you simply highlight the area you want embossed and then emboss as usual.  You can emboss writing or use to outline as I did.)   I stamped the message in the jar with black ink.  I tied a ribbon around the top of the card.

 On the inside I affixed a rectangle of Alora Dimples to make it easier to include a message and added a couple of flowers from the Alora Combo Stickers.

Wednesday, June 13, 2012

Tweet Life on Wednesday!

This bright and cheery paper is from Little Yellow Bicycle's Hello Spring! line and is the Scrapbooks Plus Wednesday layout.  The layout features some great embellishments that coordinate with the line and the title, Tweet Life, is the free element!  The flower pot is a '10 things' premade embellishment from LYB and is oh so cute!  The banner at the top center of the layout can be used for journaling or to feature small photos!  So many options with this layout!  Hurry in today to pick up your instructions and supplies for this layout and get those recent Spring photos scrapped!  Enjoy!

Saturday, May 12, 2012

A Little Glitz, A Little Glamour and Presto A Lovely Book

I never make books, but this month’s Basic Grey Plumeria papers and embellishments seemed perfect to fill a little book.  So I made one.  I think it would make a great gift to thank someone for their involvement in a special day, such as bridesmaids.  This paper reminds me of weddings while avoiding the usual white and silver.

I started with a BoBunny Chipboard book.  I simply glued coordinating papers to the back and front of each chipboard page with a glue stick and a brayer.  (Okay, I first decided what color and embellishments would go on the front and the ¾” of each odd page that showed.  Because so little of each page would show, I was able to use some pages that didn’t seem to go together.   For example, I loved  Moonstone and Budding Lavender, but with the orange  they didn’t seem  to go with the cover’s grape color.   But by using turquoise on the ¾” that showed and only using the orange on the parts of the page that didn’t, I was able to use Moonstone and Budding Lavender.) 

Then I decorated each page with ribbons, lace, buttons, chipboard, rhinestones, and other embellishments.  As I was working on the pages, I thought this is my favorite page and then I’d complete another one and it was my favorite page. 

I used a variety of punches to cut photo mats and accents.  I used a scalloped circle punch, a circle punch a Martha Stewart punch around page, a Sizzix library die, a Tim Holtz Mini Labels die, a Tim Holtz Movers and Shapers Flourish die, and a Tim Holtz On the Edge Brackets die.

For my embellishments (and I used lots) I started with the letters and chipboard designs from the Basic Grey Plumeria line   I especially loved the stamps and butterflies.  For one butterfly, I created antennas by using stickpins with gold pearl hearts on top.  (The set of stickpins includes white hearts and gold and white orb shapes.)   I used lots of rhinestones and pearls from BoBunny French Market Collection.  On the cover, I used them to add a little glitz as accents on the flowers.   Two of the KaiserCraft wooden doilies added nice touch.  I used lace and six different ribbons available at ScrapbooksPlus.   I also used Tim Holtz Hangar Clips, Bazzill Flowers, and Bazzill Jewels. Elements buttons are used on a few pages.   I really did just start with the background and then piled on the fun embellishments.


When all pages were complete, I punched holes through the paper  (the book comes with holes in the chipboard) and put the book together with ivory rings and tied lots of ribbons on them.  

If you want to copy my book, the store staff can help you locate the items you need.  Most will be displayed in the back of the store near the Design Team Wall.  While there, you can take a really close look at the book.  I liked doing this so much I think you’ll see more books from me in the future.


Monday, April 23, 2012

Memo Board Class

Spend a fun afternoon creating a unique magnetic memo board and magnets to match.  You can use the memo boardfor notes, calendars, scrapbook ideas or pictures that make you happy.   I’m going to use mine to hold all my Sizzix Movers & Shapers  dies so  I’ll be able to see them all at once as I plan a scrapbook page.

During the class you'll learn techniques that you can use to make other memo boards or in other papercrafting projects.  For example, you'll learn how to make flowers with ribbon and glubers.  We'll use a variety of materials. 

You don’t need a lot of special tools so once you learn the techniques you’ll be able to make memo boards for children’s rooms, gifts, your office.You are limited only by the available scrapbook paper. Let’s face it there is always more scrapbook paper that you’d love to use so join us for a fun and productive afternoon. 

The class is Sunday May 6th from 1:00-4:00pm.   To sign up, call ScrapbooksPlus at 703.263.9503.  Better yet stop by the store and you can see all the new items and sign up while you are there. 

Wednesday, January 25, 2012

Layout for Your Holiday Photos--Today's Make & Take

Start the year off by getting your pictures in scrapbooks.  Today’s Make and Take, which can be made quickly,  features October Afternoon’s new Holiday Style line.   Using a old fashioned “City Sidewalk” theme, the 2-page layout is perfect for Christmas pictures that don’t include children.  In addition to the beautiful papers, the layout uses two sizes of red Bazzill flowers, silver pearls and lots of blue, clear and silver jewels.  The free element is a journaling tag.  This line includes some really cut papers so you may want to get more while you’re at ScrapbooksPlus.  Don’t forget your 40% off coupon so you can get yourself a gift.  The coupon is only good on Wednesday so visit the store today. 

Friday, December 30, 2011

Share Your Sentiments with an Exploding Box

An exploding box is a small box that when opened has pages and pockets for pictures or messages, giving you a special way to share your sentiments.  They are great for special relatives or friends.  My  box is filled with inspirational messages for a friend, who is going through a tough time.  You have a total of 20 sides inside the box on which you can put messages, pictures or embellishments.  In addition, you have pockets for 8 tags or special memorabilia.  This is one of the projects that looks tough but the basic framework is easy if you follow the pattern.  The Simple Stories Life Documented collection works especially well.  The double-sided coordinating papers are of just the right weight – they are easy to work but thick enough for a box.  The embellishments can be as simple or complicated as you want. 

For this project you need four pieces of paper/cardstock – three for the boxes and one for the top.  For the outside of the box, I used Live Life 24/7.  A 12" x 12" piece forms  the outside of the box and one set of inside flaps. For the middle box, you need a 10.5” square.  I used Newsprint.  And for the inner box, which requires a 9” square,  I used Orange/Grid. 

Begin with the 12" x 12" paper.  Imagine your paper is a grid with 4" squares as in the image below.  (My drawing is not to scale; all should be 4" squares.)   Score on dotted lines and cut on solid ones.  To assure that all my lines were straigiht and corners square, I used my trimmer, changing from a cutting blade to scoring blade as needed.   Score a diagonal line from the outside corner of A to the inside corner of A.  Repeat with C, G & I.


A

B

C

D

E

F

G

H

I

Inside of Outer Box
Fold along score marks.  The four corner squares will become triangles once you complete folding.  Use glue to hold the corners in the triangle shape.  The flatter they are the better it will be when you fold the box.  I inked all the edges with Fired Brick Distress Ink.  The four squares that you have on the inside can be decorated.  I would recommend that you decorate these with flat objects as the two other sets of “pages” will be on top of these.  I stamped messages on coordinating paper and affixed to the squares.  If you use, a lighter paper on the inside you could stamp your design directly on the flap.  Cut out objects, border trim, etc. would be really great for this. 
 
Middle Box Pocket & Tag

For the middle (10.5" square) and inner (9" square) boxes, score and cut as shown in diagram above.  Squares should be 3 1/2" and 3" respectively.  (Note: Do not score diagonal lines as you did for the outer box.)  For these two boxes, you fold along the scored lines to make four pockets for each.  Seal the side edge of the square.  I used 1/8” redline tape to hold the pockets in place. You only need to adhere on side since once box is glued in place a bottom will be formed.  Remember in selecting colors and folding to consider what color you want the pockets to be.  The pockets will be the color of the paper that is facing down.  

Inner Box Pocket & Tag


I inked the inner box with Spiced Marmalade Distress Ink and the middle box with Weathered Wood Distress Ink.  I stamped a variety of  positive messages, butterflies and birds using Tim Holtz stamps. (Stampers Anonymous Odds & Ends, Stuff to Say,)   I used some hearts cut from the papers, circles and scalloped circles.   Life Documented provides lots of circles and messages that could be used.  On the inner pockets, you can use items with a little more depth.  For example, I used some Bazzill flowers.   (Since you are going to decorate the bottom, it is best to put the thicker embellishments at the top.)

 
I used the Simple Stories journaling cards to create tags to put in the pockets. I trimmed them to fit the size of the pockets.   I affixed an eyelet and tied a ribbon to the top.  (I used white ribbon and sprayed it with Spiced Marmalade Glimmer Mist.  The tags can include a message, a picture or one on each side.

Inner Box
Once you have all boxes decorated, glue the boxes together.  You can use your favorite adhesive.  I used Glossy Accents because I wanted to make sure it stuck.  Once the boxes are together, you can decorate the bottom of the inside of the box.   I made one flower with a Gluber and a strip of linen ribbon that is available at ScrapbooksPlus.   (If you  haven’t used Glubers, you need to try them.  They are really easy to use to make a variety of flowers.)  You simply roll the ribbon and push down into the massive (and strong) glue dot.  Of course, you could use any kind of flower or other embellishment you like.  The remainder of my flowers are  Bazzill paper flowers. This is where you can make the box fit your theme and use lots of the fun embellishments available at Scrapbooks-Plus.  The only limit is the space you have.


Inside of Box When Closed


Fold the box closed and secure with a ribbon.  I used the elasticized ribbon from the Tim Holtz Ideo-ology Lavish Trimmings set.  After it was sprayed with Spiced Marmalade Glimmer Mist it looked great with the paper.  I fastened the ribbon with a Tim Holtz Idea-ology Memo Pin.  An Idea-ology Trinket Pin would work the same way – perhaps even better because it wouldn’t have a sharp edge.  You can tie it shut with any ribbon, but using this elastic ribbon means you don’t have to re-tie every time you open the box.

Voila!
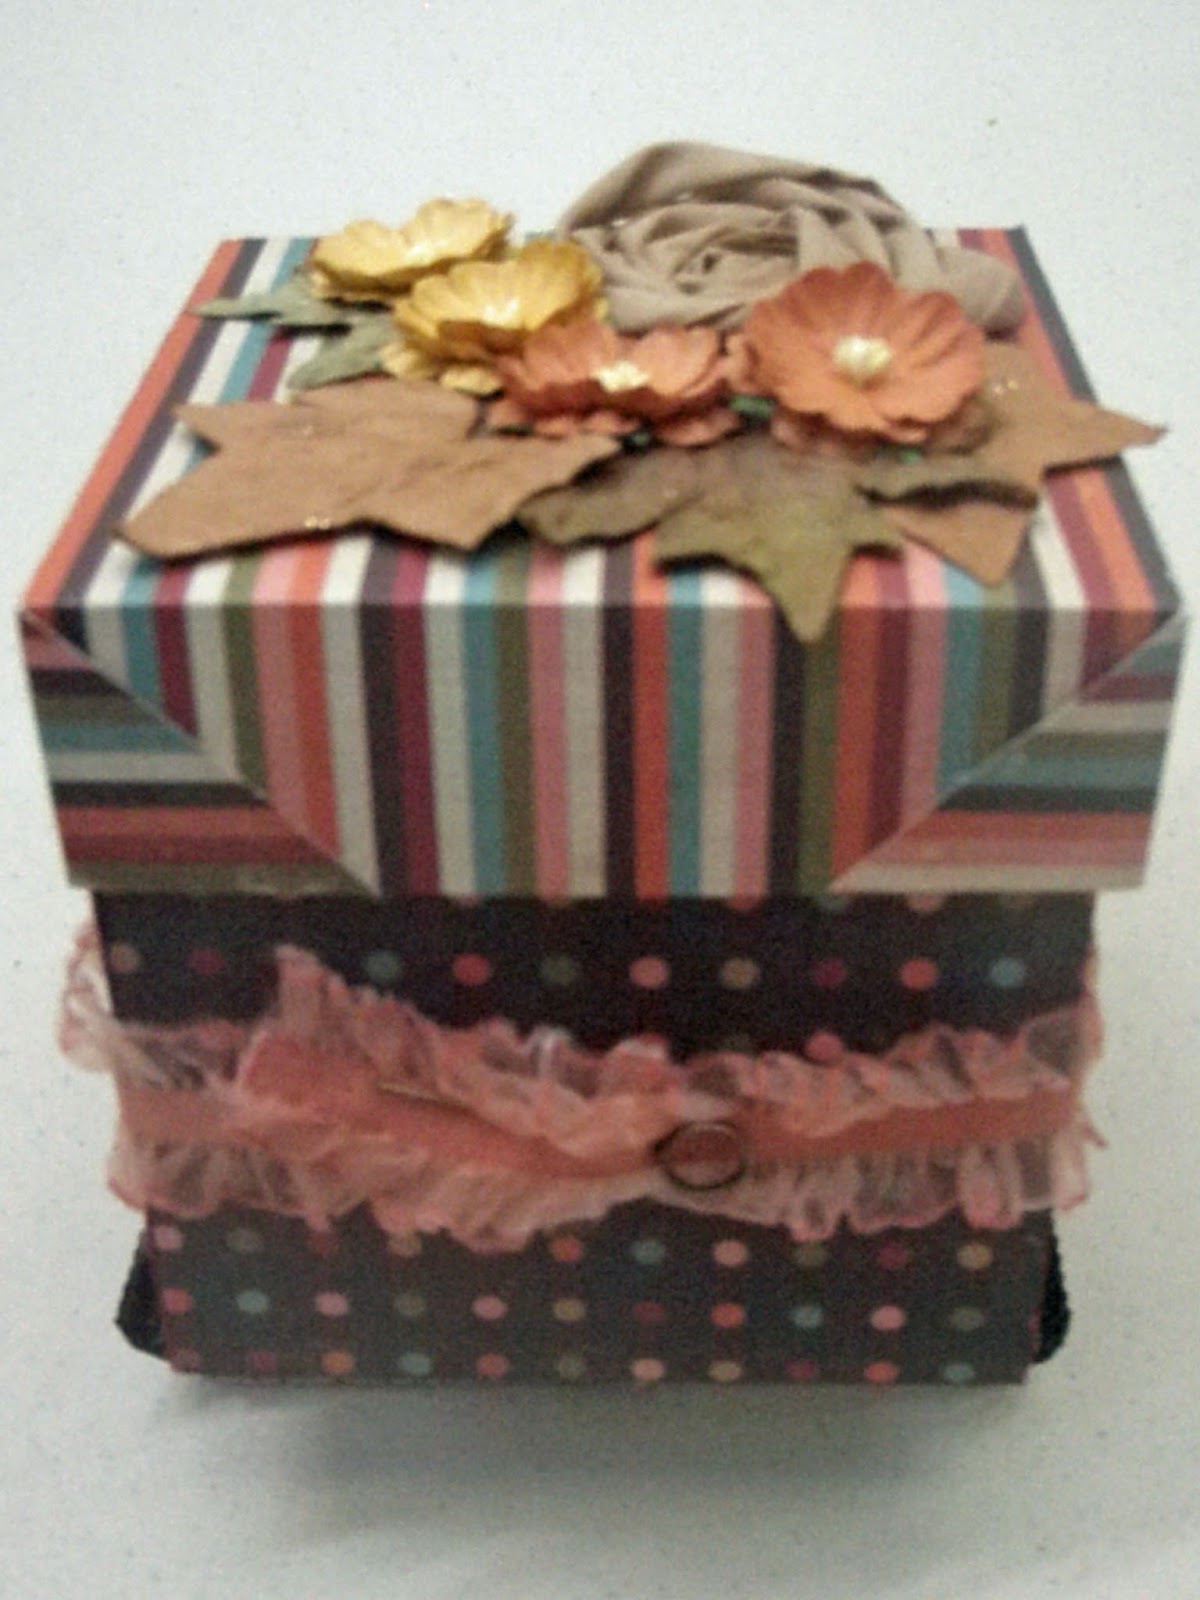
A Beautiful Box wtih a Special Inside

For the box top, you need a 5 ¾”  piece of paper/cardstock.  Score 1½” around all four outside edges of the box.  In the corner squares, cut a straight line from the out edge to the inside edge of the square.  Fold along the scoring lines, gluing the corner edges. 

All that is left to do is decorate the top of the box.  I made mine match the decorations that I put in the bottom of the inner box so I used another flower made with a Gluber and linen ribbon and the same Bazzill flowers.  I added a few Prima leaves.

These are perfect when you want to give a little more than a card, but not a big gift.  What grandmother wouldn’t love one of these with pictures of the grandkids?  Or it would be a great way to share your  feelings or memories with your Valentine?  I’m thinking it would also be a great thank you gift for a hostess.  And you get the fun of making it.  Try it!


Friday, September 23, 2011

Basic Grey Papers & Flowers for Special Memory

I had a special picture of my cousins from our annual family reunion.  As with all pictures with a lot of people, it is hard to know what to do with them.  I know from trying to sort out old pictures of my Mom’s that it is important to name the people because even though today we may be able to identify them all, 50 years from now people will say who is that?

Rather than simply putting boring labels at the bottom, I decided to put each person’s name on a flower stem. (The stems were cut from Oxford Deans List. The person’s name was written on it with a pen.)  I then used flowers (made in a variety of ways) to identify to which family each person belonged and where in the picture they are.  Let me explain.

My sister and I are flowers made from Tim Holtz Sizzix Tattered Flower die cut from Basic Grey paper.   (Both flowers are the same; the die contains four flowers.)  My Uncle Dick’s kids are also represented by flowers made using the Tim Holtz Sizzix Tattered Flower die, but I used a different paper and flower.   All my Aunt Joann’s kids are all Bazzill Paper Flowers 1.5 Primula French Vanilla.  (These flowers are great and ScrapbooksPlus has them in  lots of fun colors and different sizes.) My Aunt Marilyn’s kids are all blue BoBunny buttons and Uncle Tom’s are tan BoBunny Buttons.   (Smaller buttons the centers of  the flowers.)  I tied a knot in each of the buttons with blue sewing floss.  The flowers are placed vertically and horizontally to correspond to where the person is in the picture.  For example, my cousin Tommy is in the back row and the furthest to the left so his flower is one of the tallest and on the left side of the page.
I also used symbolism to enhance the meaning of the page.   For example, the #19 represents the total number of cousins.  It is from the Pink Paislee Daily Junque Mini Note & Label set, which contains 43 embellishments.  l  also used two cards from this set on the right side to provide balance.  In the upper right, I used a Kaisercraft Wood Flourishes leave to  provide two leaves to represent the two cousins who are no longer with us.  

This page was a lot of fun to make and will provide special memoires for years to come.

Wednesday, September 7, 2011

Stars of My Life

This month’s page map gives you lots of options for how to make it your own.    You have 9 squares in the center.  It is up to you whether you use them all for pictures, all for decorations or a combination of pictures and decorations.  My squares included some with pictures, some with embellishments and some words.   My page includes a picture of me with each of my aunts and uncles when I was young.  Since I have only four, that left me five squares to use as accents.   

I used the Oxford Frat House paper for the background.  To bring the focus to the center where the pictures are, I made a large photo mat (10” x 10”) to hold all the pictures and other décor. I printed 3” x 3” pictures and placed them equally on the grid.  I cut 3” x 3” squares from coordinating paper.  In the center square, I placed a subtitle made from letters cut from Oxford Fencing paper. Instead of a square in the upper left, I used a journaling block from Life Documented Flash Cards.  I inked it with Peeled Paint Distress Ink.  All squares were inked with Peeled Paint Distress Ink.  

 I inked ribbon (available atScrapbooksPlus) and Tim Holtz idea-ology trimming lavish flower ribbon with Peeled Paint Distress Stain and used the ribbon to decorate the squares.  If you haven’t tried Distress Stain, you really should.  It is so easy to make items the color you want .  I added a heart stamp and some flowers cut with Tim Holtz Tattered Flowers Sizzix die. 

Since I had some chipboard stars, I titled this page “Stars of My Life.”  (I apologize that the picture makes it difficult to read the title. ) Although it goes with the embellishments, it is also true – my aunts and uncles played a significant role in my life.  They continue to today.) I used  a large chipboard star for the title.  I covered it with Versamark and embossed it with Peeled Paint Distress Powder.  The remainder of the title was made with Pink Paislee Daily Junque wood alphabet.  

This month’s page map is one that  is easy to adjust to the pictures that you want to scrap.  Simply gather the 3” x 3” pictures.  Once you have these selected and placed, pick paper and embellishments for the other squares that reflect the theme.  You can make them frilly and pink for a girly girl, bold and modern for a hip look, fill with sports symbols for the big game, or since it is September you could use a school theme with a back to school picture of each of your kids.   

Monday, June 13, 2011

Circle flowers

I have been really into making ribbon flowers for the past few months.  Each month I try to find another type of flower to make.  This month, I made a few simple circle flowers- the pink ones on this layout that I posted earlier this month.
As promised, I'll give you a quick tutorial showing how I made these.  I took two similar colors of pink 1 1/2 inch wide ribbon- one in satin and the other sheer. 
I freehand cut circle shapes in slightly different sizes.  Don't worry about making them perfect.  Just cut basic shapes.  Then I melted the edges slightly to keep them from fraying. 
I used a tea light because I was doing quite a few circles.  You need to be careful not to burn your edges- just to melt them slightly.  The better quality your ribbon the less likely you are to burn the edges.  Also, different types of ribbon burn faster- such as the sheer ribbon which burns very quickly. 
Once I cut my circles and sealed all my edges, I alternated sheer and satin circles to create my flowers.  I layered them until I was happy with the look and then used my Crop-a-dile to punch a hole in the center for my rhinestone brad.  These are super easy and I like the fact that the less than perfect circles that I cut freehand are perfect for this flower!  Here's the completed flower:

Give these easy flowers a try today!!

Sunday, June 5, 2011

Check out the Page Maps!

 Have you checked out the PageMaps that the Design Team does each month?  They are in a new spot in the store- just to your left as you walk into the crop room.  This is one of my favorite things that we do on the Design Team because everyone uses the same basic design but all of the pages are so very different!  I love the different interpretations of each team member!

This is mine for this month using the Webster's Pages goodies.  I incorporated almost all of the elements on this page- the paper, the coordinating vellum, the die cut paper, the dimensional ribbon roses (green), the canvas ribbon and even a canvas tag! I threw in a few more items that I show you how I made later this month- the pink circle ribbon flowers and some green tulle.  This was so fun to create!  Here's a close up of canvas tag, the canvas ribbon (which I've pleated-pink- as well as used flat- blue zig zag), my circle ribbon flowers and the awesome green ribbon flowers that I cut into sections. Pick up a PageMap at the store and give it a try!

Monday, May 23, 2011

Using Big Letters – Beautiful Bermuda

The extra large chipboard letters at Scrapbooks Plus attracted my interest every time I went in the store. (They are available in cream, burgundy and black for only 69 cents.) So as Designer of the Month, I included a letter in the kit to see some ways to use the letters.

I originally planned to use my “B” for a family page but as I worked on my projects a new idea arose. The pink side of the Perky paper reminded me of the pink Bermuda sand and the pictures I had not scrapped from a trip to Bermuda. As I looked at my pictures, “Beautiful Bermuda” popped into my head and I had a title and a use for my “B.” To go with the theme and the colors of the page, I sprayed the “B” with Cadillac Pink Glimmer Mist making it a solid, shinny pink. To make it more interesting, I used the green vines from the Vicki B. rubon set to add accents. This also brings together the pink with the green background. The “Beautiful” above the “B” and “Bermuda” below came from the Vicki B. Sticker set.

I placed the pictures in a grid on a photomat made from Perky paper (pink side) and added a frame from Bazzillion paper (brown side). Some pictures are on each side of the 2-page layout. This didn’t provide enough attention to the pictures so I added a corner accent in each corner created from the rubon set. The flowers in the center are also from the Vicki B. rubon set. They are placed so that each is partially on both pages and draw your eye to the center of the picture display. Tape the pages together on reverse side with painter’s tape to assure that they don’t move while you work and apply the rubons as usual. Once affixed you can simply pull the pages apart and the rubons separate with the design fitting together perfectly when you place the pages together. I love this trick!

To add a little more design, I covered a chipboard flourish with Bazzillion paper (brown side) and also cut two smaller flourishes ones from the same paper. (The dies for these are available in the crop room.) To add interest, I sprayed the flourishes with Decadence Chalkboard. The effect of this is hard to see in the picture but when you look at the page directly it adds a benefit.

Without the “B” this page would not be nearly as attractive. Check out the letters. You can use all kinds of scrapbooking techniques on them to make them fit your page. How else can you add this kind of focus on a page for only 69 cents?

Saturday, May 7, 2011

Cards in a Box


I made a set of three coordinated cards and a box to keep them in using the cheerful floral prints of the Vicki B. line. To make the box, I used Vicki B. and Loverly paper. I decorated the box with rick rack, ribbon and a variety of embellishments. Making the box is easy and it provides an attractive place to store cards or a gift box if you choose to make a gift of the cards. Of course, the technique allows you to make a box for anything you want. Once you learn the technique, you can make boxes for anything that you want. The instructions for making the box follow. In my May 14th blog, I’ll describe how to make the coordinating cards.

To make the bottom of the box, cut a 9 ¼” x 7 ½” piece of Loverly paper. Score 1 ½” from the edge completely around the piece. On the two short ends make a cut from the edge of the paper to the score line (for a total of four cuts). Fold along the score lines, putting the tabs on the inside and glue. To make the top, repeat the process with a 8 ½” x 6 ¾” piece of Vicki B. paper and score 1” from the edge all around. I inked the box top with Spun Sugar Distress Ink.

For the decoration on the side of the box, cut two pieces of plain white rick rack slightly larger than that needed to go completely around the box. Spray one with Key Lime Glimmer Mist to make it green. Once dry, weave the green and white rick rack to create a close knit ribbon. Affix to the side rim of the box top.

Cut a 4 ¼” square piece of Perky. Ink edges with Spun Sugar Distress Ink. Stamp a design that matches the one you intend to put on cards with VersaMark or Perfect Medium. I used a large butterfly (and my cards each have a butterfly image as well). Emboss the design with white embossing powder. Affix square to the top of the box.

Add three Tim Holtz idea-ology Jump Rings to one of the holes in a KaiserCraft wooden key. (You can paint or ink the key if you like. I used mine as it came from package.) Affix the key to the box. Place three Vicki B. green pearl jewels to the body of a Flora Doodle butterfly and place on box. Add a bow made with pink ribbon with swirls, three Vicki B. green pearl jewels and three Bazzill Twisted Flowers. You can also add stickers from the Vicki B. sticker set. I used the one saying “Flowers are love’s truest language.”

Next week, I’ll provide the instructions for the coordinating cards.

Thursday, May 5, 2011

Dimensional Paper Flowers

I made this simple explosion box card this month from our beautiful Design Team papers!  I added on top a neat dimensional flower that is super simple to make but quite impressive.   Here's a close up of the flower:
Here's how to make it...  gather 9 paper flowers that are the same.

Take 8 of your 9 flowers and fold them each in eights (in half, then half again, then half again) using a bone folder, if needed, to create a pointed center.  Then cover the center circle (not the petals) with a strong liquid adhesive for paper.  This will be your flower base. Take 7 of your folded flowers and  place the points in the glue creating a circle.  This was difficult to capture a picture of, but you can see that the center doesn't have petals pointing upwards.  This is where your last pointed flower should go, adding a little more adhesive, if necessary.   Let dry and you'll have a flower so dimensional, you'd think you just picked it!

Wednesday, April 13, 2011

More Ribbon Fun

Hi!  Laura here with a few more ribbon techniques for you to try that I used on this month's Design Team projects!  I'm using 1" Satin ribbon for on my project but you could use these techniques with any width or type of ribbon.
The first technique is quick and easy...ribbon pleating with my secret weapon... a stapler!
Here's a photo so you can see my ribbon pleating in progress.  I added pleated ribbon to the bottom of my layout by using a sturdy piece of cardstock because I wanted to hide my staples-- although you could easily staple right on your project for a different look.  I folded the ribbon over on itself to create the first pleat, adding a staple with my Tim Holtz Mini Attacher (love, love, love the tiny staples!).  If you don't have this tool, you must add it to your stash!  They are located in the store in the tool area near the other Tim Holtz tools.  Then I created another pleat, stapled and kept repeating until my pleats were well, com-pleat (sorry, I couldn't resist the pun!).  I then glued my cardstock to the back of my project so the pleats peeked out from the bottom.  Super easy!  See bottom of post for a photo of the completed (I resisted the pun here) look!

On this same project, I used the same 1" Satin ribbon and made a gathered ribbon flower.  This is easy also but to create you'll have to dig out a needle and thread. 

I chose a matching color thread, tied a knot at one end of my thread and stitched a running stitch along one side of my ribbon.  I know, I can't sew straight or even stitches-- I'm a little embarrassed to show you my terrible stitching but this just demonstrates that anyone that can thread a needle can do this! 

Once you've stitched all the way through your ribbon piece (mine was about 14 inches), hold the end of the thread opposite your knot and start pushing your ribbon down to gather it by the knot. 


Then I held it in place and stitched a few stitches through the center of the flower to hold it together and then knotted my ribbon to tie it off.  You can then move it around to shape it how you want it.  You might also try taking a short cut and use wired ribbon.  This saves you from stitching-- just secure the wire on one end of your ribbon so you don't pull it out of the ribbon and start scrunching your ribbon down the ribbon on one side.  Once fully scrunched you can twist the two ends of the wire together to secure. 

And here's my completed layout with both ribbon techniques...
Get out your ribbon and have some fun!


Tuesday, April 5, 2011

Rolled Ribbon Rose Tutorial


I have been having fun lately with ribbon and creating flowers of all kinds.  On my two page Design Team layout this month I used several rolled ribbon roses.  They are super simple to make and you can use any kind of ribbon that you have handy!  I used 1" width grosgrain for mine but you could use anything you choose. 
I first punched out a circle about the size of my completed flower.  The DT paper this month is Stella & Rose by My Mind's Eye.  It is really nice thick paper so I didn't need to use cardstock but you would want to choose something with a nice weight to it as your base. (I used a scallop but you could easily use a plain circle punch or even hand cut a circle as it won't be seen).  Then cover your circle with a super sticky tape.
   I used my Tim Holtz Mini-Attacher to staple my ribbon to the center of my circle which is where we'll start our rose.  (I folded my ribbon over but if you are using narrower ribbon you may not need to do this).  Now the fun starts!  Use one hand to slowly turn the circle and the other to twist your ribbon and lay it down on your sticky circle as shown below:
You can make this as tight or as loose as you want.  Whichever you choose will give you a different look for your flower.  I loosely twisted mine.  This takes more ribbon.  The amount of ribbon will vary depending on how tightly you twist and how large your completed rose is.

When you get to the outside of your circle, trim your ribbon and tape the loose end to the back of the circle.  I used a small piece of green ribbon folded loosely, stapled and then taped to the back of the circle for a leaf.  Here's how my roses look on my layout:


Have fun making your own roses!  I haven't tried it yet but you could take two ribbons and twist them together to create a really unique flower.  Give it a try!