Showing posts with label cardmaking. Show all posts

Tuesday, February 5, 2013

Valentine's Day Cards

Valentine's Day Cards from BoBunny Love Letters
With Valentine’s Day nearly here, now is the time to get your Valentine’s Day cards made.  ScrapbooksPlus has some great papers for your projects. 

I especially loved BoBunny’s Love Letters line.  It has pinks and turquoises and just makes you happy to look at.  For my Valentine’s Day card, I used the Airmail paper, which has stamps on one side that are ohh so cute and the Love Letters, which has fun stripes.  I made a standard-sized horizontal card with these two papers.  For the trim and a handmade envelope, I used BoBunny Island Mist Vintage.  This turquoise-mottled paper (with gold polka dots on one side) made an envelope that popped, especially when I added a little trim and hearts from Love Letters.  (If you haven't checked out this line of paper, I encourage you to do so.  Similar to the BoBunny dots, this paper comes in a variety of colors  -- all vintage and all with gold dots on one side -- that can be used with all kinds of paper.  I love the browns and blues.)

I also made a little matchbook using the same papers as the card.  I added a Valentine's Day message so it could serve as a unique card. 

Stop by ScrapbooksPlus and check these out.  I am not sure that the picture does them justice.  While you’re there, you can get the supplies you need to make these.  You can also check out other Valentine's Day papers, such as Basic Grey's True Love, which includes little mini bottle caps!

ScrapbooksPlus will be offering a class to make these three items plus a Valentine’s Day exploding box.  Not only will you make these great items, but you’ll learn how to use a scoring board.  So whether you want to make t hese items or to learn how to use a scoring board, sign up now as space is limited by calling ScrapbooksPlus at 703.263.9503.  The class will be held on Saturday, February 9, 2013 from 10:30am – 2:30pm for a cost of $45.  I hope to see you there!   

Saturday, February 2, 2013

Exploding Box & Cards

Most people love to get handmade cards and gifts. I think it is especially nice for Valentine's Day.  On Saturday, February 9th Scrapbooks-Plus will offer a class in which you'll make four Valentine-themed items using a scoring board and BoBunny’s Love Letters line. 

You’ll make an exploding box that would be a great Valentines gift for one of your loves – grandmother, mother, daugter, husband.  It looks like a box but when you open it up out pops all kinds of spaces that are decorated.  You can add messages and pictures specific to the receipient. You could even include a gift card in one of the pockets.  If you have a child away at school one of these with gift cards would be most welcome. 

In addition, we’ll make a newly popular “matchbook,” which can serve the same purpose as a card, but is oh so cute. 

 A card and matching envelope will complete our projects. 

Although these projects are great and reason enough to take a class, but the real purpose of making these is to learn about a scoring board.  After making these item, you can decide whether this is a tool you need in your papercrafting tool box.  Whatever you decide, you’ll have completed some projects, learned how to make some new items and had a fun afternoon. 

This class is part of a series I'm teaching to share new tools and techniques so that we are continuing to expand our papercrafting skills.  I always feel that I make better decisions when I get to use somehting before I buy it and you'll definately gain that experience with this class.  And you'll have a lot of fun!

The class is on February 9, 2013  from 10:30am – 2:30pm with a cost of $45.   The items are on display at the store if you'd like to look at them up close.   To sign up stop by or call Scrapbooks Plus at
703-263-9503.   Space is limited.

Sunday, October 14, 2012

Halloween Card

Since most people email these days, people really love it when they get something in the mail.  And it is even better when it is a handmade card!  Once I have the idea, making a card is a snap.   So use this one or take a look at the Design Team Wall for lots of other ideas.  The instructions to make this card follow.

Cut a 9“x 6 ¼” piece of Authentique Glowing paper and score it to make a 4 ½” x 6 ¼” card. 
Stamp three images on Chillingsworth Orange/Tan  paper with Stazon black ink.  I used  Stampers Anonymous Tm Holtz Stamps Mini Blueprints CMS 136.  This is a great set that has four images for each Halloween, Thanksgiving and Christmas.  Cut out the stamped images and ink edges with Spiced Marmalade Distress Ink. Affix these to black cardstock that is just slightly larger than the piece with stamped image.  Affix two of the images to the outside of the  card with pop dots and one to the inside top (not with pop dots).

Add  a 1 5/8” x 6 ¼” strip of Authentique Glowing paper (Herringbone side) on bottom of card.  Stamp message on a strip of Orange/Tan paper with VersaMark and  emboss message with Zing Black Embossing Powder. Affix to top of  Herringbone strip.  Affix ribbon to the top edge of strip.

On the inside, add a rectangle of Orange/Tan piece, inked with Spiced Marmalade & Black Soot Distress Ink so  you have a place to write a message.

Affix ribbon across inside along fold line and on outside.   Tie bow on left side

Tuesday, September 18, 2012

Using Scraps

I had a great time creating with the embellishments from the Sweetest Thing line from MME.  When I pick up a new paper line to scrapbook with I always pick up a few coordinating embellishments.  I have not always done this.  I used to think I could make my own so much cheaper.  The reality is that if I want to get any scrapbooking done, I need to buy most of my embellishments.  Maybe I'm a slow learner and the rest of you already knew this but once I figured this out I found it makes scrapbooking more enjoyable for me!  I get more done and I also find that I use all of my embellishments by making cards with my scrap paper and embellishments.  This makes them a great value for me too because there is no waste!


The 'Happy' on this birthday card was premade and part of the embellishments pack that I used on a scrapbook page.  I pulled a Birthday stamp from my stash and made a quick and easy card from left over paper and embellishments!  What do you do with your left over papers and embellishments?


Thursday, August 30, 2012

Sewing Themed Card

Since my sister is a seamstress, I tend to buy scrapbooking supplies that have a sewing theme but then don't use them.  The Handmade Quilt paper of the Clippings Line seemed the perfect paper to make use of these.   I combined the paper and its matching buttons, which look like spools, with some stamps I had and presto a sewing themed card. 
 
I used some white cardstock for the card.  For accents, I used Handmade Quilt and Cotton Dress papers.  I cut a message box using a Tim Holtz  Sizzix Mover & Shaper Styled Label die.   Inside I used Technique Tuesday border stamps to add buttons and stitches to border the message.   The message and border were stamped with Black Stazon ink and the some of the pieces were inked with Forest Moss Distress ink. 

Thursday, July 12, 2012

Bon Voyabe Card

The travel theme of this line make it perfect for a Bon Voyage card. 

I stared with a card base from Luggage (blue herringbone).  I used the Carte Postale and Traveler card from Voyage to decorate the front and inside of the card. (I chose the Traveler for the inside as it provided space for writing.  I affixed a border from  Check In Boarder Sticker sheet along the bottom and used letters to spell “Bon Voyage.” 

I cut out three tags from 6” x 6” paper pad.  (I love these smaller versions of the designs from the 12” paper and this one is extra special.  In addition to the smaller designed paper, you get some extra boarders and tags.  It is definitely worth the investment.  These tags are a perfect example.)  I added a white eyelet to each tag.  You could just leave it like this or you could handwrite in some pertinent information for the trip people are going on that you are giving the card to.  I decide I wanted to jazz it up a bit so I stamped a small travel design on each  tag with VersaMark and embossed with Zing Black Embossing powder.   A little light blue and white twine through the eyelets was the final touch.  Add stripe of red & white cut from stripe at bottom of sheet of paper on the bottom of inside.


Saturday, June 30, 2012

Thanks A Bunch Card


Although we all love receiving cards,  we just don’t send them often enough.  Wen I first saw, the Mason (or if you prefer Ball) Jar stamp with the message “thanks a bunch” I knew I wanted to make a thank you card with a bunch of flowers.  The BoBunny Alora line of paper made this easy.  


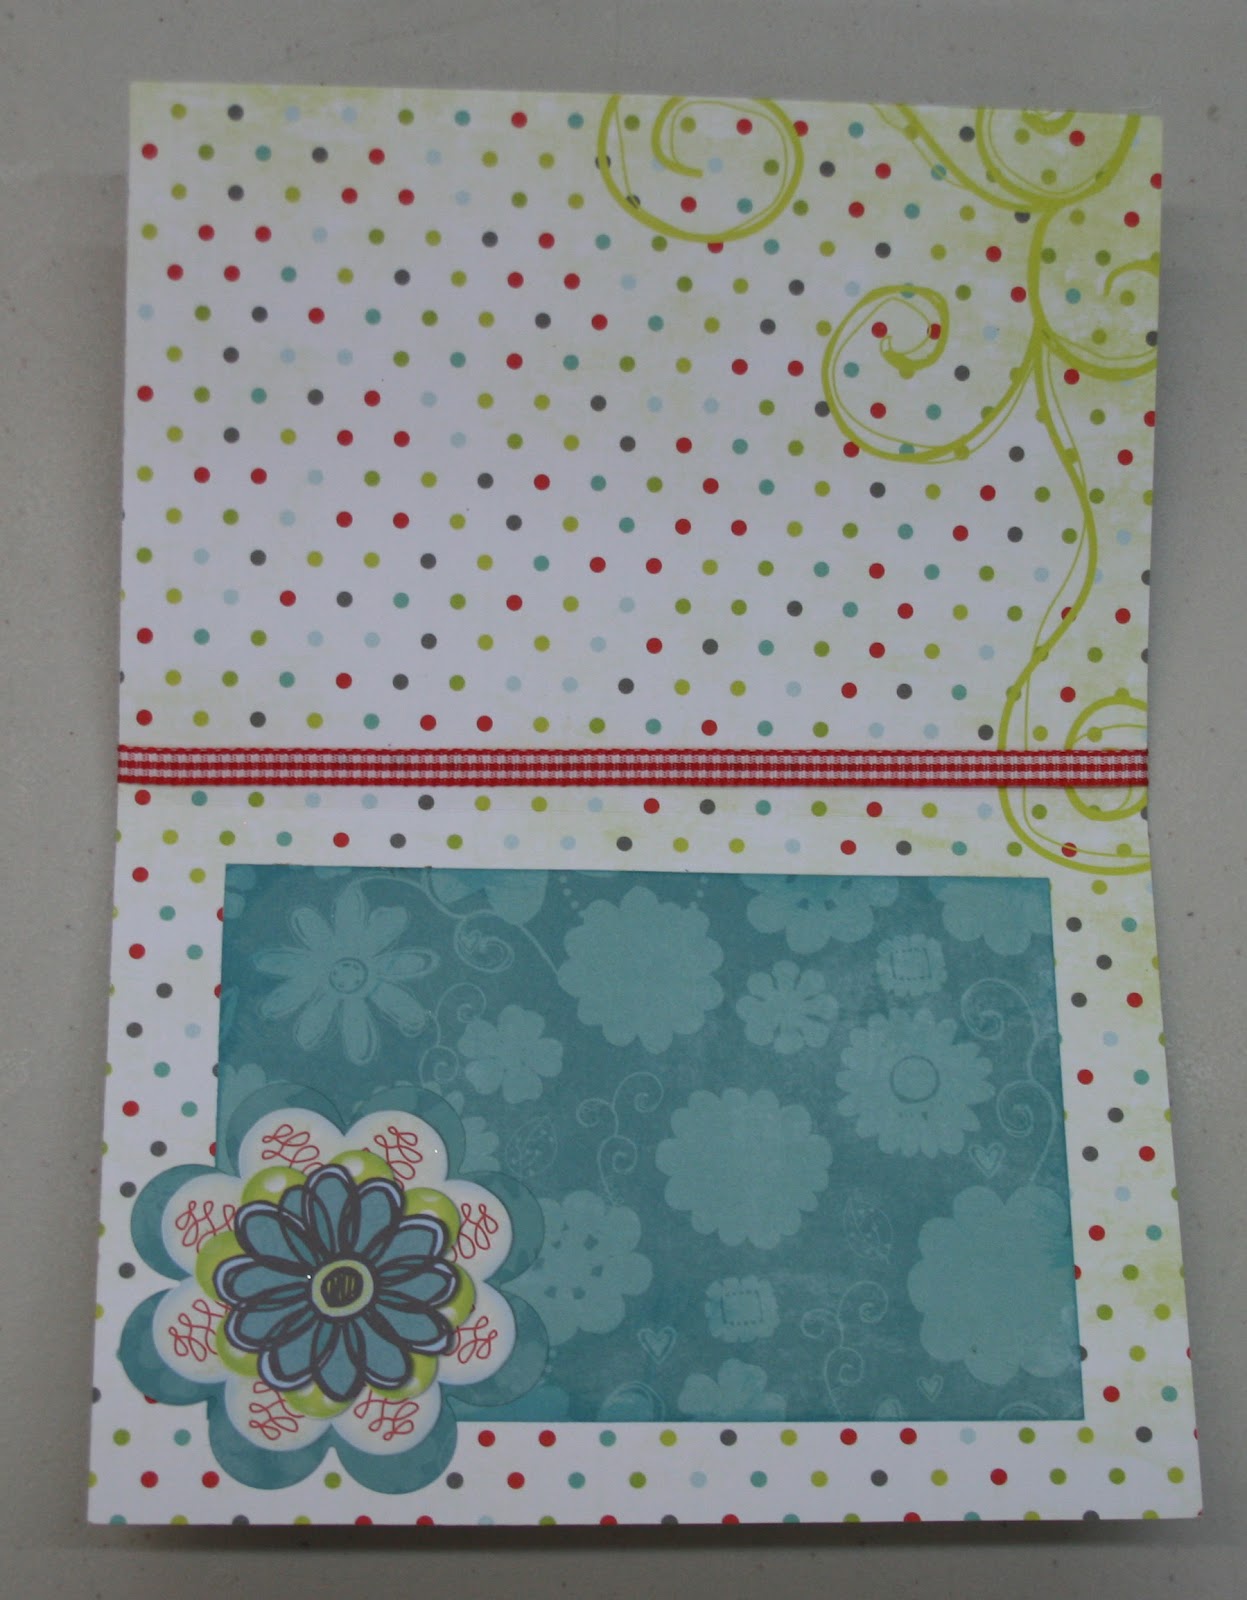
I used the Alora Stitches paper to make the card base.  (This meant the inside is polka dots of various colors with a cute flourish in the corner if you cut it out just so.)  I cut a rectangle slightly smaller than the rectamge; from the red side of Alora Wish.  I cut a square of four flowers from Alora Cut Outs.  


I stamped the Mason jar with VersaMark and embossed with Stampendous shabby green embossing powder.  (This embossing powder is great as it has different types of flakes so you get a much more interesting texture than with solid embossing powder.  It comes in several colors so check it out at Scrapbooks Plus.)  To add a little more, I used an Inkssentials Embossing pen and the same embossing powder to make the centers of the flowers match the jar.  (To use the pen, you simply highlight the area you want embossed and then emboss as usual.  You can emboss writing or use to outline as I did.)   I stamped the message in the jar with black ink.  I tied a ribbon around the top of the card.

 On the inside I affixed a rectangle of Alora Dimples to make it easier to include a message and added a couple of flowers from the Alora Combo Stickers.

Friday, March 23, 2012

Glittery Easter Card

I’ve been wanting to play with the new microfine glitter and an Easter card gave me the chance. 

Glue piece of white velvet paper to chipboard.  Cut bunny out using Sizxiz Tim Holtz Easter Elements Dies cut.

Easter is spelled with letters adorned with microfine glitter in Ocean Spray, Yellow and Pink. To make letters, fasten double-stick tape (available at ScrapbooksPlus) to a piece of white cardstock.  Cut letters needed to spell  “easter.”  I used Sizzix dies but any cutting system will work.  Remove the protective covering from the letter and sprinkle with glitter.  Use finger to burnish (press firmly) the glitter firmly into the tape. With a strong brush, brush away excess glitter.  Doing one color at a time assures that your letters don’t end up with bits of other colors on them.  Make bunny’s bow in the same way.

To make the card, I cut a 6 ¼” x 9”  strip of Societe paper.  (Remember to check before cutting as the design is one-way on the side that will be the inside of the card.)  Score and fold to create a 6 ¼” x 4 ½” card. 

I used two Bazzill Half the Edges in white to frame the bunny and the word.  Using these for borders and trims really speeds up your project.  Be sure and check out available colors.  You get 20 per package.    ScrapbooksPlus also has the full size ones.

Wrap Follow Your Heart twine around the card several times and tie small bow.

Stamp inside with appropriate Easter message or hand write a message.


Tuesday, February 7, 2012

A Snowy Valentine's Day Card

I really wanted to make a Valentine’s Day card this month but when I saw the papers with blues, greens and browns, it appeared that this was not going to work.  Then I saw one of the Cardstock Stickers in the set  said “I’d Melt for You.”  Presto I had a Valentine’s Day card idea.    

To make the card, just like I did you cut out two  6 ¼” x 4 ½” pieces of cardstock, score and glue them together so you have the Winter Plaid on the outside and the Snowy Aspen on the inside for writing.  Look carefully before you cut as there are some nice white designs on the plaid that you may want to place on the edge of your card.  Cut a 6 ¼” x 2 ¼” strip of Skate Scratch and put a small a strip of Brown Snowy Scratch cut with a scallop punch on each side.  Affix to the center of the card.      

Stamp a snowman on the Snowy Aspen paper with VersaMark.  I used the Basic Grey Snowman but any stamp would work.   Emboss with Chestnut Zing Embossing Powder and cut out.  Make a hat using the same technique.  Stamp three little hearts with VersaMark and emboss with Barn Door Embossing Powder.   Paint the snowman with Chandalier Glimmer Glam.    (You could also use small heart buttons or cut small hearts from a pretty paper. If you are affixing something to the snowman, paint with Glimmer Glam and then affix objects.)  Draw a face on the snowman with a pen.  Fastened the snowman to the right side of the card with pop dots.  Glue three chocolate hearts in red and silver foil to the left side using Glossy Accents.

Paint the Cardstock Sticker that says “I’d Melt for You” with Chandalier Glimmer Glam.  Stick the sticker on a piece of Brown Snowy Scratch and cut around the edge leaving a small border.  To make the card a little more Valentiney, make the word “Melt” red.  I used Claudine Hellumuth’s dash of red acrylic paint.  The tip on the bottle is so tiny that I was able to fill in the tiny word directly from the bottle.   Affix the Cardstock Sticker to the card.  

Stamp your Valentine’s message inside the card. 

Saturday, January 7, 2012

A Holiday Thank You Card with Photo for Grandma!

Although this card could be varied to meet many needs, it was designed to be a thank you note for a child’s Christmas gift.  With space for a picture, it can act as a photo frame on a table.  It is made with StargazingC, Caroling and Tomato Velvet paper.  Buttons and twine make attractive closures for the card.    Detailed instructions for making the card follow.


1.     Cut a 6”x 12” strip from Stargazing.  Score vertically at 3” and 9” to form flaps that meet in the middle when folded. 


2.     Decorate the inside first as once you do the outside the surface will not be flat and it will be hard for things to stick.
a.     Center -- Cut a piece of Tomato velvet paper  just slightly larger than your picture as a photo mat.  Mine is 4” x  5 ½.”  I cut little slashes in each corner  to stick the edges of the picture in so it will remain in the card during transit, but remove easily if the recipient wants to put in a frame. Affix  photo mat to the card. Cut 3 stockings (front & back)  out of Tomato velvet paper.  Make three stockings from Tomato Velvet. I used a Cuttlebug die but any stocking will work.  I cut three and then cut three reversed and used two for each stocking so that both sides would be the same.  I cut a top for each stocking out of white paper and applied white flocking powder.   Run twine through a red heart button from Bo Bunny’s Father  Christmas Buttons from the back to the front & then back to the back.  Affix near top left of center piece of card with Glossy Accents.  Hang stockings. (I put knots in between to keep stockings from ending up all on one end.)  Put twine through the other button in the same way.  Affix to card on right side of center piece and trim remaining twine as desired. 
b.     Right Inside Flap – I used an ornament  (3”) cut from Silver Valley with Joys of the Season Cricut Cartridge. Using Detail White embossing powder, emboss the word “Thanks” on top of the ornament.  Tie a strand of red/white twine through hole in ornament.
c.      Left Inside Flap -- Cut a 6 x 3 ¼” piece of tomato velvet .  Fasten it to the left inside starting at the fold line.  It will hang over the edge approximately ¼”.   On the inside left apply  a 2 ¾” x 5 ¾” piece of Caroling.  Add  a gift (2 ½”) cut from Silver Valley with the Cricut Joys of the Season Cartridge.  Cut the ribbon from Tomato velvet.
3.     Left Outside -- Fold in the extra tomato from the inside and fasten firmly.  Add a  2 ¾”  x 2 ½” piece of Tomato velvet  on  the top left.  Add  a just slightly smaller  piece of Caroling. 
4.     Right Outside -- On the right bottom add a 3 ½”  x 2 7/8”  piece of tomato and a slightly smaller piece of Caroling.
5.     Closures -- Use green star buttons from the Bo Bunny’s Father  Christmas Buttons set and red & white twine to close; affix to two flat buttons with glossy accents.  (1st run thread for bows through.  After dries tie bow & trim.  Affix twine to one of the underneath buttons with glossy accents; affix buttons to card with glossy accents; wrap twine to close. 

Wednesday, December 7, 2011

Holiday Card

This month’s Year-o-graphy papers are so easy to use.  They provide you the opportunity to scrap life’s events with only a little effort.  Because they have designs to celebrate your life pre-printed on the paper, you can make cards and scrapbook pages by just cutting them out or you can do what I did and use their designs but add some of  your own scrapping ideas. 

For example, the paper includes a set of 6" x 4" rectangles, one of which has a Christmas tree and a little tab that says Happy Holidays.  You could simply cut out the rectangle and affix it to cardstock and you have a Chrismas card.

I used their ideas and basic shapes but added some of my own pizzazz. 
I cut out the tree, star and tab from the Christmas rectangle.   (You can cut straight through the ornaments as they will be covered by eyelets.)  Affix the tree to a 6”x 4” rectangle of the Red Mine Calendar paper.  Distress edges and ink with Forest Moss Distress Ink.  For the ornaments, I used American Craft Elements medium gold eyelets.  If you are more of a bling person you can use jewels for the ornaments.  Tiny buttons would be really cute as well.  The tree could also be used as an embellishment on scrapbook page and you could add bling, eyelets or brads to match the colors in your pictures. 

Once the tree is decorated (and this might be the only tree I decorate this year), affix the rectangle to the card.  I made my card out of Green/Notebook.  To make it a little more unique, I stamped the front of the card using stamps from two different Tim Holtz Stampers Anonymous Christmas sets and Fired Brick Distress Ink.  I used a the Christmas carol from the Holiday Wishes set and the writing from  the Letter to Santa set.  I affixed the star and the tab I cut out to the card.  Inside I stamped “Happy Holidays” using message from the Holiday Wishes set.   

With just a little work, you have a handcrafted holiday card. 

The set includes a wide variety of designs, holiday messages, everyday messages and stickers that allow you to use this same approach to make cards for every season or scrapbook pages.  This is the approach that I used for all my scrapbook pages this month.  I made a 2-page layout the documents my schedule while I was in France, a Christmas page and an everyday page about a visit to Georgetown Cupcake.  In my subsequent blogs, I’ll share the tips for these pages.  If you want to get caught up on your scrapbooking, I’d suggest you get to Scrapbooks Plus and get your Simple Stories Year-o-graphy products.

Monday, November 14, 2011

A Thank You Card


I used our paper to make a card that is perfect for a thank you to your Thanksgiving hostess.  It is so easy to make.

Cut a piece of Ivory Text paper  5 1/2” x 12” and score at 3” and 9” and fold along score lines.  You will have a card that is 6” on the back and have two 3” flaps.  One flap will be on the top and the other on the bottom. This paper is great for cards  because it has text and colors but is still light enough that you can write your message over it.  I used the Sizzix Tim Holtz Alterations On the Edge Brackets die to give the flaps a decorative edge. 

Stamp “thanks” with Walnut Distress Ink on the bottom flap and emboss with Clear Embossing Powder.  Repeat inside the card where the message would go.

Cut two pieces of Golden Flourish 4 ½ ” 6 1/2.” Cut the edges using the other edge of the die.  (The on the edge dies have two possible designs you can cut.)    Glue these two pieces inside the flaps so that the Golden Flourish shows on the outside.  You will need to cut the straight edge of these pieces to make the card so that the top edge doesn’t cover the outside message.

To embellish top flap, I used a corrugated chipboard circle from the Little Yellow Bicycle Hello Fall set of corrugated shapes.  I filed and inked the circle.   I punched an owl out of a circle of Golden Flourish and put inside the chipboard circle.  Both were sprayed with Glimmer Mist marmalade.  I added jewel eyes and two jewels outside the word “Thanks.” You could easily embellish the card with any of the corrugated shapes you like.  The Little Yellow Bicycle Hello Fall Jewels add a little glamour and offers several color options.

Saturday, August 13, 2011

Stand up Card Set and Card Box

I created this card file box with this month's Design Team kit.  It was a lot of fun to create!  The kit this month is really fun!  It has lots of images, stickers and 'card blocks' (my term for a cardstock page that is broken into individual blocks that you can use as one or cut into blocks).  I created dividers for each month so I could note the birthdays, anniversaries and other occasions I needed to remember.  This was the last project I created from my Design Team kit this month and I started looking at all the cool things I still had left and decided to make a set of cards.  One of my goals is to try to avoid having left overs of a kit once I've created my main projects so I typically make cards from the leftovers.  That helps me use what I have and create cards to have on hand at a moment's notice-- or add to my new box!

I had a friend give me a card that stands up on its own.  It is really simple but so unique.  Here's how you make them.  I created smaller scale cards for this but you could adjust the size quite easily.  Essentially this is a card with a diagonal line scored in the front.  Here's what my blank card looks like after I scored it.
I used a 3 1/2" by 8" piece of cardstock for each card.  Then I scored a center line at 4" and then a line diagonally on one side of the card- which will become the front.  Then fold on each line.  I decorated only the bottom right triangle of my front.  It makes it easier to fold the front and work only on the folded triangle so you don't adhere your decorative paper to the other triangle.  Then create a 1 to a 1 1/2" strip (this doesn't have to be exact- whatever scraps you have) and adhere it on the inside right side of the card, lengthwise.  I used foam tape to pop up my sentiment which makes the 'stand up' part easier but thicker cardstock would make the stand up effect work as well.

Here's a photo of a few of my finished cards.  I'd encourage you to use up your scraps when you complete your layouts with some simple cards!   

Enjoy!
Laura

Tuesday, June 7, 2011

Easy Father's Day Card


The adult dog with a crown with two pups on the Time of My Life paper shouted father to me so I used it to make a Father’s Day card. With this design as the main feature this card was finished in no time. I simply cut the paper at 6” vertically so I had a 12” x 6” strip that had the dogs in bottom half. I folded it at 6” to give me a 6” square card with the dogs on the front.

To embellish the card, I added aqua brads in the crown and placed an eyelet over every brown dot on the front left and bottom edges. The dots on the paper made it a snap to add the eyelets since there was no measuring. I stamped “Happy” with Tumbled Glass & Vintage Photo Distress Ink. The “Father’s Day” came from the Ladies & Gent sticker set.

To cover the inside of eyelets and brads, I put used a 12” x 6” piece of the Time of My Life paper on the inside of the card with the timepieces on the side. Alternatively, you could use a plain section of this paper. To make a special place for the message, I cut a silver frame from the Framed Beauty paper and affixed it on the inside. To finish, I tied a ribbon across the top.

This would be perfect for the father of two or better yet twins! It is so easy and fast, you’ve got plenty of time to get it done for Father’s Day – June 19th!

Saturday, May 14, 2011

A Set of Cards


I made this set of coordinated cards using the Vicki B. paper. Each card is similar in terms of basic design and theme but different papers, stamps and a variety of ribbons colors are used to make each unique. In my May 7th blog, I shared how to make the coordinating box for storing the cards.

For each card, you’ll need:
•A 8 ½” x 6” base (Any cardstock will work as the entire front of the card is covered. I used Bazzill white as it is easy to write on and provides a strong base for all the added items.)
•A 4 ¼” square from Perky
•A 4 ¼” x 6” rectangle from a coordinating pattern. (For my three cards, I used Stripes, Perky (floral side) and Vicki B. paper.)
Fold the base in half so that you have a 4 ½” x 6” card.

Affix 4 ¼” x 6” piece to the front of the base.

On the pink side of the Perky square, stamp a design with VersaMark or Perfect Medium. On each card, I used some variety of a stamps so that each card would be unique but still coordinate with the others and my box, which has a large butterfly design and a Flora Doodle butterfly. Since my butterflies were small I used several stamps on each card. Emboss the design with white embossing powder. Ink edges with Spun Sugar Distress Ink. Affix a ribbon horizontally across the square near the top. For my cards, I used a variety of colors – pink, green and orange. Affix rick rack down each side of the square.

Tie small bow with same ribbon as used on the square. Emboss a chipboard key with white embossing powder on both sides. Put two Tim Holtz Idea-ology jump rings together. Put one end of the jump ring chain through the top holes in the chipboard key and put the other end through a back loop of the bow. Affix bow to the card.

Select messages from Vicki B. Sticker sheet and attach. Alternatively, you could simply stamp messages on the card.

By using matching colors and papers, you can create a set of coordinated cards. Put them in a coordinated box and they make a great gift. (The instructions for the box were provided in my May 7, 2011 blog.) Using a variety of papers, stamps and embellishments you could make a unique set of cards specially designed for the recipient.For example, you could use the KaiserCraft buggy to decorate the box and decorate each card with the KaiserCraft diaper pins to make thank you cards for baby gifts or cards to enclose pictures to send to Grandma.

Thursday, April 14, 2011

Easter Card

Great Easter cards can be made from the Stella Rose papers that the Design Team used for April. I made an Easter card using three of these papers and resist embossing. When you are resist embossing, you emboss as usual and then use ink to color the paper. Because the embossing resists ink, the stamped design remains the color of the embossing powder but the paper is colored by the ink. For my card, I stamped a flower on a 1 ¼” square of white paper with VersaMark and embossed the flower with white embossing powder.
Once you have embossed your design you can apply ink in any way you like. Regardless of how you apply the ink, it will color the paper but not the embossed design. The easiest way to apply ink is to wipe an ink pad across the paper. You also can spray with Glimmer Mist. I, however, used a fun technique with ink and two colors of Glimmer Mist. Here’s how I did it. I used a 1” acrylic block like a stamp. I chose a 1” block, which was ¼” smaller than the paper I was using so that I would have a white frame on the outside of the inked image. I covered the block with Wild Honey Distress Ink as if it were a stamp. Next, I sprayed the ink-covered block with Sun Sisters and Peach Delight Glimmer Mist. This added more variety yellow and a different shade of orange. It also added glimmer. After adding a couple of spritzes of water, I stamped the block on the paper with the embossed design just like it was a stamp. You may want to practice with colors a bit to get exactly the effect that you want. For another card, I used Dragonfly Glimmer Mist just a touch of Inchworm Chalkboard. I liked the result. If you have a spots without paint, you can use a paint brush to push paint in those spots. Once dry, I assembled the card. For this card, I started with plain white ribbon and used Dragonfly Glimmer Mist to make it turquoise to match the paper. Once it was dry, I gathered the ribbon to give it a special look. To gather ribbon, you simply use tweezers to grab a thread or two in the center of the cut edge of the ribbon and gently pull until it is gathered the appropriate amount. Of course, you have to pull carefully so you don’t break the thread. I also find it helps to adjust the gathers as you pull. With these two techniques you can have fun and create unique cards. I’m sure they will be appreciated by the recipient.

Monday, February 7, 2011

Valentine's Day Cards

Hi! It’s Kathy Bryant one of the new members of Scrapbook Plus’s Design Team. I have been scrapping for more than a decade. Most of my scrapping focuses on family, travel or both. I like designs that include lots of photos. I look forward to sharing my ideas and designs with you. I hope you’ll comment on my blogs. Your feedback will help me to meet your needs. [Simply click on comment underneath the blog to provide feedback.]


With just a few items you can make unique cards, like the one I made for this month’s design challenge. Although mine is an anniversary card, it would be a great Valentine’s Day card – for your spouse, your Mom or an aunt. Who doesn’t love to get a handmade card? The English Rose Collection is great for romantic cards.


I used two special items in this card – canvas and embossed plastic. I stamped the card’s message on canvas strip. Using canvas in cards or scrapbooking pages can add texture. The adhesive-backed canvas is available in either the 8 1/2 x 11 or 12 x 12 size. It can be cut into whatever shape you need and you can stamp or paint on it. If you want another color you can spray it with Glimmer Mist.
I used plastic to create a little more texture and interest to the card. (This is a subtle thing and hard to see in picture.) Cut a piece of plastic (like those you get product in) to the desired shape and run it through an embossing machine. In addition to looking good, it is green! For Valentine's Day you could emboss plastics with hearts.

Interesting ribbons can also be used to make great Valentine cards. This pink heart ribbon with the ruffled ribbon makes great trim for a Valentine. I used it for this baby card. It also comes in red. Of course, if the color you need is not available you can spray the ribbon with Glimmer Mist to change the color. I created some to match the English Rose Collection.


I used another fun set of ribbons to make a valentine for my sister, the seamstress. I picked ribbon that looks like rick rack. It comes in many colors. This would also be great for kids cards.
For my niece, the purse aficionado I made a purse using the Snap On Envelope stamp and a piece of ribbon for the handle. I stamped the purse and the hearts from the Basic Grey Love Stamps with Dusty Concord Distress Ink. I then embossed them with a clear embossing powder. I trimed the card with the same ribbon used for the handle.

I feel so good to have my valentines made a week in advance. I’ll talk to you again on the 14th. Kathy

Tuesday, June 23, 2009

"Fun in the Sun" Card

I loved the phrases printed on the Summer Daze Words paper...pretty much a comprehensive list of all the activities associated with summer time.
.
.
.
.
To create this "Fun in the Sun" card, I simply trimmed out several strips, matted them on orange card stock, and arranged them to resemble the rays of the sun. I stamped the flip flops on cardstock, added a little bling for fun, and adhered them with red line tape, so that the one on the far right is actually holding the card closed.
The sentiment inside reads "Enjoy your summer - however you choose to spend it!"

Tuesday, May 12, 2009

Father's Day Card


This is a card for father that's easy to make from scraps. June is fast approaching & you must make that card soon. The papers in our kit had browns & blues, so it seemed like a good combo for a man's card. It began with a sheet of solid green cardstock folded in half. Strips were placed to one side with layers of blue and white solids that were torn cut and embossed. The brown is one of the Coredinations papers that was distressed to show the blue underneath the brown.

Use stickers for the title - father. Add a newspaper and coffee sticker element to give it the meaning of father being relaxed. The mini tools are tied with twine and attached with a brad. Now add the sentiment inside before mailing it to dad.

Thursday, April 16, 2009

Cordinating Core Papers by Loretta Cooper


One of my favorite new things from CHA this year is this coordinating paper. Here's the secret the "core" ... it's a different color than the exterior. Why would you want paper with a different color core?, you may well ask. The answer is, all the better to emboss with. I ran this paper through my Quick Kuts Revolution with one of their 4X4 inche embossing dies.... You can of course do that with any kind of paper... but here's where the really cool part comes in. Lightly sand the raised ridges with fine grade paper or one of the Making Memories Sanding Blocks (anybody can show you where they are in the store!) and voilia! I just LOVE the way this looks. After trying it out once, I rushed back to the store, and purchased about 20 pounds of this paper... This promises to be my new card making trick... plus it's just so much fun to see the color reveal itself!

Have Fun!
Loretta