Showing posts with label eyelets. Show all posts

Tuesday, August 7, 2012

Rat Pack Themed Layout

I love it when I can design layouts the reflect the essence of my pictures.  Although it wasn't mmediately obvious when I saw the Basic Grey Clippings line, upon review I discovered that the grey herringbone and red houndstooth paper worked well to create a perfect layout for pictures from a Rat Pack-themed party at a famous nightclub in San Fran.

Here’s how to make this page.  Start with a background of Novella.  Add a 5” x 12” piece of Handmade Quilt on the top.  Affix a strip of shiny black ribbon (available at ScrapbooksPlus) where the papers meet.

Cut 6 ¼ ” X 10 ¼ ” piece of white cardstock; print or write message in right bottom corner.  Add two  4” x 6” pictures (one horizontal and one vertical).

To make the sign and the flourish, you use one of my favorite techniques.  Using the Tim Holtz Sizzix Hanging Sign Die cut sign hangar from chipboard.  Cover hangar with VersaMark by pressing into VersaMark pad, emboss with Zing black embossing powder.  The texture created is wonderful.  Put eyelets in holes.  The flourish was cut with the Tim Holtz Mover & Shapers Mini Flourish die.  To make the sign, glue a 5” x 3” piece of Novella to a piece of chipboard. (For this purpose I use a glue stick and even out with brayer.  Because of how you are cutting you need every bit of the paper glued to the chipboard and this is a great way to do it.)  Cut out sign using same die as you used for hangar. Put eyelets in holes.  Affix sign to hangar using Tim Holtz Jump Rings or Clasp Clips.

Put title on sign using alphabet from Printed Chipboard & Alpha Set.  I love this set of alpha for several reasons.  A couple are that they give you lots of letters and even have a apostrophe’s. 

In bottom right and left corners, embellish with  Clippings Brads and Wooden Buttons.  I put Memory Thread in the holes of the buttons.   This set of brads gives you lots of options and the buttons are really fun.

Thursday, June 14, 2012

Using the Alora Line to Make A Thank You Book

I warned you last month that after I found out how great it was to make a book with coordinated papers and embellishments that my altered item might be a book every month.  Two months doesn’t always make, but the BoBunny Alora line had such cute items I couldn’t resist making a book as a thank you gift.  My aunt included three extra Moms, who weren’t going to be with their children on Mother’s Day,  in the celebration that she was having with her kids.   A book with some pictures of each Mom seemed a great way to say thank you.

And since this was a thank you for inviting us to her home, a house was the perfect shape.   I made the book with a house die that is available for you to use at ScrapbooksPlus.  It is just the right size for a book.  I made both covers from chipboard and then covered them with Alora papers.  One thing I love about making your own book shape rather than using a purchased one is that you can cut the papers to cover the pages with the same die.  Oh so easy!  For the inside pages, I simply glued two pages together.  Even though the Alora papers are double-sided, I still glued them together as I didn’t think a single-sheet was quite sturdy enough.  Another alternative is to make a chipboard base for each page.  This would make your book much more durable.  (One thing I would do differently is to cut off the edge of the roof on the side that I am binding together for the book as it catches.  If you just use your trimmer to cut that side straight the pages will turn easier.  I plan on doing this when I pick mine up.)  

I encourage you to take a look at the larger dies available at ScrapbooksPlus for you to use.  You can use them while you’re at a crop at no charge.  During non-crop hours, use of the room and all the tools (including dies) is free if you spend $5.00 .  You can buy the chipboard you need at the store.  Another advantage of cutting your book at the store is you only buy what you need.

I punched holes for the ribbon to hold the book together with my Crop-a-dile and inserted We R Memory Keepers Eyelets.  Not only do they keep the holes from ripping, but they add a bling.   The turquoise ribbon that I used to hold the book together is a bit shimmery as well.

On the front and back cover, I stamped “thanks a bunch” and a heart inside a jar with a stamp available at Scrapbooks Plus.  (The stamp includes some other cute items you can include inside the jar.)   On the back cover, I wrote below the jar what the “thanks” was for with a pen, making the book like a thank you card.  I decorated the covers and pages using letters, borders and designs from ComboStickers, Tiny Type Cardstock Stickers, Alora Brads and Alora Jewels.  The Alora Jewels are practical because they include rhinestones and pearls in a variety of sizes. I love using them for flower centers.  On one page, I used a flower border sticker and put a jewel inside every flower.  I found two more  great ribbons at ScrapbooksPlus to use as accents in the book.   And I cut out Alora papers in a variety of shapes to add to the pages and serve as photo mats.  I especially like the alarm clock and fan cut with the Tim Holtz Movers & Shapers dies.

I think my aunt is going to like this a lot better than the usual thank you note. 

And as I’ve discovered, if you simply buy paper and embellishments from the same line, you can make a book quickly.   You can choose from pre-made shapes of chipboard and cover them with paper, make your own shapes as I did or simply use a square or rectangle shape.  Whatever shape you choose,  I’m confident the recipient will be happy.


Friday, December 30, 2011

Share Your Sentiments with an Exploding Box

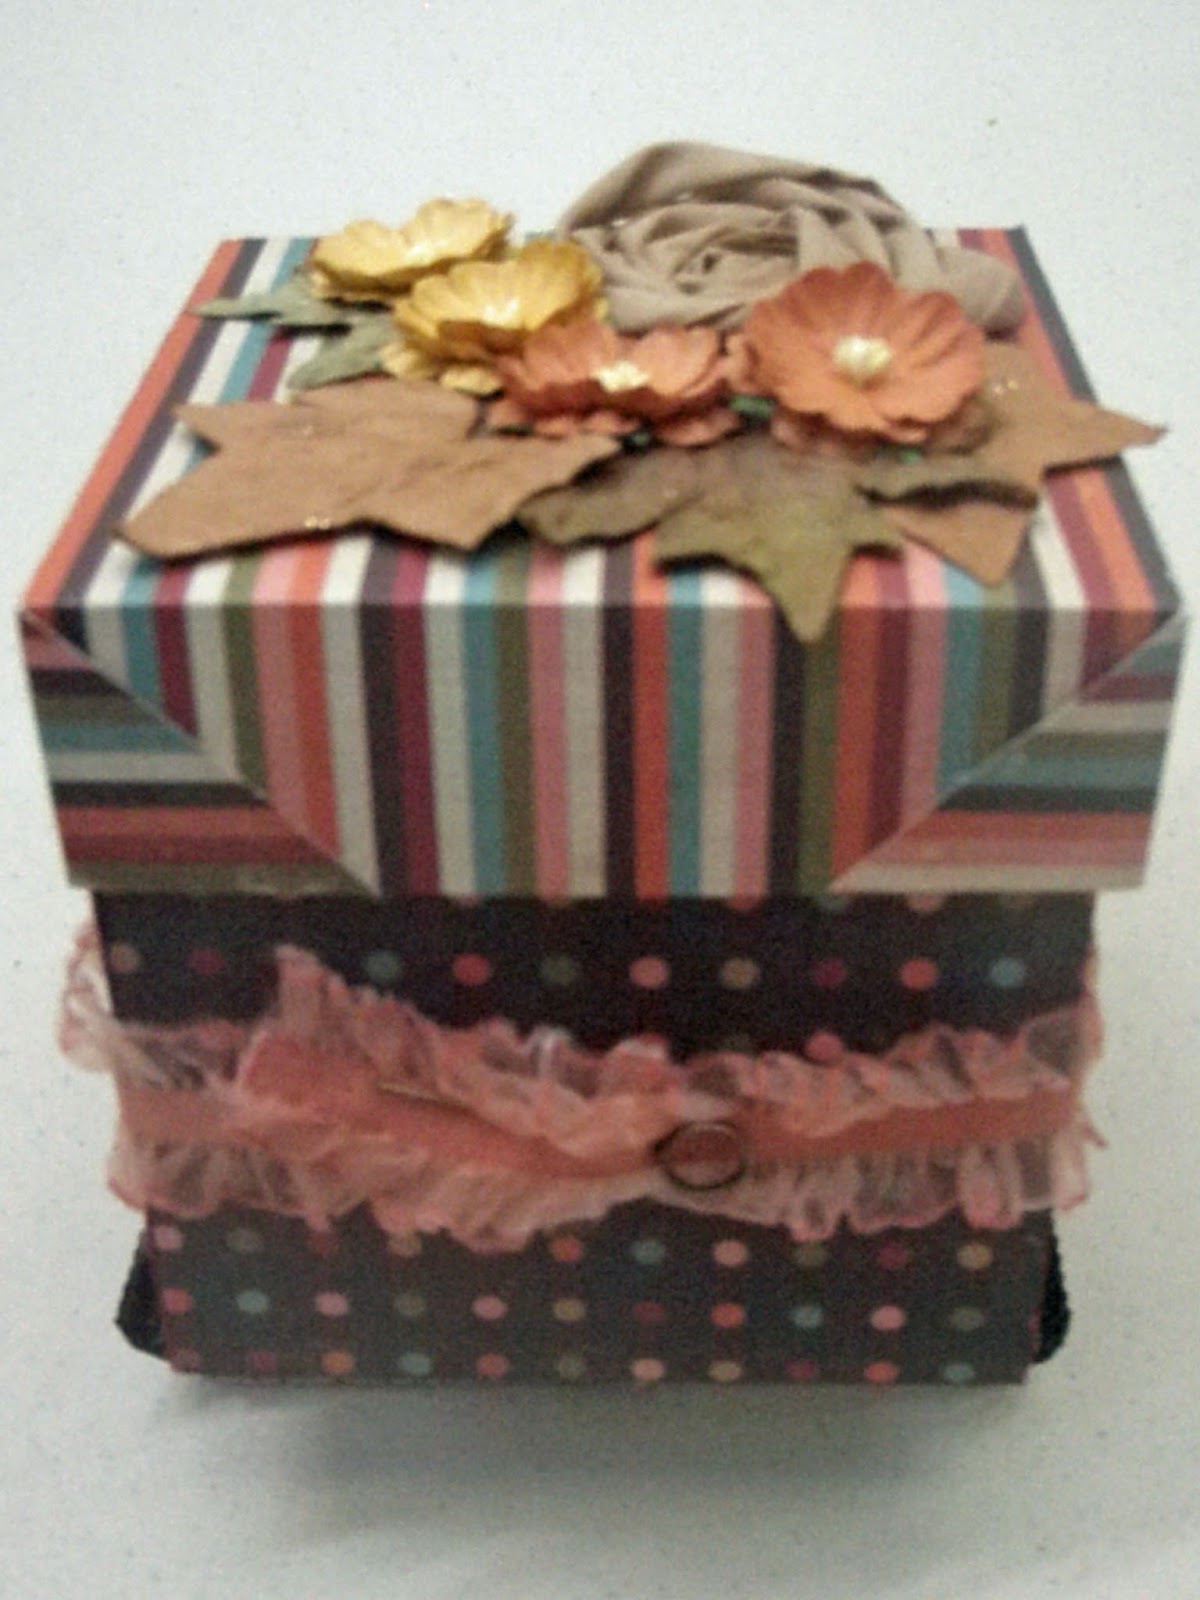
An exploding box is a small box that when opened has pages and pockets for pictures or messages, giving you a special way to share your sentiments.  They are great for special relatives or friends.  My  box is filled with inspirational messages for a friend, who is going through a tough time.  You have a total of 20 sides inside the box on which you can put messages, pictures or embellishments.  In addition, you have pockets for 8 tags or special memorabilia.  This is one of the projects that looks tough but the basic framework is easy if you follow the pattern.  The Simple Stories Life Documented collection works especially well.  The double-sided coordinating papers are of just the right weight – they are easy to work but thick enough for a box.  The embellishments can be as simple or complicated as you want. 

For this project you need four pieces of paper/cardstock – three for the boxes and one for the top.  For the outside of the box, I used Live Life 24/7.  A 12" x 12" piece forms  the outside of the box and one set of inside flaps. For the middle box, you need a 10.5” square.  I used Newsprint.  And for the inner box, which requires a 9” square,  I used Orange/Grid. 

Begin with the 12" x 12" paper.  Imagine your paper is a grid with 4" squares as in the image below.  (My drawing is not to scale; all should be 4" squares.)   Score on dotted lines and cut on solid ones.  To assure that all my lines were straigiht and corners square, I used my trimmer, changing from a cutting blade to scoring blade as needed.   Score a diagonal line from the outside corner of A to the inside corner of A.  Repeat with C, G & I.


A

B

C

D

E

F

G

H

I

Inside of Outer Box
Fold along score marks.  The four corner squares will become triangles once you complete folding.  Use glue to hold the corners in the triangle shape.  The flatter they are the better it will be when you fold the box.  I inked all the edges with Fired Brick Distress Ink.  The four squares that you have on the inside can be decorated.  I would recommend that you decorate these with flat objects as the two other sets of “pages” will be on top of these.  I stamped messages on coordinating paper and affixed to the squares.  If you use, a lighter paper on the inside you could stamp your design directly on the flap.  Cut out objects, border trim, etc. would be really great for this. 
 
Middle Box Pocket & Tag

For the middle (10.5" square) and inner (9" square) boxes, score and cut as shown in diagram above.  Squares should be 3 1/2" and 3" respectively.  (Note: Do not score diagonal lines as you did for the outer box.)  For these two boxes, you fold along the scored lines to make four pockets for each.  Seal the side edge of the square.  I used 1/8” redline tape to hold the pockets in place. You only need to adhere on side since once box is glued in place a bottom will be formed.  Remember in selecting colors and folding to consider what color you want the pockets to be.  The pockets will be the color of the paper that is facing down.  

Inner Box Pocket & Tag


I inked the inner box with Spiced Marmalade Distress Ink and the middle box with Weathered Wood Distress Ink.  I stamped a variety of  positive messages, butterflies and birds using Tim Holtz stamps. (Stampers Anonymous Odds & Ends, Stuff to Say,)   I used some hearts cut from the papers, circles and scalloped circles.   Life Documented provides lots of circles and messages that could be used.  On the inner pockets, you can use items with a little more depth.  For example, I used some Bazzill flowers.   (Since you are going to decorate the bottom, it is best to put the thicker embellishments at the top.)

 
I used the Simple Stories journaling cards to create tags to put in the pockets. I trimmed them to fit the size of the pockets.   I affixed an eyelet and tied a ribbon to the top.  (I used white ribbon and sprayed it with Spiced Marmalade Glimmer Mist.  The tags can include a message, a picture or one on each side.

Inner Box
Once you have all boxes decorated, glue the boxes together.  You can use your favorite adhesive.  I used Glossy Accents because I wanted to make sure it stuck.  Once the boxes are together, you can decorate the bottom of the inside of the box.   I made one flower with a Gluber and a strip of linen ribbon that is available at ScrapbooksPlus.   (If you  haven’t used Glubers, you need to try them.  They are really easy to use to make a variety of flowers.)  You simply roll the ribbon and push down into the massive (and strong) glue dot.  Of course, you could use any kind of flower or other embellishment you like.  The remainder of my flowers are  Bazzill paper flowers. This is where you can make the box fit your theme and use lots of the fun embellishments available at Scrapbooks-Plus.  The only limit is the space you have.


Inside of Box When Closed


Fold the box closed and secure with a ribbon.  I used the elasticized ribbon from the Tim Holtz Ideo-ology Lavish Trimmings set.  After it was sprayed with Spiced Marmalade Glimmer Mist it looked great with the paper.  I fastened the ribbon with a Tim Holtz Idea-ology Memo Pin.  An Idea-ology Trinket Pin would work the same way – perhaps even better because it wouldn’t have a sharp edge.  You can tie it shut with any ribbon, but using this elastic ribbon means you don’t have to re-tie every time you open the box.

Voila!
A Beautiful Box wtih a Special Inside

For the box top, you need a 5 ¾”  piece of paper/cardstock.  Score 1½” around all four outside edges of the box.  In the corner squares, cut a straight line from the out edge to the inside edge of the square.  Fold along the scoring lines, gluing the corner edges. 

All that is left to do is decorate the top of the box.  I made mine match the decorations that I put in the bottom of the inner box so I used another flower made with a Gluber and linen ribbon and the same Bazzill flowers.  I added a few Prima leaves.

These are perfect when you want to give a little more than a card, but not a big gift.  What grandmother wouldn’t love one of these with pictures of the grandkids?  Or it would be a great way to share your  feelings or memories with your Valentine?  I’m thinking it would also be a great thank you gift for a hostess.  And you get the fun of making it.  Try it!


Monday, November 7, 2011

Thanksgiving Place Cards

Thanksgiving is the perfect time to use some scrapbooking techniques to decorate your table.  Using paper and corrugated chipboard shapes from the Little Yellow Bicycle Hello Fall line,  I made Thanksgiving place cards.  I made a set of four using different approaches so you could see different options.   You can easily make these to match your style your color scheme.  Make a matching set or make coordinated ones. 

You need two tags of the same size from brown Bazzill paper for each place card.  I used the large tag on the Sizzix Tag, Traditional die.  Score a line across one of the tags so that the place card will stand up.

The fun part is decorating the place card.  You use one of the corrugated chipboard shapes.  Eighteen different shapes come in the set.  I used two flowers, a bird and a squirrel.   I used a nail file to scrape off a little of the brown finish and then inked with some distress ink. I used colors to coordinate with the embellishments I would be using.  I  then sprayed the shape with Marmalade Glimmer Mist. 

I embellished the place card with paper, a few leaves from Prima’s Splendor Fall Mix and jewels from Little Yellow Bicycle Hello Fall Jewel stickers.  

To put the place card together, glue the top of the back to the top of the front.  I then affixed a metal eyelet to hold in place.

I added a Tim Holtz Memo Pen to hold the name tag in place.  I cut the name tags From cream Bazzill paper using the Cricut Celebrations die.   I inked then  with Spiced Marmelade Distress Ink. 

Write the name on it and you are all set.

Saturday, July 23, 2011

Making a Barbeque Recipe Book

This month’s papers strongly suggest celebrating the 4th of July and for us this means food, so I decided to use the From My Kitchen Cricut cartridge to make a recipe book. I used Moxie Hometown Celebration line (Star-splangled, Grand Ol’ Flag, and Patriotic Patchwork) so that everything in the book matches everything else. The recipe book has three parts – covers, dividers for different types of food and recipe cards. It was easy to put together. The description that follows seems complicated but it really is not. The only challenging part was figuring out what size to cut the pieces.

For the front and back cover, I cut two 5" X 6 ½" pieces of chipboard. I covered the edges with blue ribbon so the edges would be finished. After I finished the edges, I adhered paper to both sides of each cover using a glue stick and a brayer. Using the Cricut, I cut the title “Barbeque” and “Recipes” from dark blue Bazzill cardstock.

I cut six dividers using the same cardstock as the title using the Tabs Feature (2 each of mixer, blender and toaster; 4 ¼”). Each divider has a title on the divider and on the tab of the divider. For the title that goes on the divider itself, I cut the words using the Cricut from the same cardstock as the dividers. The cartridge offers several options. I used drinks, appetizers, vegetables, meats, breads and sweets. To make the titles stand out, I cut an oval shadow for each using the Cricut. The oval shadows and the tabs (3 3/4”) were cut from matching paper. I used a label maker to make the title to go on the tab. For some dividers, I added some stickers from the Moxie Hometown Celebration sticker set to decorate them a bit more.

I printed the recipes on My Mind’s Eye American Made “Patriotic Picnic” Paper. I printed five recipes on one piece of paper by using Microsoft Publisher so I could turn some sideways to fit more per page. They were cut to be 3 ¾” x 6” . I cut a recipe card overlay for each recipe (Tab Feature Key, Shift & Cookie) from one of the Moxie papers and glued to the recipe card. In printing the recipes you have to work around the shape of the recipe overlay.

There are a few ways that you could make this project a little simpler. Two involve the recipe card overlays. The simplest way would be to not use any recipe card overlays so that your recipe card would just be a rectangular piece Patriotic Picnic paper. Another alternative is to use recipe card overlay that is rectangular. The cartridge offers several options. I used an overlay that has a circular cutout on one side requiring formatting the recipe to avoid this spot. Another option is instead of printing the recipe on paper and then cutting to match overlays, you could simply cut a recipe car and stamp lines on it for handwriting recipes.

After punching three holes in all (cover, dividers, recipe cards), I put We R Memory Keepers blue eyelets (large) so that the holes would withstand use. After putting book in proper order, I strung all items tan twill ribbon from Scrapbooks Plue and tied in a knot and then a bow. You could also use rings but I liked the look of the ribbon.

It will be great in the future to have all the recipes I use for barbequing in one place so that I don’t need to look through a bunch of cookbooks. It would also make a nice gift for a housewarming or bridal shower.

Saige Barnett, who was visiting my house, for the 4th of July holiday helped me with this project. She did lots of assembling and holding.

Thursday, July 7, 2011

Easy Sports Pages using Page Map

Using the page map for this month (available at the store), I made a baseball-themed page to showcase pictures of my 8-year-old nephew throwing out the first pitch at an Arizona Diamondbacks game. I followed the page map reasonably closely except since all my pictures were vertical I replaced the four horizontal photos with three vertical ones.

The background is I Love America #IA404 paper. The flags for the banner were cut using the Cricut Celebrations cartridge and strung on Lime Twist Fly a Kite Soar Twine. I cut the letters using Sizzlits die and affixed them to the banner flags with Glossy Accents. I used two brads from the Bo Bunny Liberty Brads set to anchor the banner to the background. (I wrapped the twine around the brad a couple of times and then stuck the brad in the paper.)

The white pleated banner that divides the page horizonatally is a pre-pleated Bazzill paper strip. Called Perfectly Pleated, it reminded me of the bunting often used at ball parks for special games, especially when I added a scalloped piece of Bazzill Red Glitter paper.


For my journaling, I cut out a strip of tickets with Tim Holtz Sizzlits Ticket Strip die. I stamped them using blue ink and stamps from the Stampers Anonymous Tim Holtz Collection (Odds & Ends). Journaling in red continued the red, white and blue theme. I used glittered stars from the Bo Bunny Liberty Brads collections. Other were cut from Bazzill Glitter paper using Sixxiz dies and affixed with Glossy Accents. Although I used “I” throughout this blog, I must confess I had some help. I had some ten-year-old visitors over the holiday, who helped me. They loved using the Vagabond to cut out shapes. It is so simple to use that I just described it to them once and they cut out shapes while I did other things. Kale Barnett not only helped me finish this page, but he and his twin sister, Saige, made a page for their sports photos. As a result, I can share three variations of this month’s page map – a baseball one, a basketball one and a football one. These pages show how easy it is to use the page map as a guide and vary the page with your interests.

Scrapbooks Plus has lots of items (like the basketball brads Saige used) to make your sports page, no matter what your sport. If you don’t have a cutter or sports dies, there are plenty of items such as bats, helmets and balls that can replace those in these pages. There is also a wide variety of twine. I used the Lime Twist, which comes in a variety of colors, but Kale used the Sew Easy fancy floss (baker’s twine primary) which comes in 3-color packages.

Have fun making a page for the special athlete in your family!

Tuesday, June 7, 2011

Easy Father's Day Card


The adult dog with a crown with two pups on the Time of My Life paper shouted father to me so I used it to make a Father’s Day card. With this design as the main feature this card was finished in no time. I simply cut the paper at 6” vertically so I had a 12” x 6” strip that had the dogs in bottom half. I folded it at 6” to give me a 6” square card with the dogs on the front.

To embellish the card, I added aqua brads in the crown and placed an eyelet over every brown dot on the front left and bottom edges. The dots on the paper made it a snap to add the eyelets since there was no measuring. I stamped “Happy” with Tumbled Glass & Vintage Photo Distress Ink. The “Father’s Day” came from the Ladies & Gent sticker set.

To cover the inside of eyelets and brads, I put used a 12” x 6” piece of the Time of My Life paper on the inside of the card with the timepieces on the side. Alternatively, you could use a plain section of this paper. To make a special place for the message, I cut a silver frame from the Framed Beauty paper and affixed it on the inside. To finish, I tied a ribbon across the top.

This would be perfect for the father of two or better yet twins! It is so easy and fast, you’ve got plenty of time to get it done for Father’s Day – June 19th!

Tuesday, June 9, 2009

A Moment in Time...

It doesn't look like a .25 cent garage sale find, does it? I found the clock about a month ago and knew I would use it to create an altered project, but I was willing to wait for the right paper. And then Esther included the perfect stuff in this month's kit - the BEE-YU-TEE-FUL embossed, double-sided "A Kite Day Words" paper from Best Creations.

It is a pretty simple project. I removed the original picture insert from the clock face and used it as a pattern. I traced the circle onto a piece of vellum, so I could hold it over the patterned paper (and the picture) and pick out exactly which sections would work best. The shiny peacock blue ribbon was great to delineate the different sections.
.
As soon as I saw the embossed kites, I wanted to cut one out to travel around the clock on the minute hand. I attached it with a little red line tape - so you know it is going to be "flying high" for a long time! Tip: I bent the end of the minute hand up very slightly to make sure it would clear the embellishments. I checked it every few minutes for the first hour and made the adjustment when I noticed it had gotten stuck.

The circular green frame on the upper left of the clock face came off of the Flair Designs Summer Daze die cut sticker sheet and made it easy to add a simple title. I set it with eyelets using The Big Bite from Cropodile. I tell you, that tool has completely changed my relationship with eyelets. It is so easy to use. Debbie has one in the crop room at Scrapbooks Plus. You should try it out - you will definitely be using more eyelets on your projects, too!
.
Several good things about this project: it was really inexpensive - it was quick and easy - I can see myself changing the picture and the paper at a later date (maybe even seasonally)- and I think this would make an awesome gift for someone - because everyone needs to know what time it is!

Monday, June 1, 2009

"Sunshine" Single Page with Circles

I was completely inspired by all the cool circle designs printed on the Flair Summer Daze Words paper. It made for a really easy layout. I trimmed the top and left side of the paper to make it 11.5" x 11.5" and mounted it on some orange card stock. The pictures were cropped into circle shapes and mounted on more of that vibrant orange. I used some pop dots to vary the height of a couple of them and added a circular journaling block. If you look closely you will see 3 small eyelets on the bottom left and upper right of the page, just repeating the theme of orange circles! With all of the great words already printed on the page, any of which would make a perfect title for this page, I didn't feel the need to create an actual title. This is probably the fastest layout I have made in a long time - and I love it!