Showing posts with label Bo Bunny. Show all posts

Tuesday, February 5, 2013

Valentine's Day Cards

Valentine's Day Cards from BoBunny Love Letters
With Valentine’s Day nearly here, now is the time to get your Valentine’s Day cards made.  ScrapbooksPlus has some great papers for your projects. 

I especially loved BoBunny’s Love Letters line.  It has pinks and turquoises and just makes you happy to look at.  For my Valentine’s Day card, I used the Airmail paper, which has stamps on one side that are ohh so cute and the Love Letters, which has fun stripes.  I made a standard-sized horizontal card with these two papers.  For the trim and a handmade envelope, I used BoBunny Island Mist Vintage.  This turquoise-mottled paper (with gold polka dots on one side) made an envelope that popped, especially when I added a little trim and hearts from Love Letters.  (If you haven't checked out this line of paper, I encourage you to do so.  Similar to the BoBunny dots, this paper comes in a variety of colors  -- all vintage and all with gold dots on one side -- that can be used with all kinds of paper.  I love the browns and blues.)

I also made a little matchbook using the same papers as the card.  I added a Valentine's Day message so it could serve as a unique card. 

Stop by ScrapbooksPlus and check these out.  I am not sure that the picture does them justice.  While you’re there, you can get the supplies you need to make these.  You can also check out other Valentine's Day papers, such as Basic Grey's True Love, which includes little mini bottle caps!

ScrapbooksPlus will be offering a class to make these three items plus a Valentine’s Day exploding box.  Not only will you make these great items, but you’ll learn how to use a scoring board.  So whether you want to make t hese items or to learn how to use a scoring board, sign up now as space is limited by calling ScrapbooksPlus at 703.263.9503.  The class will be held on Saturday, February 9, 2013 from 10:30am – 2:30pm for a cost of $45.  I hope to see you there!   

Saturday, February 2, 2013

Exploding Box & Cards

Most people love to get handmade cards and gifts. I think it is especially nice for Valentine's Day.  On Saturday, February 9th Scrapbooks-Plus will offer a class in which you'll make four Valentine-themed items using a scoring board and BoBunny’s Love Letters line. 

You’ll make an exploding box that would be a great Valentines gift for one of your loves – grandmother, mother, daugter, husband.  It looks like a box but when you open it up out pops all kinds of spaces that are decorated.  You can add messages and pictures specific to the receipient. You could even include a gift card in one of the pockets.  If you have a child away at school one of these with gift cards would be most welcome. 

In addition, we’ll make a newly popular “matchbook,” which can serve the same purpose as a card, but is oh so cute. 

 A card and matching envelope will complete our projects. 

Although these projects are great and reason enough to take a class, but the real purpose of making these is to learn about a scoring board.  After making these item, you can decide whether this is a tool you need in your papercrafting tool box.  Whatever you decide, you’ll have completed some projects, learned how to make some new items and had a fun afternoon. 

This class is part of a series I'm teaching to share new tools and techniques so that we are continuing to expand our papercrafting skills.  I always feel that I make better decisions when I get to use somehting before I buy it and you'll definately gain that experience with this class.  And you'll have a lot of fun!

The class is on February 9, 2013  from 10:30am – 2:30pm with a cost of $45.   The items are on display at the store if you'd like to look at them up close.   To sign up stop by or call Scrapbooks Plus at
703-263-9503.   Space is limited.

Saturday, January 12, 2013

Displaying Travel Photos with BoBunny Snowy Day

The BoBunny Snowy Day line was designed and great for winter photos of all types and lots of the items include snowflakes, mittens and winter messages, but that doesn’t mean it isn’t great for other photos.  I loved the rich colors and was eager to use the papers, but I didn’t have winter photos of any type.  I did have lots of travel photos.  I decided that the blues, browns and golds would be perfect for a day in Briare, France, a lovely city on the Loire River. 

BoBunny has a wonderful line of dots and solids that cooridinate well with specific lines.   I used  the Slate Dot and Plum Dot in this layout.  The solid side of the Plum Dots was perfect for my pictures.  For Trim on top and bottom, I used the Slate Dot and punched it.  The Snowy Day Stripes had colors that I loved and only a couple of stripes related to snow so I just used this paper as accents and didn’t use the “snow” lines.  Some of the tags were without snowy messages so I used these.  When taken out of the “snowy” situation, the snowflakes on brads and papers, look like designs or the sun. 
                                                                                                                                                                                                                                                       
As with many of my travel layouts, I was challenged as I had lots of pictures I wanted to use and quite frankly I thought journaling would take away from the beauty of the layout.  My solution – hidden journaling.   The tab on the left with a brad is actually the pull for a long piece of paper that contains the story of this day.  Result:  The memories are preserved and the beauty of the pictures isn't  marred by text.  

As usual with BoBunny, this line has great chipboard, brads, buttons and jewels.  I couldn’t use them all in this layout, but I sure wanted to.  So if you ignored this month’s line because you didn’t think you had snow pictures, I encourage you to head to ScrapbooksPlus and check out these papers. 

Tuesday, January 1, 2013

BoBunny Snowy Day Line

The Design Team used BoBunny’s Snowy Day line to create its January projects.  As the name conveys, the papers, journaling blocks, tags and embellishements have a snow theme.  Lots of snowflakes, mittens and snow sayings, such as "let it snow."   Typical of BoBunny, the line includes brads, cute buttons,  jewels, die cuts and chipboard shapes. 

The rich hues of blues,  browns, plums and golds provide great backgrounds for winter pictures. The Design Team added some of the BoBunny cooridinating solid papers with dots on the reverse side.  Slate Dots, Plum Dots and Curry Dots papers go especially well with the Snowy Day line  

Although the papers are perfect for snow pictures, the color combination is great for other pictures as well.  As an example of the versatility,  I made two layouts of travel pictures, without any snow in them.  Many of the prints work for a variety of pictures. 

I can’t wait to see what the Design Team has made with this versatile line.  You can check out the Design Team’s projects at ScrapbooksPlus.  Feel free to take pictures of those that give you ideas for your layouts.  While you're there you can pick up the supplies you’ll need to make some great layouts. Or you can sign up for one of January's crops and usethe Design Team Wall for ideas create your own layouts. 

Saturday, June 30, 2012

Thanks A Bunch Card


Although we all love receiving cards,  we just don’t send them often enough.  Wen I first saw, the Mason (or if you prefer Ball) Jar stamp with the message “thanks a bunch” I knew I wanted to make a thank you card with a bunch of flowers.  The BoBunny Alora line of paper made this easy.  


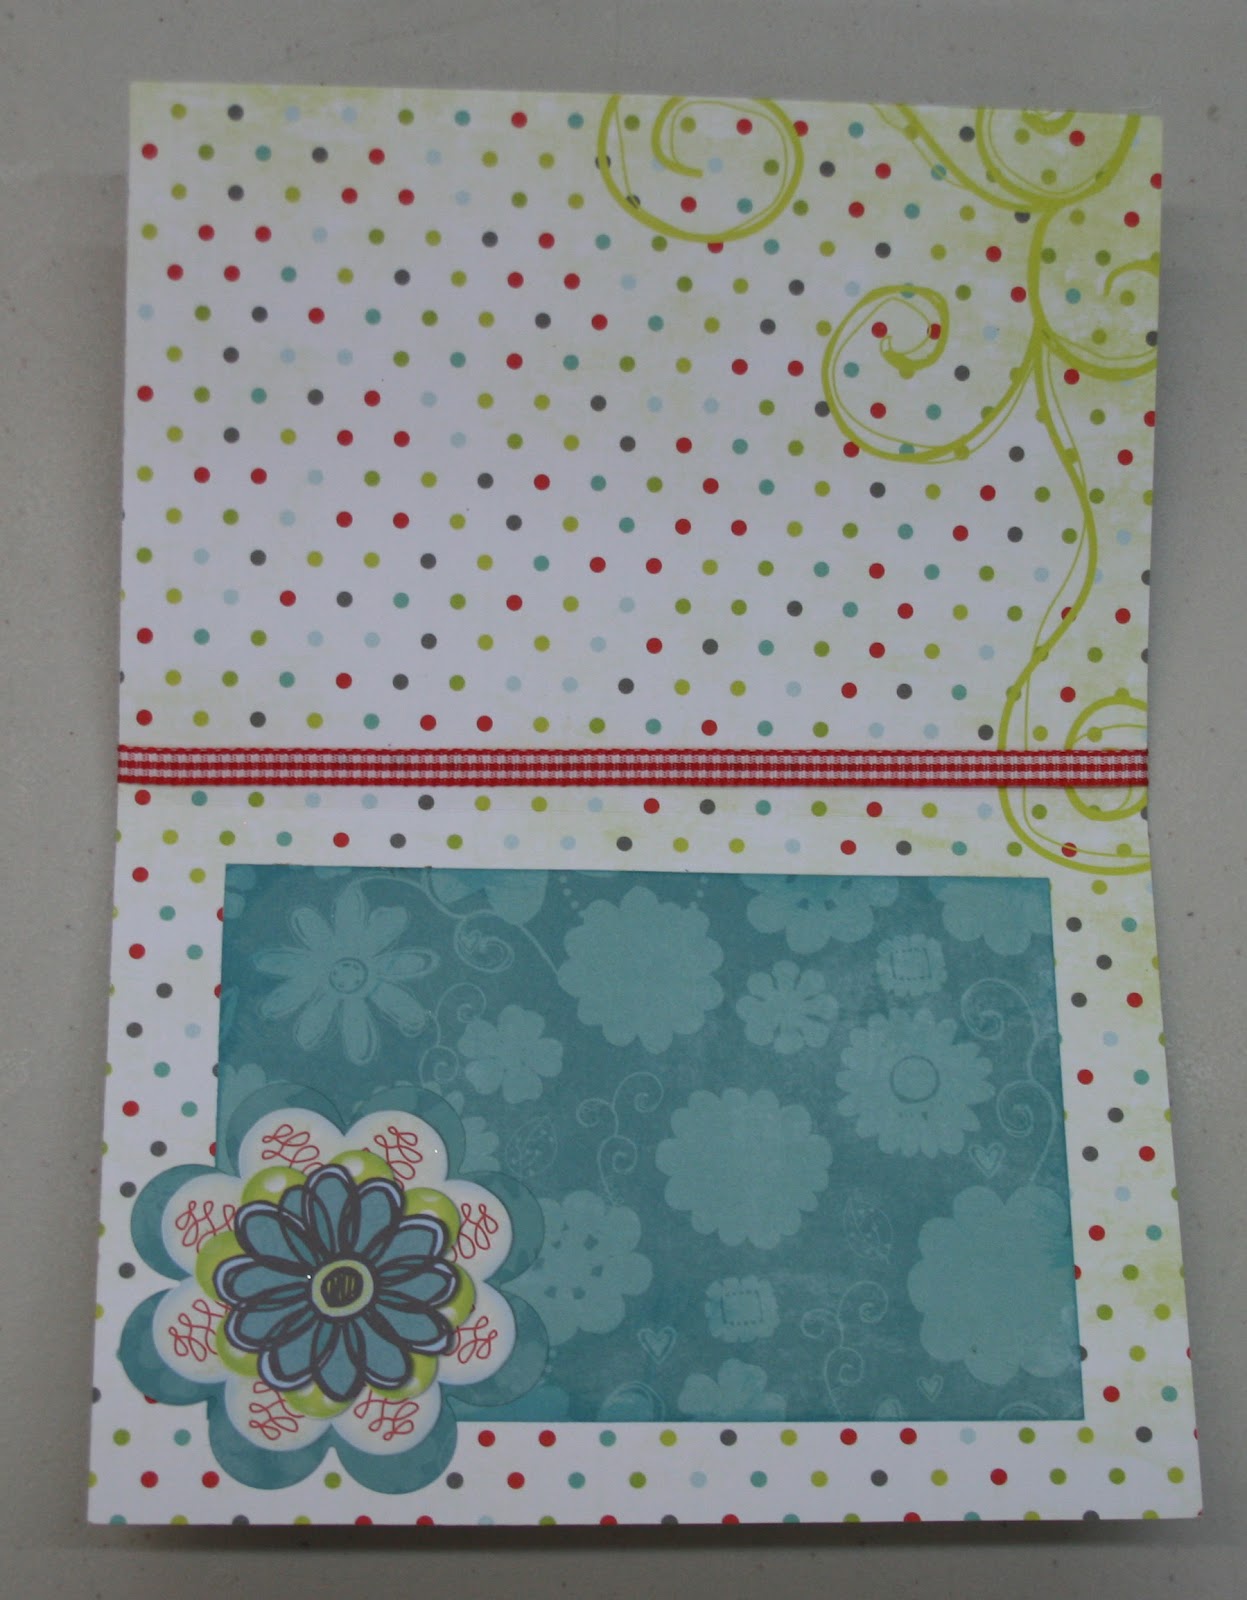
I used the Alora Stitches paper to make the card base.  (This meant the inside is polka dots of various colors with a cute flourish in the corner if you cut it out just so.)  I cut a rectangle slightly smaller than the rectamge; from the red side of Alora Wish.  I cut a square of four flowers from Alora Cut Outs.  


I stamped the Mason jar with VersaMark and embossed with Stampendous shabby green embossing powder.  (This embossing powder is great as it has different types of flakes so you get a much more interesting texture than with solid embossing powder.  It comes in several colors so check it out at Scrapbooks Plus.)  To add a little more, I used an Inkssentials Embossing pen and the same embossing powder to make the centers of the flowers match the jar.  (To use the pen, you simply highlight the area you want embossed and then emboss as usual.  You can emboss writing or use to outline as I did.)   I stamped the message in the jar with black ink.  I tied a ribbon around the top of the card.

 On the inside I affixed a rectangle of Alora Dimples to make it easier to include a message and added a couple of flowers from the Alora Combo Stickers.

Saturday, June 23, 2012

Make a Wish!

With the Alora paper, it is about as easy to make a page as to make a wish.   I chose the Alora Stitches' polka dots for an a family birthday layout.  I cut a strip that said “Make a Wish” from Alora Wish for my title and inked the strip and the background with Barn Door Distress Ink.  After affixing the strip to the background, I added two horizontal  (3 ½” x 5”) and a vertical (5 x 3 ½”) photos in a grid-type layout.   All that remainded was to add a few embellishments and journaling.  I used the “Love” and “Wish” boxes from the Alora Cutouts for Journaling.  I added the date under the title with Alora Tiny Type Stickers.  I used a couple of flowers from the Alora Combo Stickers.  Strips of jewels frame the top of the photos and large jewels dot the “I” in the title and form the center of the circle.  That’s all there is to it!

Thursday, June 14, 2012

Using the Alora Line to Make A Thank You Book

I warned you last month that after I found out how great it was to make a book with coordinated papers and embellishments that my altered item might be a book every month.  Two months doesn’t always make, but the BoBunny Alora line had such cute items I couldn’t resist making a book as a thank you gift.  My aunt included three extra Moms, who weren’t going to be with their children on Mother’s Day,  in the celebration that she was having with her kids.   A book with some pictures of each Mom seemed a great way to say thank you.

And since this was a thank you for inviting us to her home, a house was the perfect shape.   I made the book with a house die that is available for you to use at ScrapbooksPlus.  It is just the right size for a book.  I made both covers from chipboard and then covered them with Alora papers.  One thing I love about making your own book shape rather than using a purchased one is that you can cut the papers to cover the pages with the same die.  Oh so easy!  For the inside pages, I simply glued two pages together.  Even though the Alora papers are double-sided, I still glued them together as I didn’t think a single-sheet was quite sturdy enough.  Another alternative is to make a chipboard base for each page.  This would make your book much more durable.  (One thing I would do differently is to cut off the edge of the roof on the side that I am binding together for the book as it catches.  If you just use your trimmer to cut that side straight the pages will turn easier.  I plan on doing this when I pick mine up.)  

I encourage you to take a look at the larger dies available at ScrapbooksPlus for you to use.  You can use them while you’re at a crop at no charge.  During non-crop hours, use of the room and all the tools (including dies) is free if you spend $5.00 .  You can buy the chipboard you need at the store.  Another advantage of cutting your book at the store is you only buy what you need.

I punched holes for the ribbon to hold the book together with my Crop-a-dile and inserted We R Memory Keepers Eyelets.  Not only do they keep the holes from ripping, but they add a bling.   The turquoise ribbon that I used to hold the book together is a bit shimmery as well.

On the front and back cover, I stamped “thanks a bunch” and a heart inside a jar with a stamp available at Scrapbooks Plus.  (The stamp includes some other cute items you can include inside the jar.)   On the back cover, I wrote below the jar what the “thanks” was for with a pen, making the book like a thank you card.  I decorated the covers and pages using letters, borders and designs from ComboStickers, Tiny Type Cardstock Stickers, Alora Brads and Alora Jewels.  The Alora Jewels are practical because they include rhinestones and pearls in a variety of sizes. I love using them for flower centers.  On one page, I used a flower border sticker and put a jewel inside every flower.  I found two more  great ribbons at ScrapbooksPlus to use as accents in the book.   And I cut out Alora papers in a variety of shapes to add to the pages and serve as photo mats.  I especially like the alarm clock and fan cut with the Tim Holtz Movers & Shapers dies.

I think my aunt is going to like this a lot better than the usual thank you note. 

And as I’ve discovered, if you simply buy paper and embellishments from the same line, you can make a book quickly.   You can choose from pre-made shapes of chipboard and cover them with paper, make your own shapes as I did or simply use a square or rectangle shape.  Whatever shape you choose,  I’m confident the recipient will be happy.


Tuesday, June 12, 2012

Mother's Day Layout with Recipes

I created a 2-page layout to capture a special Mother’s Day that I spent with my aunt and several other mothers.  It was a potluck where everyone brought something so I thought it would be nice to include a picture of all the mothers along with the  recipes for the item each brought.  

The background is Alora Squiggles  I chose one of the less busy backfounds since I was going to have so many pictures.  I used one of the Cut Outs to make a frame for the title.  I cut off the two outer frames so it would fit my page better and used the Combo Stickers for the title.

A holder for each person’s recipe was made from Alora Wish and affixed to the background with  1/8” Wondertape so the recipe cards would fit and the tape would hold as the cards are pulled in and out.  I made the recipe cards by cutting rectangles from Blue Alora Dimples and  cutting the top with the Sizzix Tim Holtz on the Edge File Folder die.  (This die is great to make all kinds of file folders of any size you want.)   Each recipe can then be printed on white paper and glued to the recipe card. 

I put a picture of a Mom on each recipe holder and their name (made with a labelmaker) on each recipe card.  Some of the pictures were made with a circle punch and a slightly larger circle punch made the photo mat.  To call attention to the hostess I used a chipboard frame for her picture.  Each recipe holder was decorated  with a variety of Alora items – chipboard, stickers, brads, journaling cards and jewels.  I also used three different Bazzill Half the Edge strips.  These come in a package of 2 each of 10 different designs in a variety of colors.

I think with this page I'll remember the special day that my aunt hosted so that all the mothers she knew had a special Mother's Day.

Tuesday, June 5, 2012

Strawberry Fields in Alora

Our recent strawberry picking photos seemed perfect for the Alora papers by BoBunny that the Design Team is using this month. It was a happy, fun day spent with kids and grandparents and an unusual weekend where we didn't have 20 things going on! The happy, fun Alora paper with it's teal, lime green, light blue and bright red were perfect to offset my berry picking kids.  I have recently spent a lot of time scrapping 4x6 photos without cropping but while I stuck to my 4" height on my photos, I did crop the length of several to fit my layout design.  Recently I've been simplifying my scrapbooking by using uniform sized photos.  I've been able to quickly design my layouts and enjoy the process more. I've also been buying papers that have matching accessories.  It really makes my scrapbooking easy and fun.  Check out all the great accessories that Scrapbooks-Plus has for the Alora line!

Thursday, April 26, 2012

Memories Make & Take


Make & Take April 25th
Create a beautiful  layout to showcase those wonderful family or travel memories with this year's Make and Take.

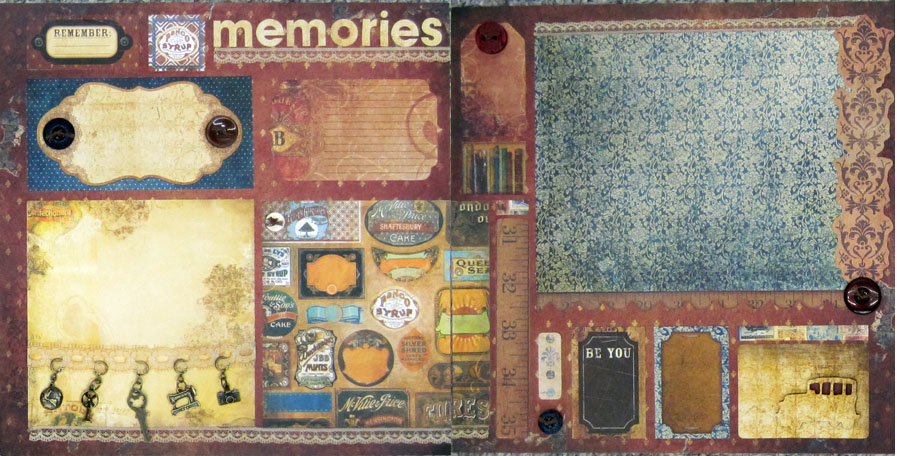
When I say the new BoBunny Weekend Market line I fell in love with it.  I especially loved the tiny charms—a sewing machine, globe, camera, key and fan.  I was thinking of a variety of different things I could use them for.  A card for my seamstress sister with the sewing machine.  A page for my travel pictues with the globe.  I had at least one idea for every charm.  

Instead, I designed this week's Make and Take using all five charms.  Combining the charms, lace and the BoBunny papers created a antique looking page that is great for family, travel or even food memories.  

It is designed with room for pictures of a variety of sizes since if you’re like me, my older pictures aren’t always a standard size.  And even if they are, I sometimes want to cut something out of the picture.  With matching stickers, buttons and diecuts, making an interesting page is easy as can be.  The free element is a card with a Tim Holtz Jalopy cut out. 

Head to ScrapbooksPlus for everything you need to make this page.  Buy a couple of extra pieces of paper and use the leftovers to create another great layout. 

Monday, April 23, 2012

Memo Board Class

Spend a fun afternoon creating a unique magnetic memo board and magnets to match.  You can use the memo boardfor notes, calendars, scrapbook ideas or pictures that make you happy.   I’m going to use mine to hold all my Sizzix Movers & Shapers  dies so  I’ll be able to see them all at once as I plan a scrapbook page.

During the class you'll learn techniques that you can use to make other memo boards or in other papercrafting projects.  For example, you'll learn how to make flowers with ribbon and glubers.  We'll use a variety of materials. 

You don’t need a lot of special tools so once you learn the techniques you’ll be able to make memo boards for children’s rooms, gifts, your office.You are limited only by the available scrapbook paper. Let’s face it there is always more scrapbook paper that you’d love to use so join us for a fun and productive afternoon. 

The class is Sunday May 6th from 1:00-4:00pm.   To sign up, call ScrapbooksPlus at 703.263.9503.  Better yet stop by the store and you can see all the new items and sign up while you are there. 

Friday, September 23, 2011

Basic Grey Papers & Flowers for Special Memory

I had a special picture of my cousins from our annual family reunion.  As with all pictures with a lot of people, it is hard to know what to do with them.  I know from trying to sort out old pictures of my Mom’s that it is important to name the people because even though today we may be able to identify them all, 50 years from now people will say who is that?

Rather than simply putting boring labels at the bottom, I decided to put each person’s name on a flower stem. (The stems were cut from Oxford Deans List. The person’s name was written on it with a pen.)  I then used flowers (made in a variety of ways) to identify to which family each person belonged and where in the picture they are.  Let me explain.

My sister and I are flowers made from Tim Holtz Sizzix Tattered Flower die cut from Basic Grey paper.   (Both flowers are the same; the die contains four flowers.)  My Uncle Dick’s kids are also represented by flowers made using the Tim Holtz Sizzix Tattered Flower die, but I used a different paper and flower.   All my Aunt Joann’s kids are all Bazzill Paper Flowers 1.5 Primula French Vanilla.  (These flowers are great and ScrapbooksPlus has them in  lots of fun colors and different sizes.) My Aunt Marilyn’s kids are all blue BoBunny buttons and Uncle Tom’s are tan BoBunny Buttons.   (Smaller buttons the centers of  the flowers.)  I tied a knot in each of the buttons with blue sewing floss.  The flowers are placed vertically and horizontally to correspond to where the person is in the picture.  For example, my cousin Tommy is in the back row and the furthest to the left so his flower is one of the tallest and on the left side of the page.
I also used symbolism to enhance the meaning of the page.   For example, the #19 represents the total number of cousins.  It is from the Pink Paislee Daily Junque Mini Note & Label set, which contains 43 embellishments.  l  also used two cards from this set on the right side to provide balance.  In the upper right, I used a Kaisercraft Wood Flourishes leave to  provide two leaves to represent the two cousins who are no longer with us.  

This page was a lot of fun to make and will provide special memoires for years to come.

Wednesday, September 14, 2011

Making Holiday Tags with Oxford Paper

I know it is only September but if we are going to hand make things for the holidays now is the time to do it so we have time to enjoy the holidays.   I liked the Oxford paper, but didn’t have any  school related pictures to scrap.  The burgundy and green colors made me think of Christmas so I made extra large tags.  These could be used in several ways --  for those really big boxes that a small tag just doesn’t do the trick, on cards or as decorations.  Another thing I love about making your own tags is that you can mix and match what you have and they all coordinate.

Reindeer
I cut the tag and a cooridinating shadow tag with the Cricut using Oxford paper.   Christmas needs a little shine in my view so I spritzed both the tag and shadow tag with Sun Sisters Glimmer Mist.  I cut a tree and painted it with Dirty Martini Glimmer Glam.   Using plain cardstock I cut out a reindeer and a star for the top of the tree..  I embossed it three times with gold embossing powder.  I added BoBunny Zoology Jewels for eye and collar.  You could also use jewels or buttons to decorate the tree. Tie with a ribbon and you are done.  You could make several of these in no time at all.

Snowman
The approach was similar to the reindeer tag except I used Silver Glimmer Mist on the tag, shadow and the snowman.  I  left the tree plain.  I embossed the snowman’s hat.  The eyes and buttons same from the Bo Bunny Jewel set.  The Bo Bunny Father Christmas buttons would also be great.  There are hearts in the set that would be adorable on a snowman.  Again, add a ribbon and you are done.  Scrapbooks Plus has a great supply of ribbon. 


Since I’m in France now, I may decide to carry the French theme all the way to Christmas and make some holiday tags with the Eiffel Tower!  Another idea is to add a picture of that special person.  That’s the advantage of making your own tags – they can be uniquely yours.

Thursday, July 7, 2011

Easy Sports Pages using Page Map

Using the page map for this month (available at the store), I made a baseball-themed page to showcase pictures of my 8-year-old nephew throwing out the first pitch at an Arizona Diamondbacks game. I followed the page map reasonably closely except since all my pictures were vertical I replaced the four horizontal photos with three vertical ones.

The background is I Love America #IA404 paper. The flags for the banner were cut using the Cricut Celebrations cartridge and strung on Lime Twist Fly a Kite Soar Twine. I cut the letters using Sizzlits die and affixed them to the banner flags with Glossy Accents. I used two brads from the Bo Bunny Liberty Brads set to anchor the banner to the background. (I wrapped the twine around the brad a couple of times and then stuck the brad in the paper.)

The white pleated banner that divides the page horizonatally is a pre-pleated Bazzill paper strip. Called Perfectly Pleated, it reminded me of the bunting often used at ball parks for special games, especially when I added a scalloped piece of Bazzill Red Glitter paper.


For my journaling, I cut out a strip of tickets with Tim Holtz Sizzlits Ticket Strip die. I stamped them using blue ink and stamps from the Stampers Anonymous Tim Holtz Collection (Odds & Ends). Journaling in red continued the red, white and blue theme. I used glittered stars from the Bo Bunny Liberty Brads collections. Other were cut from Bazzill Glitter paper using Sixxiz dies and affixed with Glossy Accents. Although I used “I” throughout this blog, I must confess I had some help. I had some ten-year-old visitors over the holiday, who helped me. They loved using the Vagabond to cut out shapes. It is so simple to use that I just described it to them once and they cut out shapes while I did other things. Kale Barnett not only helped me finish this page, but he and his twin sister, Saige, made a page for their sports photos. As a result, I can share three variations of this month’s page map – a baseball one, a basketball one and a football one. These pages show how easy it is to use the page map as a guide and vary the page with your interests.

Scrapbooks Plus has lots of items (like the basketball brads Saige used) to make your sports page, no matter what your sport. If you don’t have a cutter or sports dies, there are plenty of items such as bats, helmets and balls that can replace those in these pages. There is also a wide variety of twine. I used the Lime Twist, which comes in a variety of colors, but Kale used the Sew Easy fancy floss (baker’s twine primary) which comes in 3-color packages.

Have fun making a page for the special athlete in your family!

Thursday, June 23, 2011

Using Masks & Chalkboard Spray


Although much of this month’s paper screamed family, the Groomed Traveler said travel to me so I had to make my 2-page layout a travel one. I chose to scrapbook an afternoon I spent at the Duomo Museum in Florence. A wonderful museum that is often at the bottom of the list in a city filled with great museums but on my third trip to Florence, I finally made it.

For the right background, I used Groomed Traveler (turquoise side). On the left side, I used a plain piece of cardstock for the base. I cut a piece of Groomed Traveler paper into two pieces. I used the larger piece (12” x 7”) on the left side. The square design made a perfect frame for a picture of a Michelangelo Pieta. (The larger pictures are framed with a tiny frame of the solid side of BoBunny Coffee Dot paper. ) I used the turquoise side of the leftover piece for the other side of the background.

Before applying the turquoise piece to the background, I used Tattered Angels Chalkboard Decadence and the Tattered Angels compass stencil to design and interest to the background. Using the stencil as both a stencil and and a stamp gave different looks. To do this, I placed the stencil on the background and sprayed around it leaving a turquoise compass when I removed the stencil. Instead of wiping the stencil off, I immediately turned it over and used it to stamp the paper at the top and bottom to create brown compasses. I added another compass on the right background but did have to spray the stencil again to have enough ink for the third stamp. I also stamped a globe with Vintage Photo Distress Ink on the right background.

For the title, I used Tim Holtz idea-ology mask of Ransom letters to spell “Duomo” on a piece of Time of My Life paper. I then sprayed it well with Chalkboard Decadence. I love the result. I’ve had these masks forever and just never used them. Stickers from the Ladies & Gent set are used for the remainder of the title.

For a journaling block, I printed the journaling on Time of My Life paper. I cut the box out and used the Tim Holtz Sizzix Bracket Die to make the top and bottom edges more interesting. I inked the block first with Tumbled Glass Distress Ink and then with Vintage Photo Distress Ink. The journaling block and other accents were made from Time of My Life paper, with some using the cream side and some the green side. For picture titles and other accents, I made the same way except the writing or stickers were added after inking.

Monday, May 30, 2011

Glimmer Mist & Etched Glass Add Variety to Your Page


This page used lots of fun scrapbooking techniques and displays 6 pictures of the City Botanical Garden in Brisbane, Australia. The pictures include green, pink and orange, so the Vicki B papers were perfect.

I picked my 6 best pictures from a day at the City Botanical Garden in Brisbane, Australia and printed small ones (2 ½” x 3 1/4”) pictures. This was really easy in Windows Photo Gallery. I just selected the pictures I wanted to print from the more than 100 I took and chose wallet size pictures. I printed on 8 ½” x 11” photo paper. (Up to 9 wallet sized pictures can be printed on same page.)

I matted the pictures on a piece of Loverly (tan side) leaving a ¼” margin on 3 sides and a ¾” margin on the right side. To make the paper a little more interesting and to complement the pictures and other papers better, I spritzed it with Peach Delight Glimmer Mist. I added a slightly larger (9 ½” x 8 7/8”) mat of Florilicious. This was also Glimmer Misted with the Peach Delight. A border from the sticker set was added to the right side of the mat after spraying. I added a third mat of Bazzillion (brown side) 10” x 9 3/8”.

The flowers on the Florilicious paper are gorgeous so I cut some of them out to use as embellishments. After cutting out the flowers, I sprayed them lightly with Peach Delight Glimmer Mist. I affixed them to the page and then cut along the edge of the paper so that only part of each flower is used.

On the left side of the paper, I added a strip of Bazzillion (brown side) to provide a base for some more decorations.

To go with my garden theme, I embossed the glass squares with butterflies. This technique is easy and fun. Simply stamp your image with VersaMark or Perfect Medium on the frosted side of the glass square. Emboss with clear Embossing powder as usual and you have the appearance of etched glass. To provide a frame, I covered each piece of glass with a piece of Florilicious with a window cut out. (I used Sizzix Frame, Slide Mounts & Coin Holder Die, but you could just as easily just cut out a square the size of the glass and then punch out a square or circle.) These were also glimmer misted so that they match the flowers on the page. I placed one at the top and one at the bottom of the brown strip. Flora Doodles Earthtone butterflies in between the glass squares complete the border.

A box from the Vicki B. Cut Outs provides the space for the page title. The title is created using letters from the sticker set. The Stop and Smell the Flowers message from the Vicki B. Cut outs reminded me of the lovely afternoon that I simply walked around Brisbane’s City Botanical Gardens.

Monday, May 23, 2011

Using Big Letters – Beautiful Bermuda

The extra large chipboard letters at Scrapbooks Plus attracted my interest every time I went in the store. (They are available in cream, burgundy and black for only 69 cents.) So as Designer of the Month, I included a letter in the kit to see some ways to use the letters.

I originally planned to use my “B” for a family page but as I worked on my projects a new idea arose. The pink side of the Perky paper reminded me of the pink Bermuda sand and the pictures I had not scrapped from a trip to Bermuda. As I looked at my pictures, “Beautiful Bermuda” popped into my head and I had a title and a use for my “B.” To go with the theme and the colors of the page, I sprayed the “B” with Cadillac Pink Glimmer Mist making it a solid, shinny pink. To make it more interesting, I used the green vines from the Vicki B. rubon set to add accents. This also brings together the pink with the green background. The “Beautiful” above the “B” and “Bermuda” below came from the Vicki B. Sticker set.

I placed the pictures in a grid on a photomat made from Perky paper (pink side) and added a frame from Bazzillion paper (brown side). Some pictures are on each side of the 2-page layout. This didn’t provide enough attention to the pictures so I added a corner accent in each corner created from the rubon set. The flowers in the center are also from the Vicki B. rubon set. They are placed so that each is partially on both pages and draw your eye to the center of the picture display. Tape the pages together on reverse side with painter’s tape to assure that they don’t move while you work and apply the rubons as usual. Once affixed you can simply pull the pages apart and the rubons separate with the design fitting together perfectly when you place the pages together. I love this trick!

To add a little more design, I covered a chipboard flourish with Bazzillion paper (brown side) and also cut two smaller flourishes ones from the same paper. (The dies for these are available in the crop room.) To add interest, I sprayed the flourishes with Decadence Chalkboard. The effect of this is hard to see in the picture but when you look at the page directly it adds a benefit.

Without the “B” this page would not be nearly as attractive. Check out the letters. You can use all kinds of scrapbooking techniques on them to make them fit your page. How else can you add this kind of focus on a page for only 69 cents?

Saturday, May 14, 2011

A Set of Cards


I made this set of coordinated cards using the Vicki B. paper. Each card is similar in terms of basic design and theme but different papers, stamps and a variety of ribbons colors are used to make each unique. In my May 7th blog, I shared how to make the coordinating box for storing the cards.

For each card, you’ll need:
•A 8 ½” x 6” base (Any cardstock will work as the entire front of the card is covered. I used Bazzill white as it is easy to write on and provides a strong base for all the added items.)
•A 4 ¼” square from Perky
•A 4 ¼” x 6” rectangle from a coordinating pattern. (For my three cards, I used Stripes, Perky (floral side) and Vicki B. paper.)
Fold the base in half so that you have a 4 ½” x 6” card.

Affix 4 ¼” x 6” piece to the front of the base.

On the pink side of the Perky square, stamp a design with VersaMark or Perfect Medium. On each card, I used some variety of a stamps so that each card would be unique but still coordinate with the others and my box, which has a large butterfly design and a Flora Doodle butterfly. Since my butterflies were small I used several stamps on each card. Emboss the design with white embossing powder. Ink edges with Spun Sugar Distress Ink. Affix a ribbon horizontally across the square near the top. For my cards, I used a variety of colors – pink, green and orange. Affix rick rack down each side of the square.

Tie small bow with same ribbon as used on the square. Emboss a chipboard key with white embossing powder on both sides. Put two Tim Holtz Idea-ology jump rings together. Put one end of the jump ring chain through the top holes in the chipboard key and put the other end through a back loop of the bow. Affix bow to the card.

Select messages from Vicki B. Sticker sheet and attach. Alternatively, you could simply stamp messages on the card.

By using matching colors and papers, you can create a set of coordinated cards. Put them in a coordinated box and they make a great gift. (The instructions for the box were provided in my May 7, 2011 blog.) Using a variety of papers, stamps and embellishments you could make a unique set of cards specially designed for the recipient.For example, you could use the KaiserCraft buggy to decorate the box and decorate each card with the KaiserCraft diaper pins to make thank you cards for baby gifts or cards to enclose pictures to send to Grandma.

Saturday, May 7, 2011

Cards in a Box


I made a set of three coordinated cards and a box to keep them in using the cheerful floral prints of the Vicki B. line. To make the box, I used Vicki B. and Loverly paper. I decorated the box with rick rack, ribbon and a variety of embellishments. Making the box is easy and it provides an attractive place to store cards or a gift box if you choose to make a gift of the cards. Of course, the technique allows you to make a box for anything you want. Once you learn the technique, you can make boxes for anything that you want. The instructions for making the box follow. In my May 14th blog, I’ll describe how to make the coordinating cards.

To make the bottom of the box, cut a 9 ¼” x 7 ½” piece of Loverly paper. Score 1 ½” from the edge completely around the piece. On the two short ends make a cut from the edge of the paper to the score line (for a total of four cuts). Fold along the score lines, putting the tabs on the inside and glue. To make the top, repeat the process with a 8 ½” x 6 ¾” piece of Vicki B. paper and score 1” from the edge all around. I inked the box top with Spun Sugar Distress Ink.

For the decoration on the side of the box, cut two pieces of plain white rick rack slightly larger than that needed to go completely around the box. Spray one with Key Lime Glimmer Mist to make it green. Once dry, weave the green and white rick rack to create a close knit ribbon. Affix to the side rim of the box top.

Cut a 4 ¼” square piece of Perky. Ink edges with Spun Sugar Distress Ink. Stamp a design that matches the one you intend to put on cards with VersaMark or Perfect Medium. I used a large butterfly (and my cards each have a butterfly image as well). Emboss the design with white embossing powder. Affix square to the top of the box.

Add three Tim Holtz idea-ology Jump Rings to one of the holes in a KaiserCraft wooden key. (You can paint or ink the key if you like. I used mine as it came from package.) Affix the key to the box. Place three Vicki B. green pearl jewels to the body of a Flora Doodle butterfly and place on box. Add a bow made with pink ribbon with swirls, three Vicki B. green pearl jewels and three Bazzill Twisted Flowers. You can also add stickers from the Vicki B. sticker set. I used the one saying “Flowers are love’s truest language.”

Next week, I’ll provide the instructions for the coordinating cards.

Sunday, May 1, 2011

New Design Team Projects & Page Map Available


It’s May 1st and that means today the new Design Team projects for May are unveiled. This month’s paper will appeal to all. You can choose flowers or modern graphic designs in shades of pink, orange, green and brown. Each paper in BoBunny’s Vicki B line has a print side and a near solid side, which has depth from subtle design. Using the matching items you can create gorgeous pages in a snap. The sticker set includes letters for titles or messages, borders and some fun decorations. Decorate your pages with the flowers and borders rubons. Add bling with the jewels and trinkets. The Design Team is also using shapes made from a couple of the Tin Holtz Sizzix dies, a KAISERCRAFT wooden key, glass squares, FloraDoodles butterflies and a very large chipboard letter.

Visit the store to check out the new projects and get ideas for the fabulous scrapbook pages, cards and altered items that you can make. Take a picture of the ones you like, get this month's page map, pick up the paper and supplies you need and you’ll be well on your way to completing some great new projects.