Sunday, April 15, 2012
You Make Me Happy
Echo Park has wonderful sticker sheets for their paper collections. It makes cardmaking really easy with preprinted sentiments that you can use. I chose this sticker and layered it with three of the papers from the line. I added some green ribbon and a couple feathers from my stash along with a Kaisercraft flower. To tie it together I put two little black pieces of bling to the left of the sentiment.
Saturday, April 14, 2012
A Graceful Holder for Your Magazines, Patterns or Papers
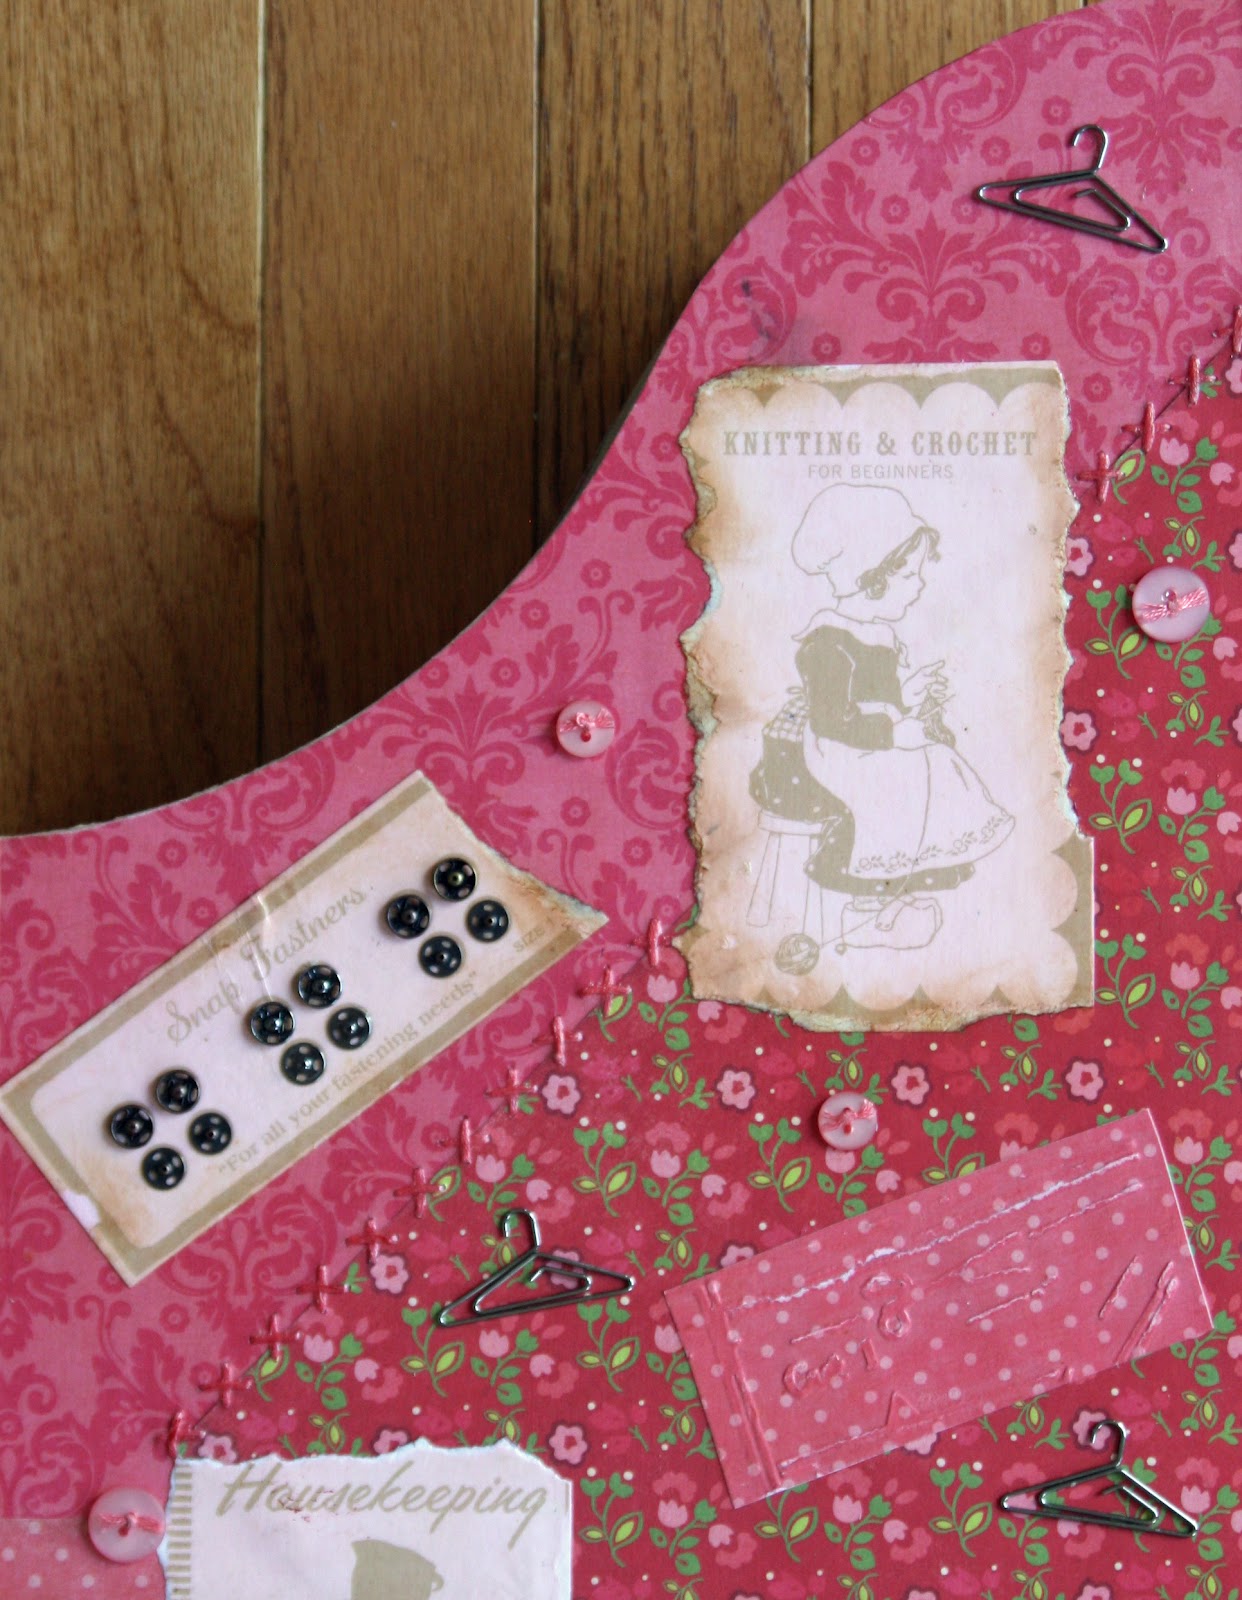
For years, I’ve had my knitting and crocheting books in an unfinished wood magazine holder but now I have a charming decorated holder using the This & That Graceful line from Echo Park and a few embellishments.
To do this, you use the basic decoupaging technique. If you haven’t done this, you simply affix paper to the wood object using Decou-Paige, Mod Podge, or any waterbase sealer-glue-finish product. To make sure it is flattened, I roll brayer over each piece I add a few times. Once you have the entire object covered, you add a coat or two on top. It only needs to dry about 20 minutes between coats. You can glue embellishments on before or after the coats of finish. 

Here’s the specifics of what I did. I painted the inside with a light color of acrylic paint before I began. (Alternatively, you could cover the inside with paper.) Then I covered the outside with coordinating colors of coordinating paper. I used a variety of sizes and shapes, scalloping the edges of some; tearing the edges of others. Since I am going to use the magazine holder for needlecrafts, I stitched some of the pieces using the Sew Easy tools before affixing them to the holder. It puts the holes in the paper for you so that they are all even in the pattern you choose. Then you sew them with coordinating thread. I used a couple of different stitches.
Once you have the base cover you can add embellishments and decorations. The rectangles on the other side of the Red Floral were perfect for this holder since referred to buttons, lace, snaps and knitting. I tore them and inked them. With the exception of the “Lace,” I affixed them to the holder prior to adding embellishments. On the one that said “Lace” I added some lace that I had inked with Scattered Straw Distress Ink. (I put this one before coating with finish so that the lace would be protected from wear and tear. I cut out letters for my title using Tim Holtz Sizzix Market Sizzlets Decorative Strip die. After adding some decorative stickers from the This and That line, I put 2 coats of finish all over the outside of the holder.
After it dried, I added Tim Holtz Hangar Clips, Tim Holtz snaps and buttons with thread tied through the holes. I affixed these with Glossy Accents.
On the narrow sides of the holder, I added KaiserCraft Wooden Doilies. I affixed them to each other with Glossy Accents, added a small circle of paper and buttons.
This is a great project to make during a crop. You can complete it in one evening. By doing it a crop, you can pick up just what you need as you go.
Labels:
altered box,
Border punches,
charms,
Glossy Accent,
sewing,
Tim Holtz
Friday, April 13, 2012
Butterfly Button Card
I don't know about you but I love adding a little vintage feel to my work from time to time. I cut out the Button Card from the Echo Park This and That paper kit and used it for my card this month. This paper has a fun modern feel with with the pretty spring-like colors but has a vintage twist. I used the button card to highlight some fun buttons from my stash that coordinate with the colors.
I hope this paper inspires you to create something fun that you love!!
Thursday, April 12, 2012
Creating Cards with Echo Park Journaling Cards
The Echo Park This and That Graceful line is great for making cards. So is the Charming line for that matter. And you can even mix and match between the lines. One 12” x 12” page consists of 12 journaling cards. Simply select one of the journaling cards and make the card from one of the papers. Decorate with some coordinating paper scraps. Add some embellishments and presto you have a card.
I started with the “Flower Garden” journaling card. I put it on a piece of Yardsticks (newsprint side) that was slightly larger than the journaling card on three sides and about ¾” bigger on the bottom. I used three of the new Bazzill flowers as embellishments. I didn’t think they were quite right with the white centers so I replaced them with This & That Charming brads. I used a rectangle (which I added a scallop on the top edge) of Red Floral to add a little extra to the top 2/3rds.
I affixed all of this to a card made from a piece of Dots for the card. The bright dots made the inside attractive and cheery, but left no place to write. I fixed that by using another journaling block. After stamping it with a message in coordinating ink, I put in on a rectangle of Red Floral with a scalloped top and bottom. I used a couple of flower stickers to decorate the back.
If you like this look, you can buy a page of the journaling blocks, a pack of brads, a set of stickers, some flowers or other embellishments and a few sheets of paper and you’ll have a whole set of cards in no time.
Wednesday, April 11, 2012
Wednesday Make and Take - April 11
Tuesday, April 10, 2012
Loving This and That!
This layout was super simple when you have the sheet with the different strips. You can pick and choose which ones work best for you!
Sunday, April 8, 2012
Play Hard - A Day at the Park!


My two grandsons had a fun-filled day at the park last month! To help capture the memory I took lots of photos of them running, laughing and playing! The "This and That" Charming paper collection from Echo Park was the perfect paper to help me remember that warm March day! I used several papers from the line as well as a few of Echo Park's embellishments and created some arrows on my Cricut to highlight my favorite snapshots from our day at the park! I had a blast working with this paper collection and found that it really helped get my creative juices flowing. You'll love it too!!
Subscribe to:
Posts (Atom)