Every visit with Santa deserves a special page to commemorate the event and the papers from SEI this month were perfect!
 I used a craft knife to carefully cut along the designs of the red velvet paper, creating a place for the photo to slip into place...just put the photo where you want it to be and follow the curves of the design. It's easy...I promise! You can use whatever Christmas quote you would like to help frame the picture...the little gold flourish on the top right of the was cut using my Cricut.
Did you notice how the large branch on the bottom left of the tree connects to a swirl on the red velvet paper? Just dumb luck, but I love it!
I was originally looking for a photo to feature on the oval medallion frame I created for the tree, but Debbie has these fabulous Santa stickers from Mrs. Grossman's that were absolutely perfect!
The oval frames were cut with Nestabilities. I inked the smaller scalloped edge with some gold ink.

I created the Santa title using my Cricut and the Design Studio Software to weld the letters together. The "S" and the flourish are from the Storybook Cart and the rest of the letters are from Base Camp. The little dots of white and red are just acrylic paint, applied with a toothpick. Some of the presents are cut from Christmas Mint paper and some are from the coordinating epoxy elements sticker set. The green file tab on the top right edge of the red velvet is from the coordinating cardstock sticker sheet.

The coolest part of the layout is that it opens up! The red velvet portion is actuallly a flap and there is a whole other layout inside...
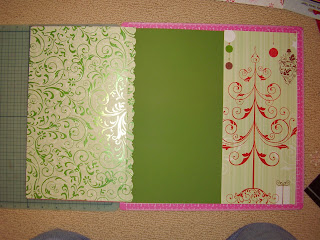
The inside of the layout started like this...
...I trimmed the Christmas Mint paper on the right as shown and adhered it to the right side of the Bazill cardstock...
I adhered the panel of red velvet paper (12" x 7")to the back of the Marzipan green foiled paper(12" x 8")...there was about a 1" overhang that I had punched with a scalloped edge punch (Martha Stewart).
.
I scored the Marzipan and folded it and applied a strip of red line tape to the back side of the Marzipan...
The journaling is on vellum, so the beautiful designs of the foiled swirl paper still show through.
The adhesive for the vellum is hidden underneath the overlapping elements, a simple but effective trick. The presents at the top were trimmed out of the same paper as the filigree Christmas Tree on the right side of the layout. They were on the left side of the paper and would have been covered up by the red velvet. I tied up little bows with floss because I love every bit of dimension and detail I can think to add! (Click on the picture to enlarge it and get a better view of the details.)
.
I hope this inspires you to create something special for your Christmas pictures this year!


No comments:
Post a Comment